Create rentals
From the Admin
From the Admin
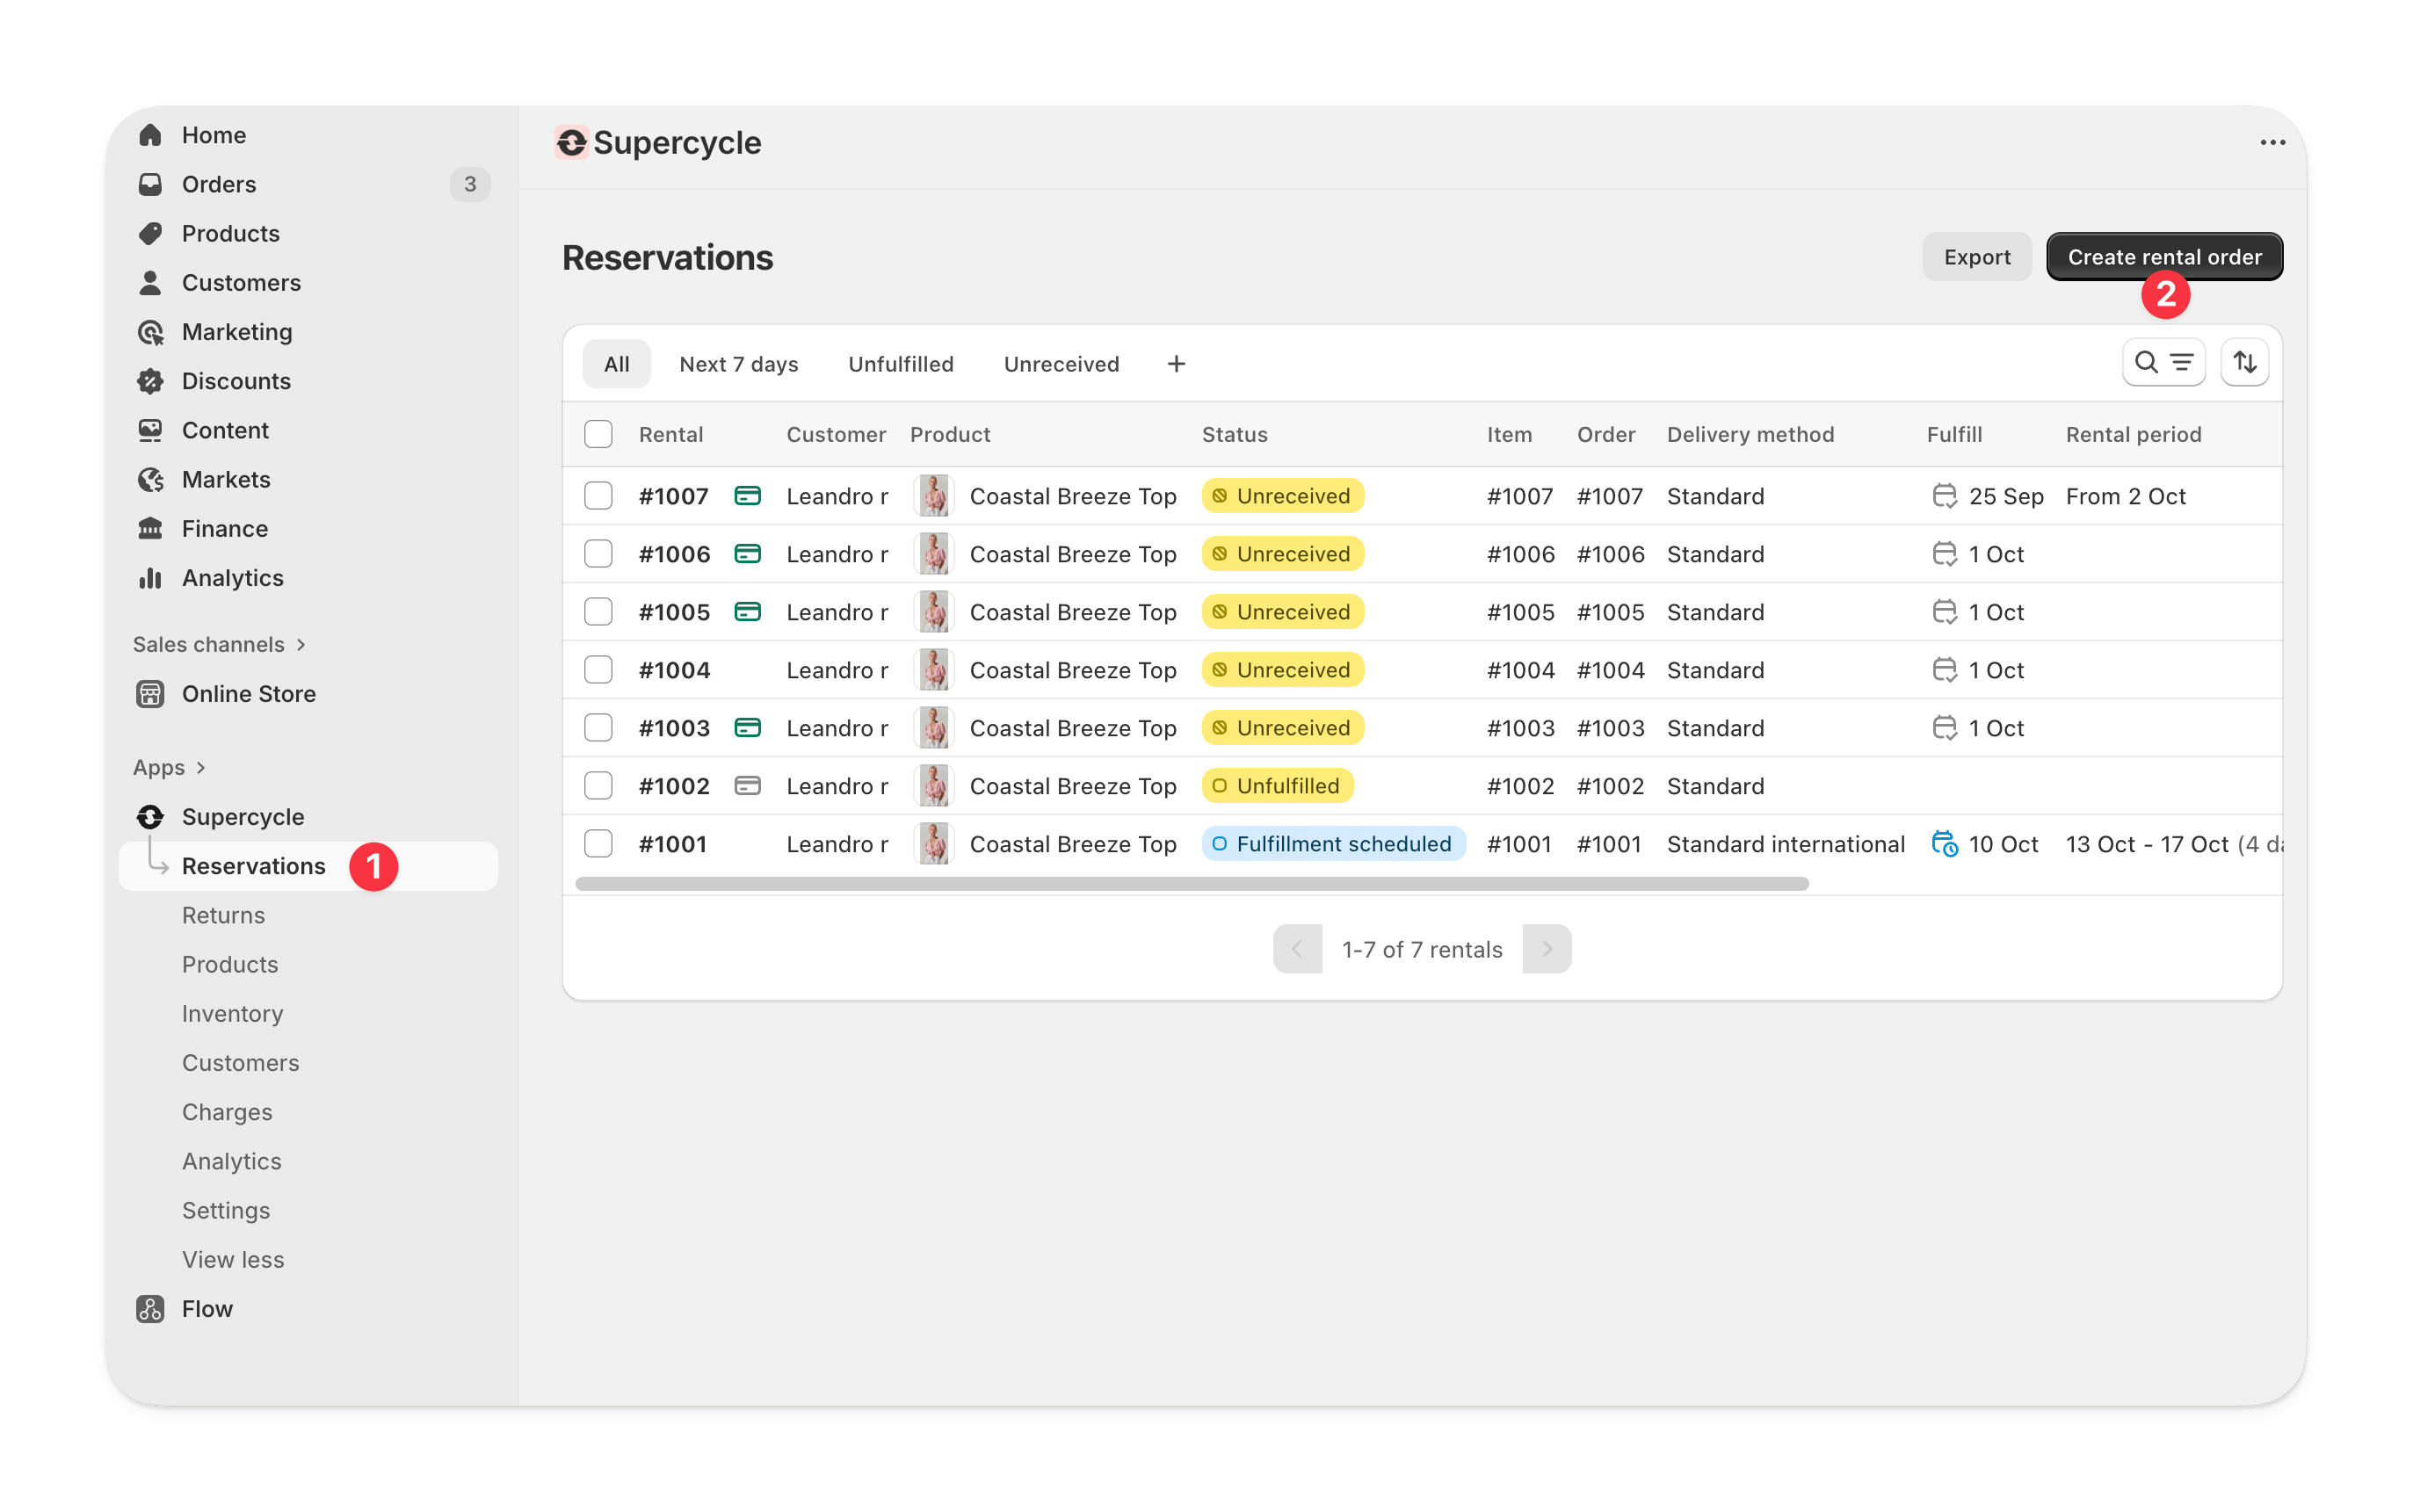
From the Supercycle admin go to Cycles
Click Create rental order
Pick or add a customer
Continue to the draft order
Add a product to the rental order
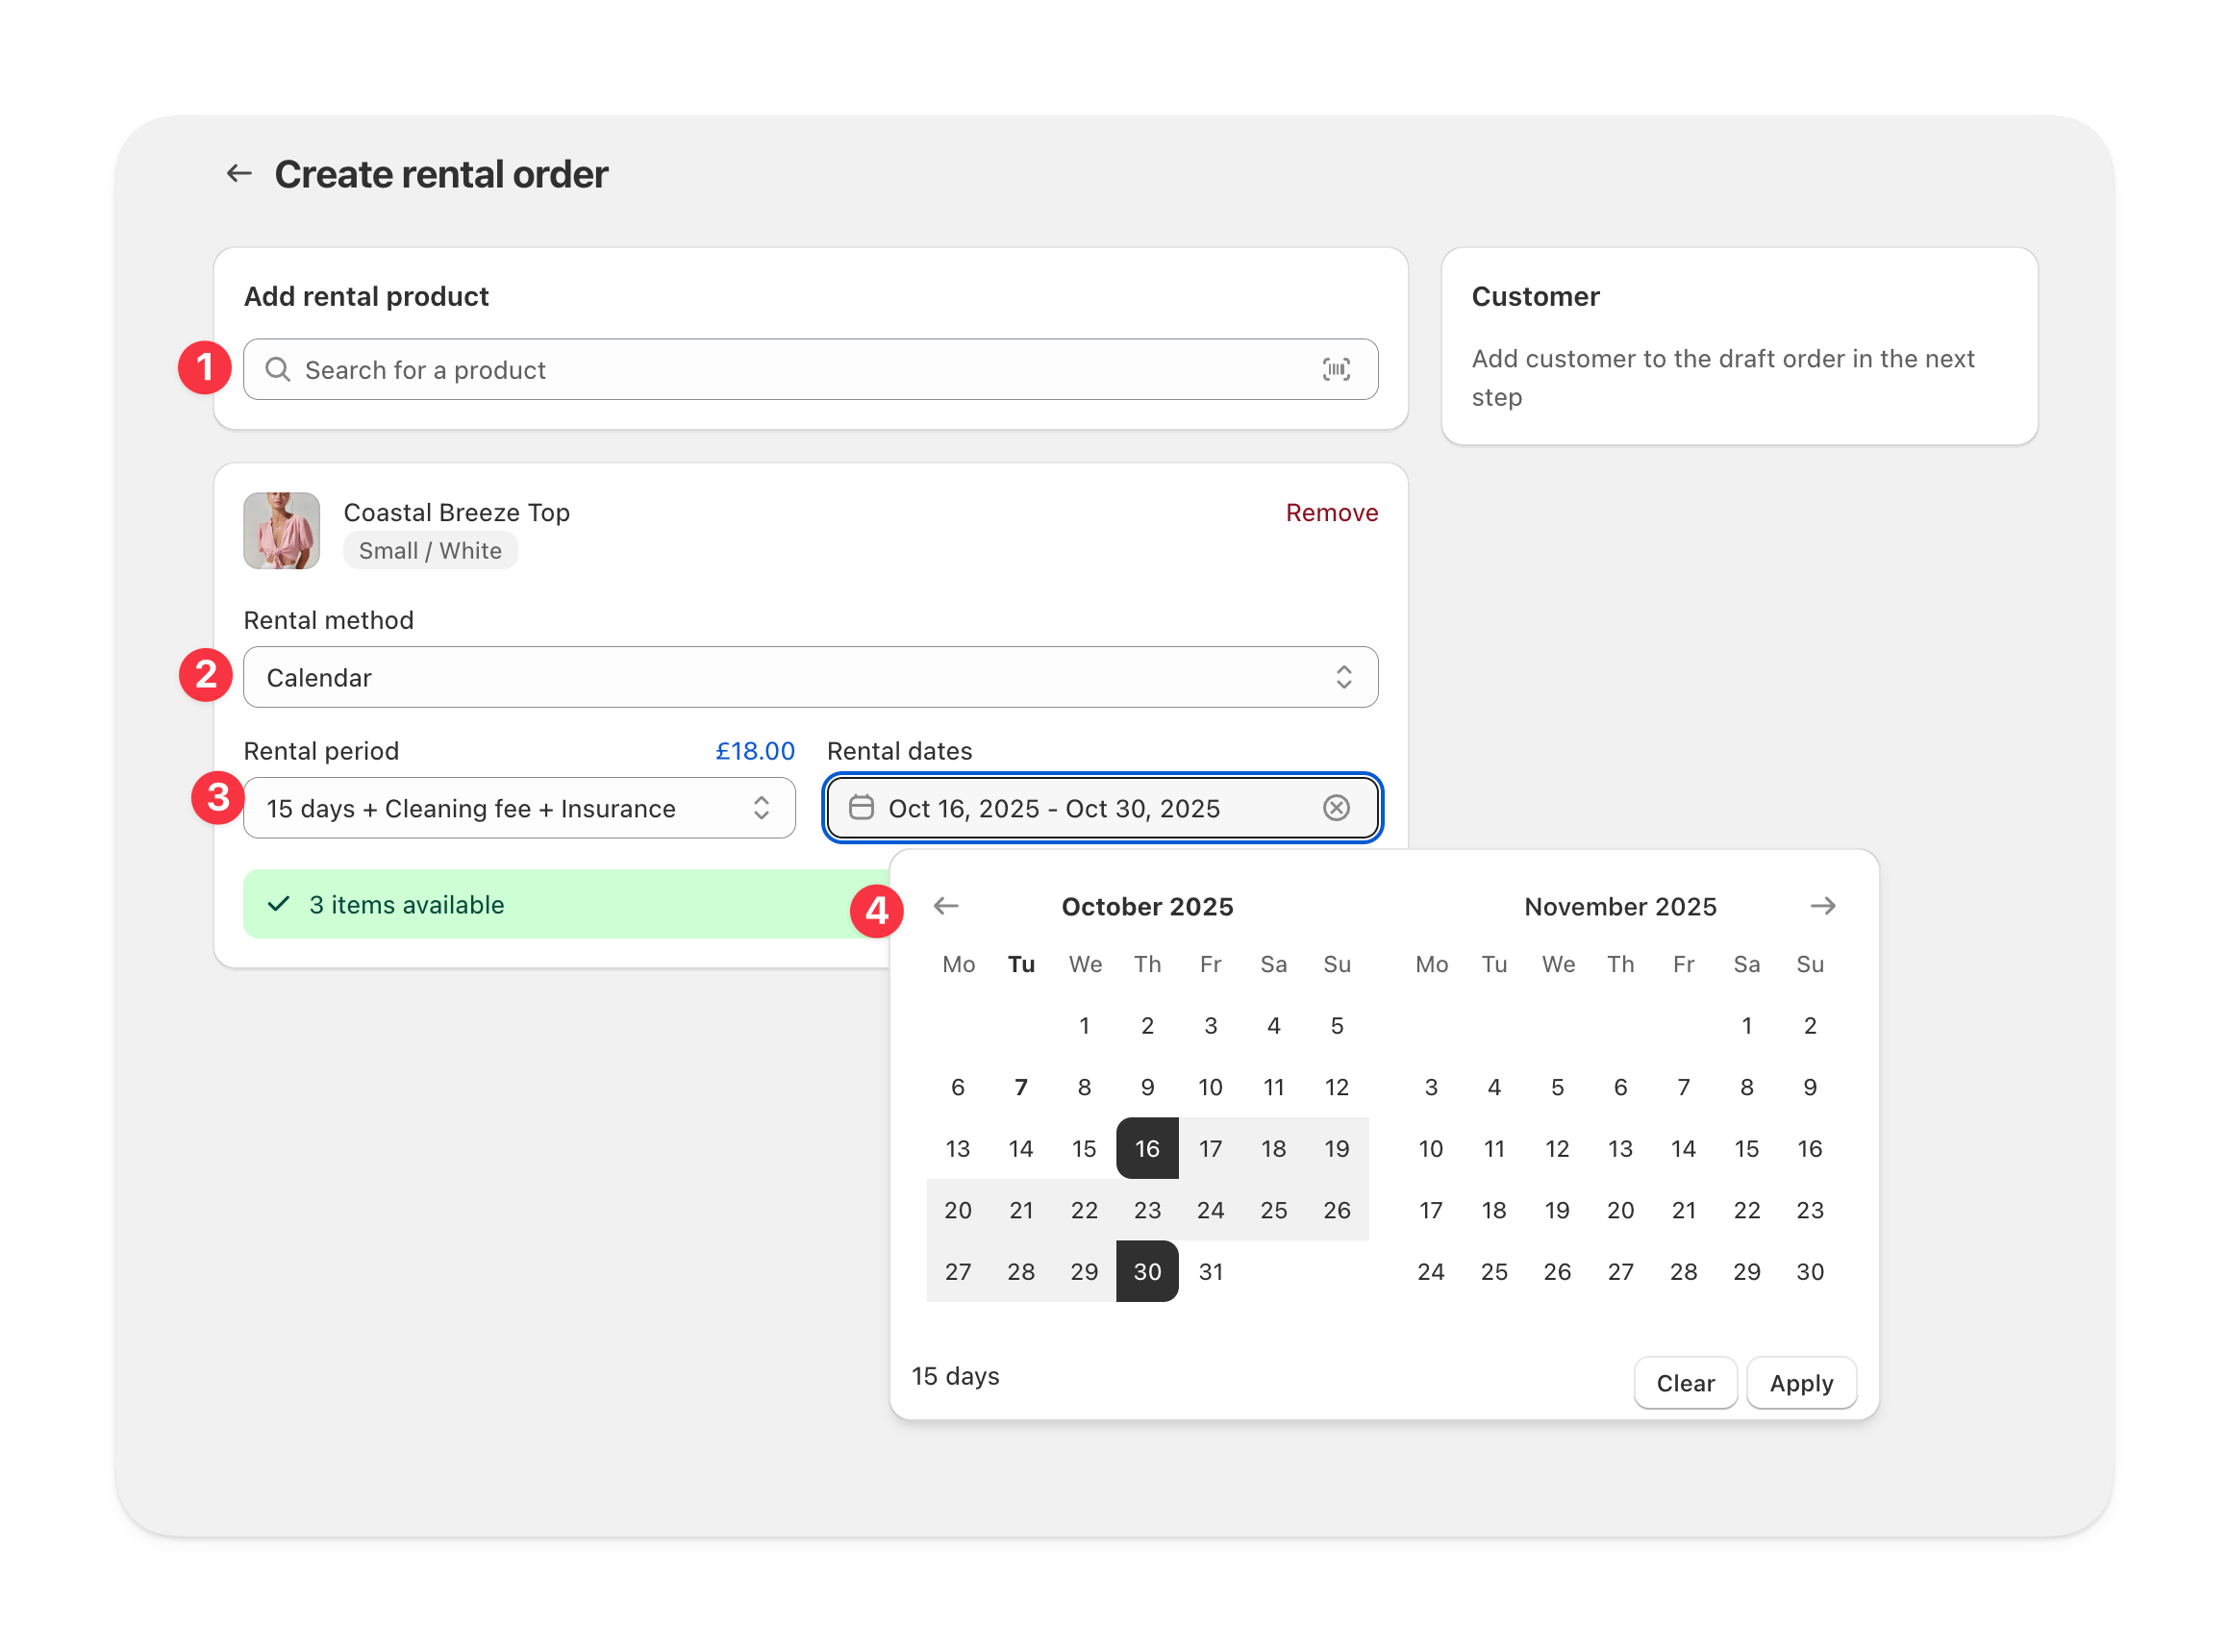
Click save to update the Shopify draft order
Customize the draft order
- Apply discounts
- Add Shipping
- Add tags or a note

Do one of the following
- Accept payment from the customer by marking the order as paid or entering card details. Then Create an order.
- Set payment to due later. Then Create an order.
Rental order created
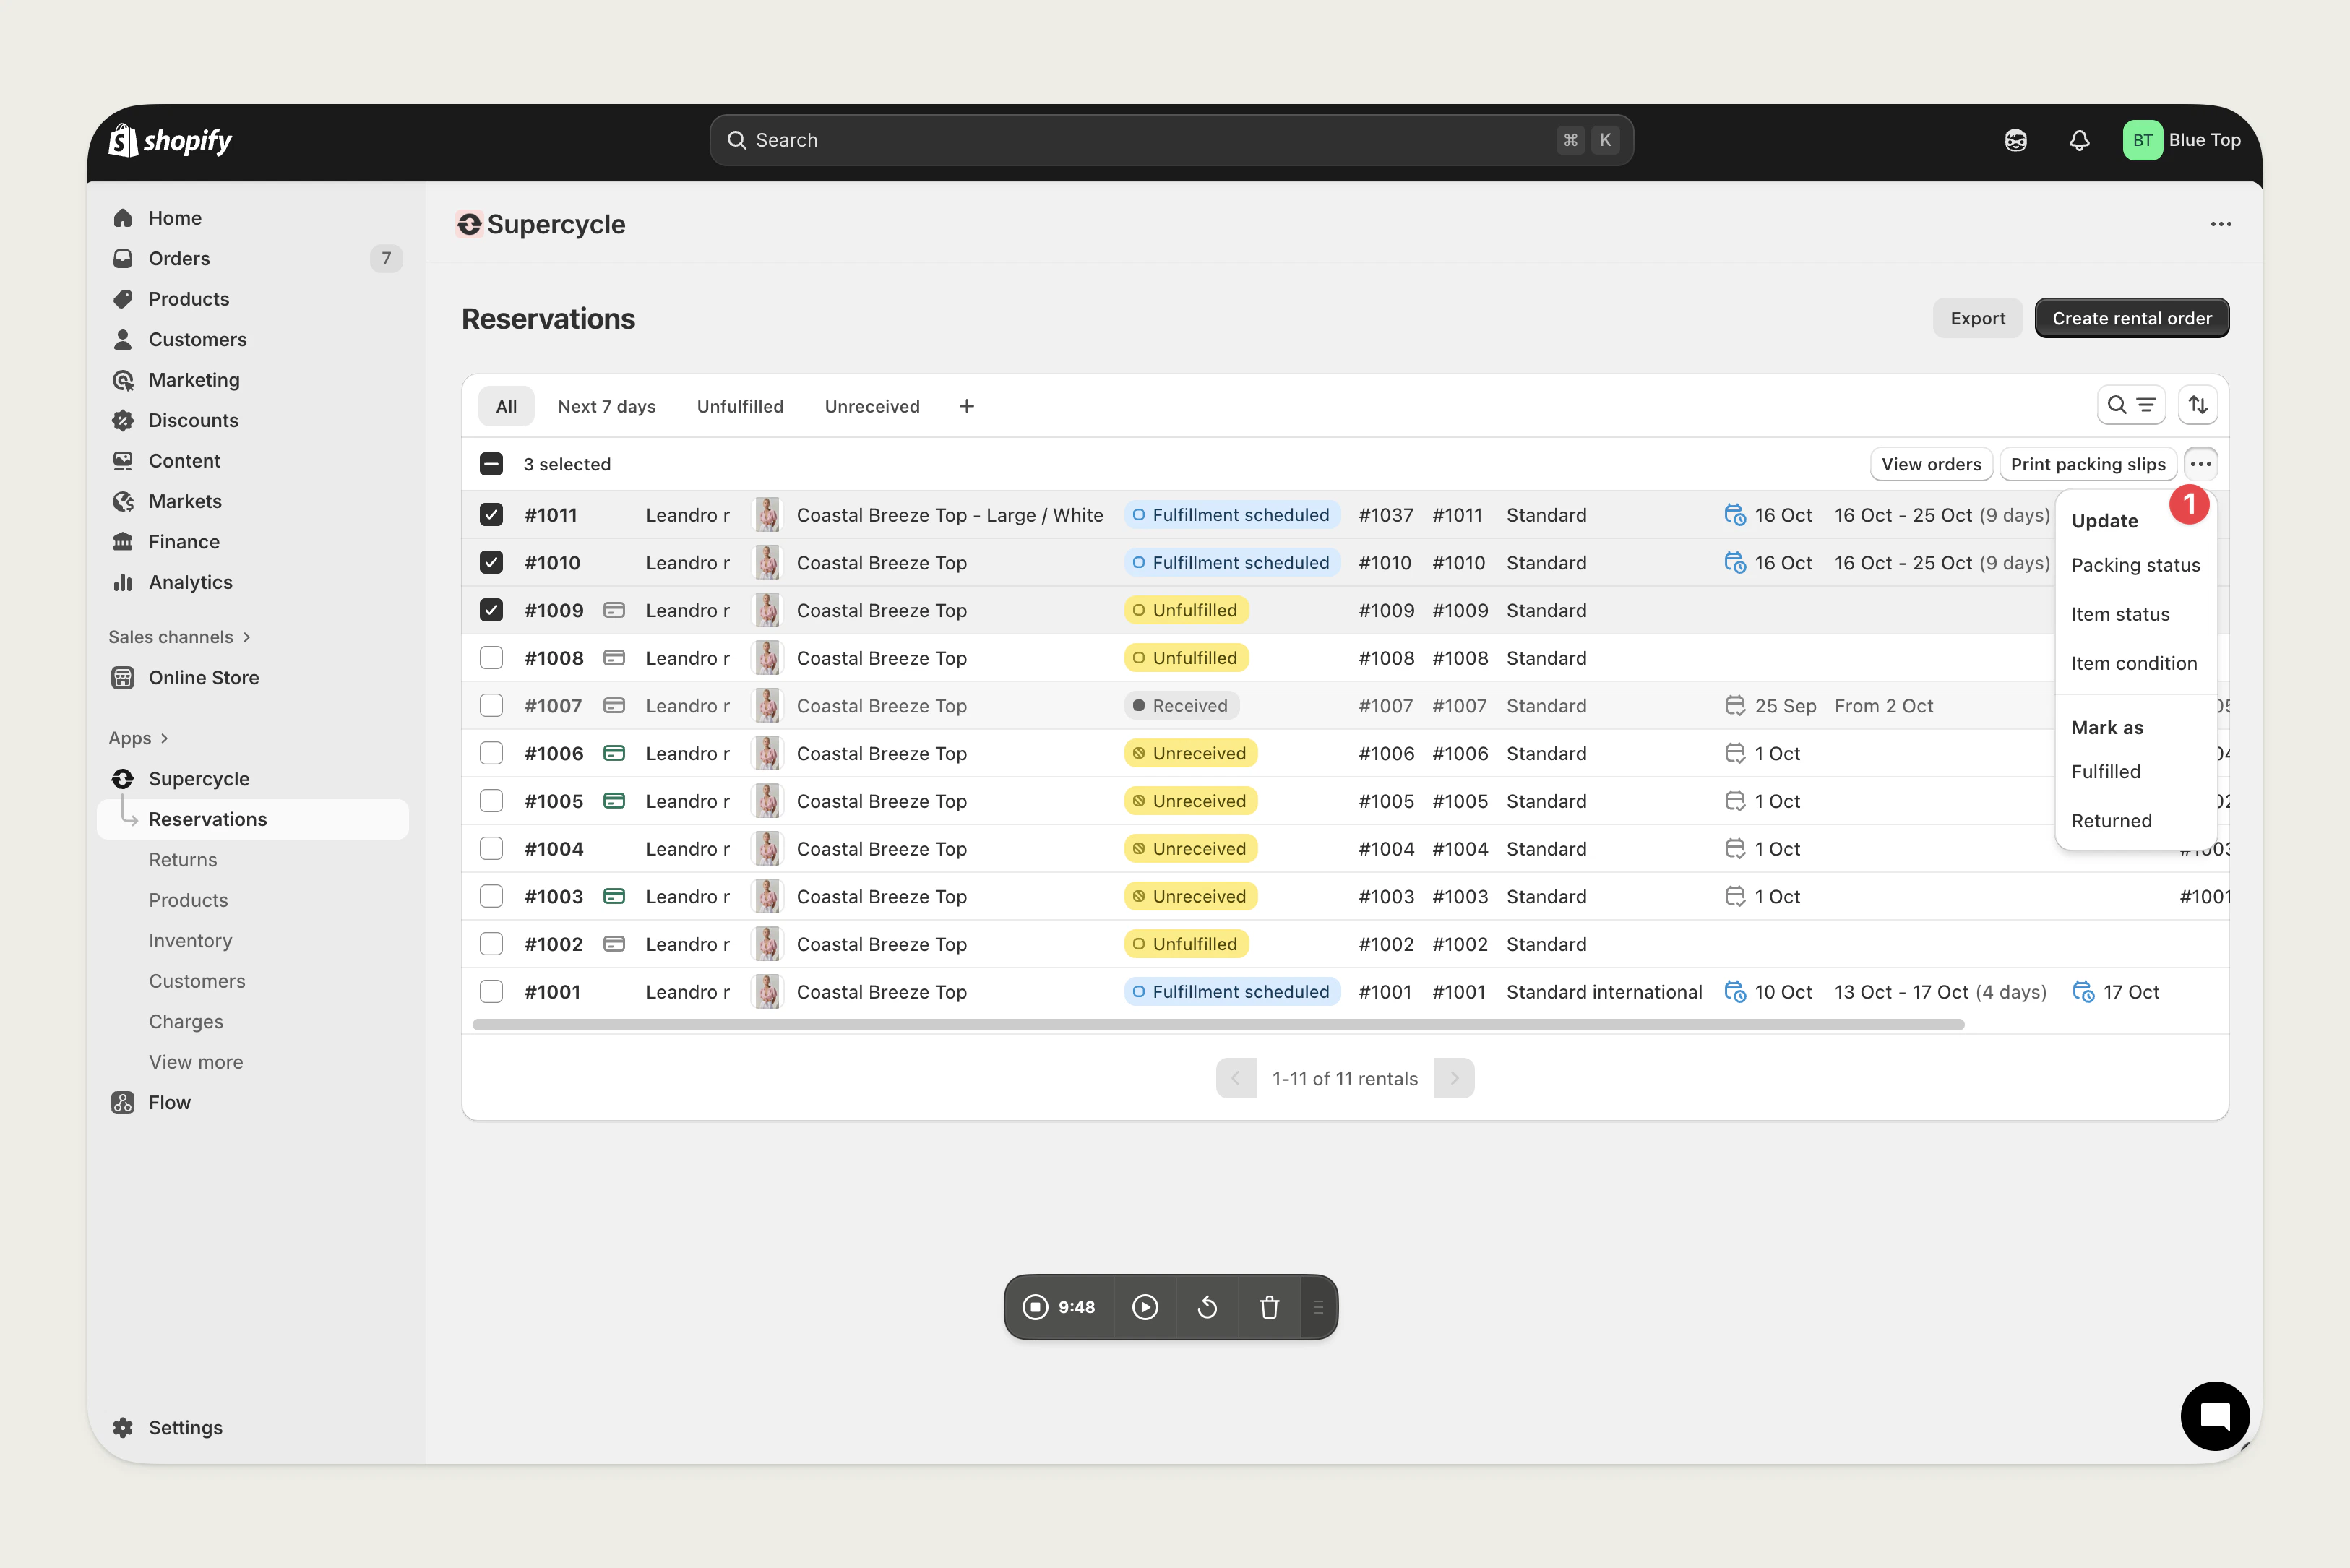
Filtering which orders to fulfil
You can find rental orders in both Shopify and Supercycle.From Shopify Orders
From Shopify Orders
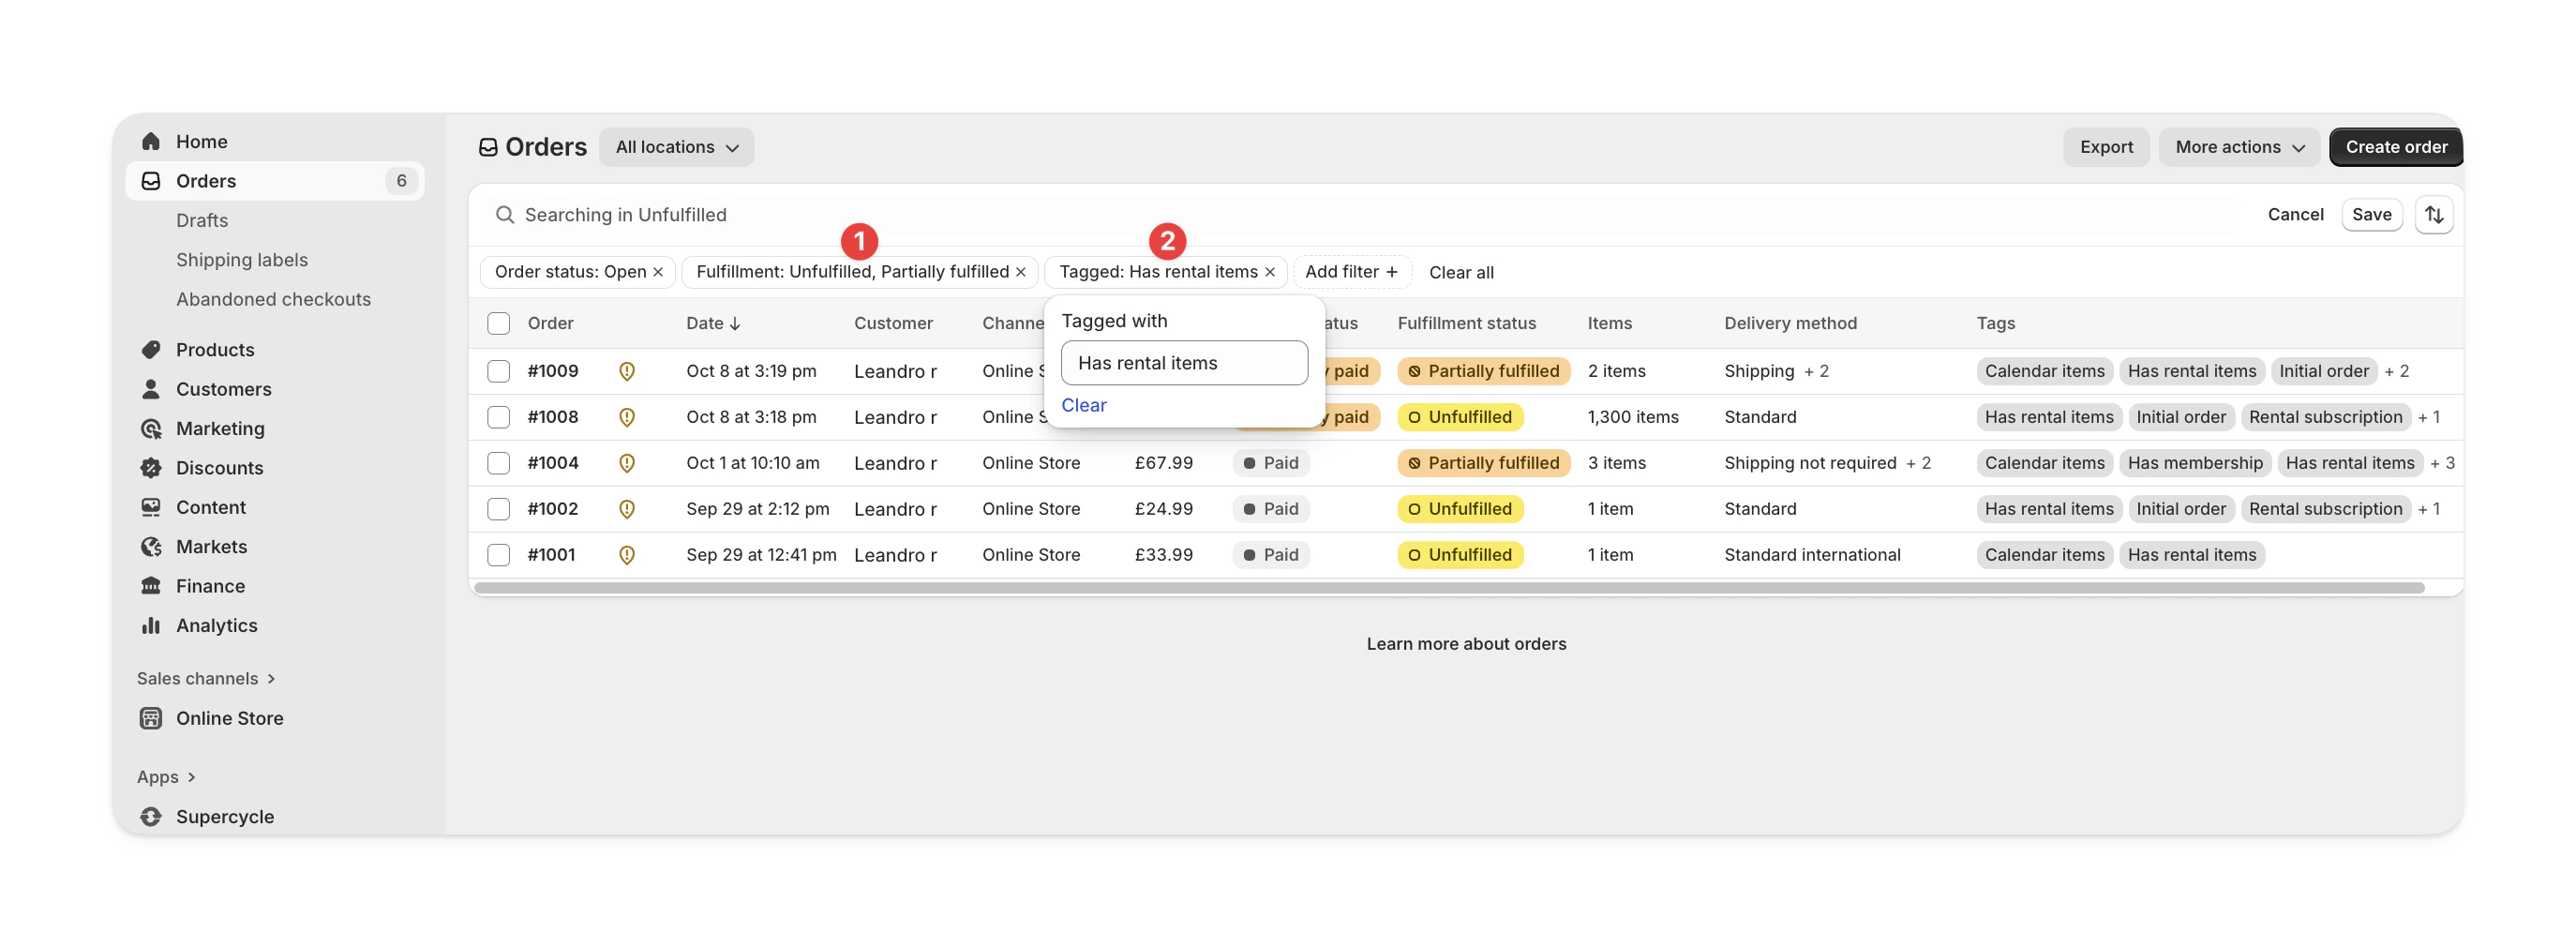
Go to Orders in your Shopify admin.
Filter by:
- Unfulfilled status
- Tagged with Has rental items
From Supercycle Cycles
From Supercycle Cycles
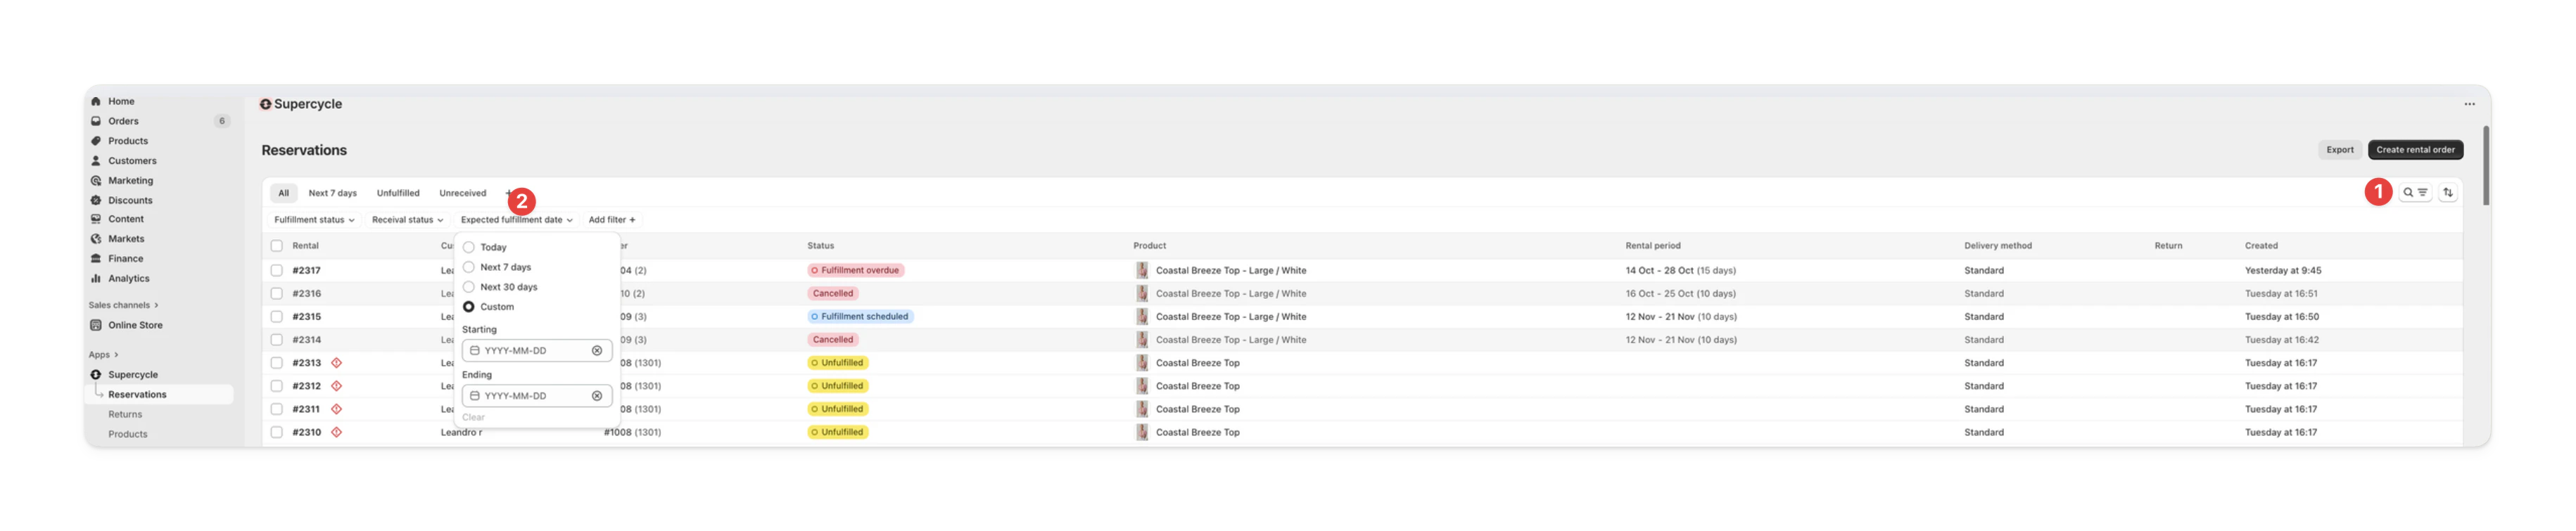
Go to Cycles in your Supercycle admin.
Use the Unfulfilled filter to see upcoming or unsent rentals.
Filter orders to fulfil today
Via the MCP
Via the MCP
list_cycles tool with:status-to_fulfillpacking_status-pending,printed, orpacked
Via the API
Via the API
Fulfil the order
You can fulfil the order from Shopify, from Supercycle, or through the API.From the Shopify order
From the Shopify order
Go to Orders in Shopify
Select Fulfil item(s)
Add a tracking number and select a carrier if needed.
Send confirmation (optional)
Click Fulfil item(s)
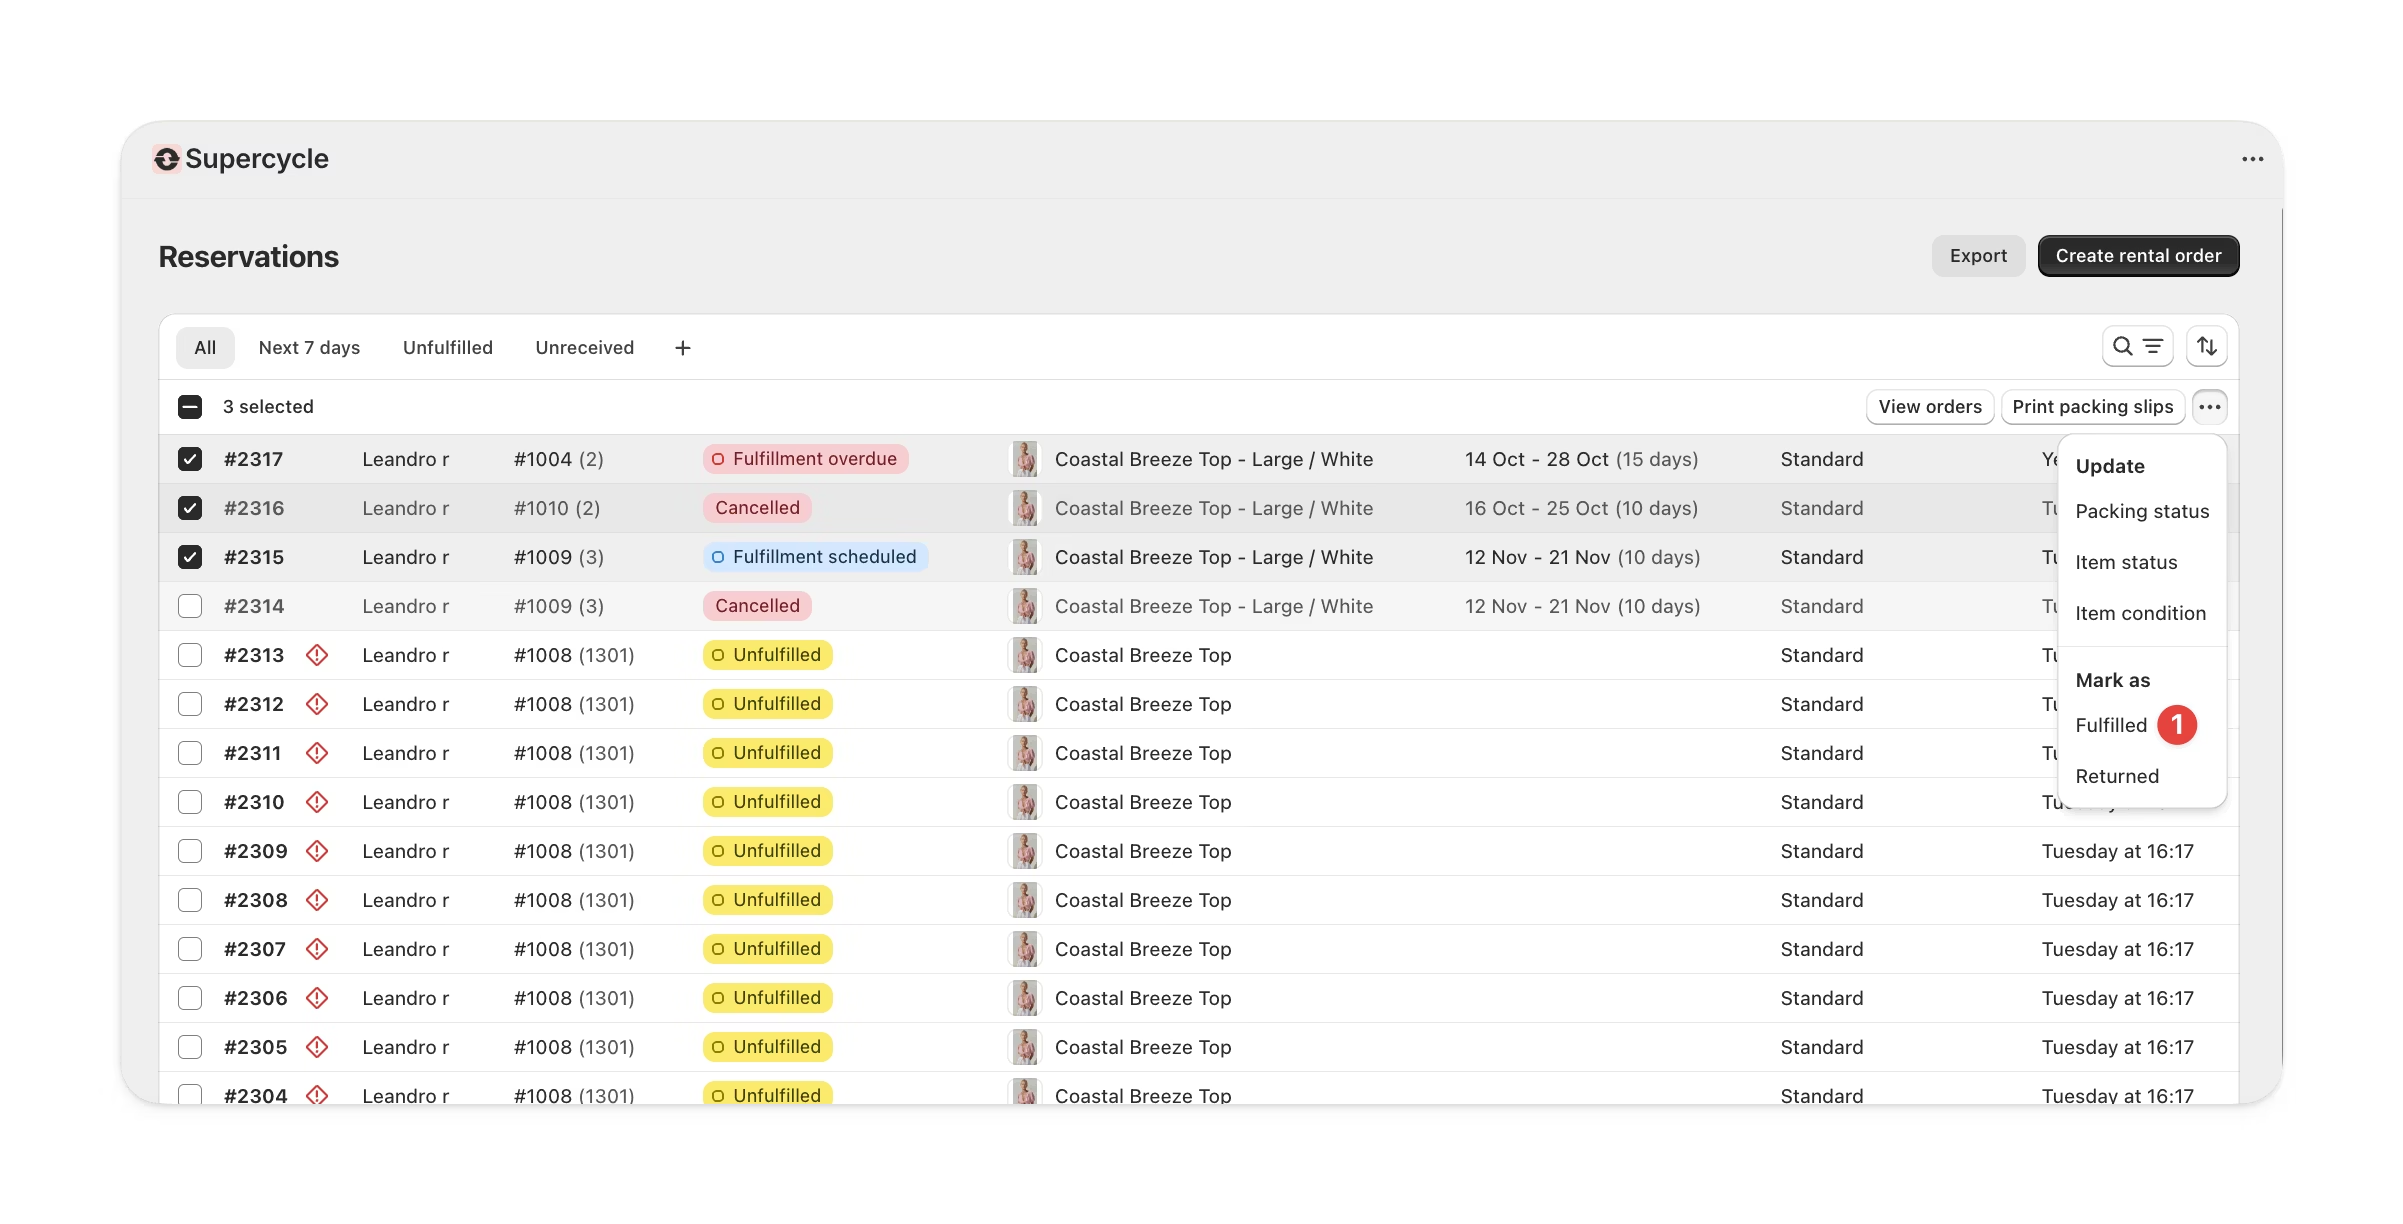
From Cycles
From Cycles
Via the MCP
Via the MCP
update_cycle tool with:id- Cycle ID (e.g.SC-1234)fulfilled_at- Fulfilment date inYYYY-MM-DDformat
Via the API
Via the API
fulfilledAt parameter.Change product/variant
You can change the item associated with a rental to any item from any product. Changing the product on a rental does not change the product on the Shopify order. If this is important, you should refund the line item in Shopify in order to cancel the existing rental and then create a new rental for the new product.From the Admin
From the Admin
Change rental item
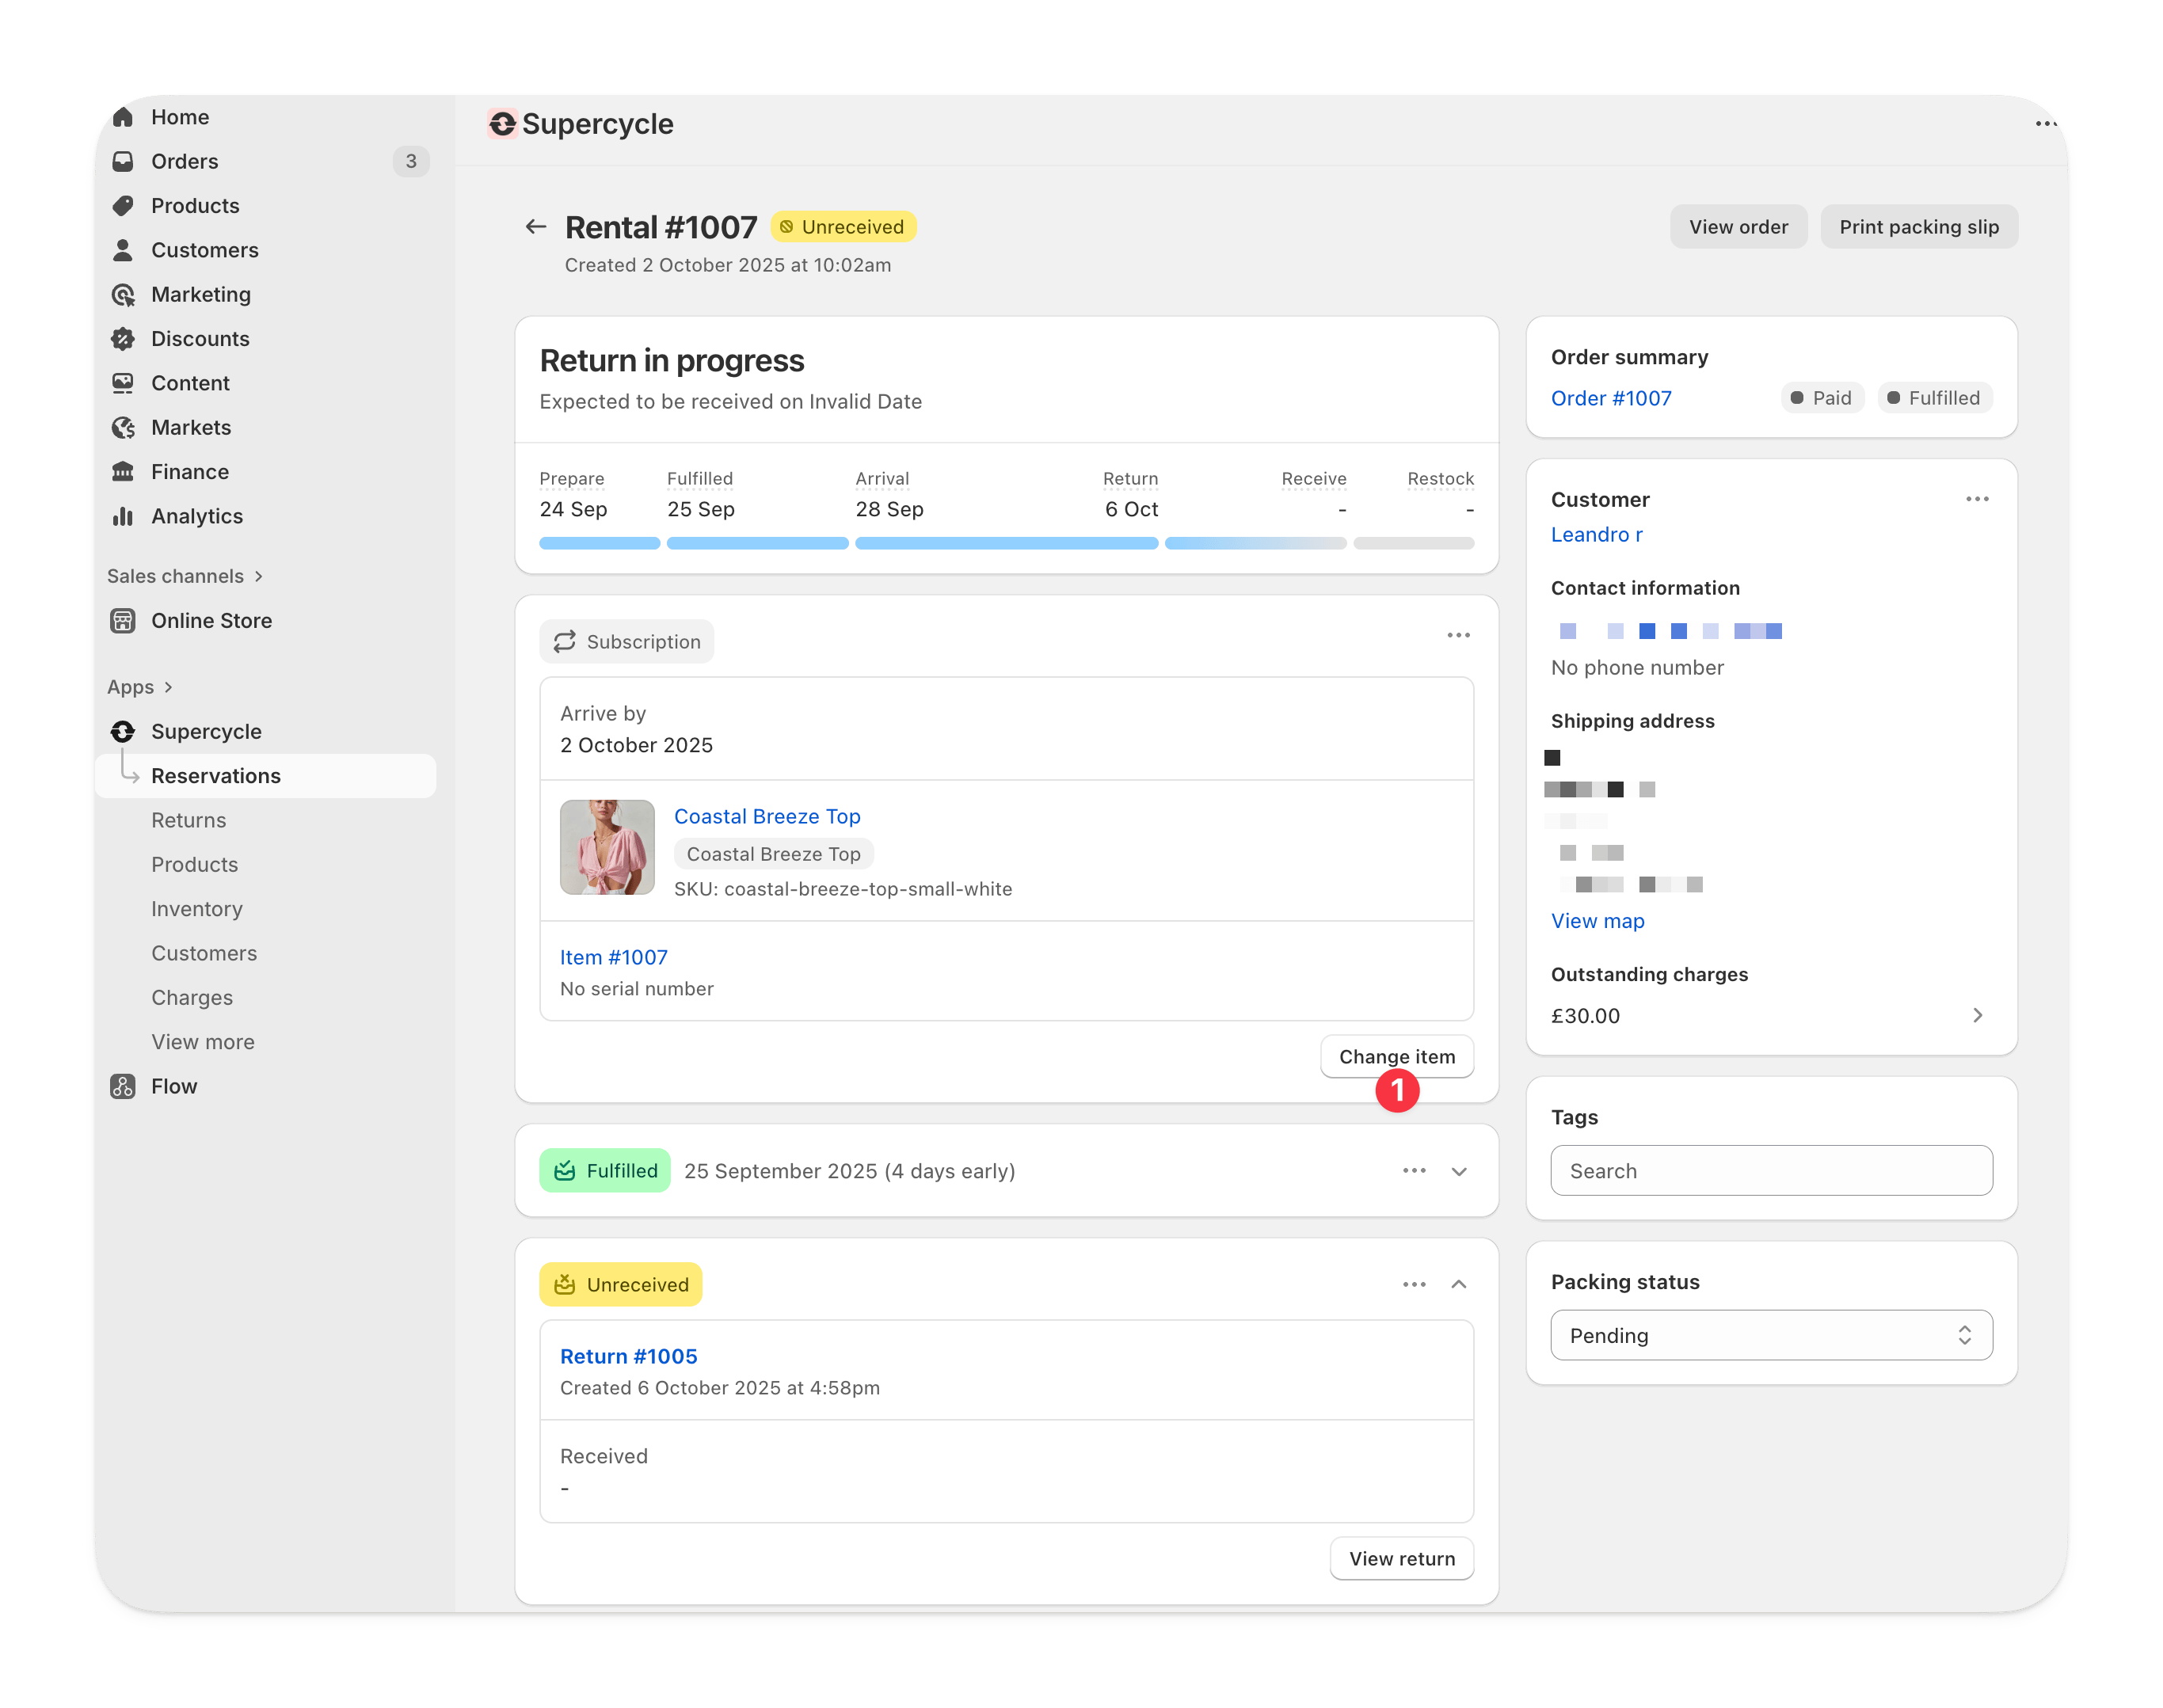
Search for a new item
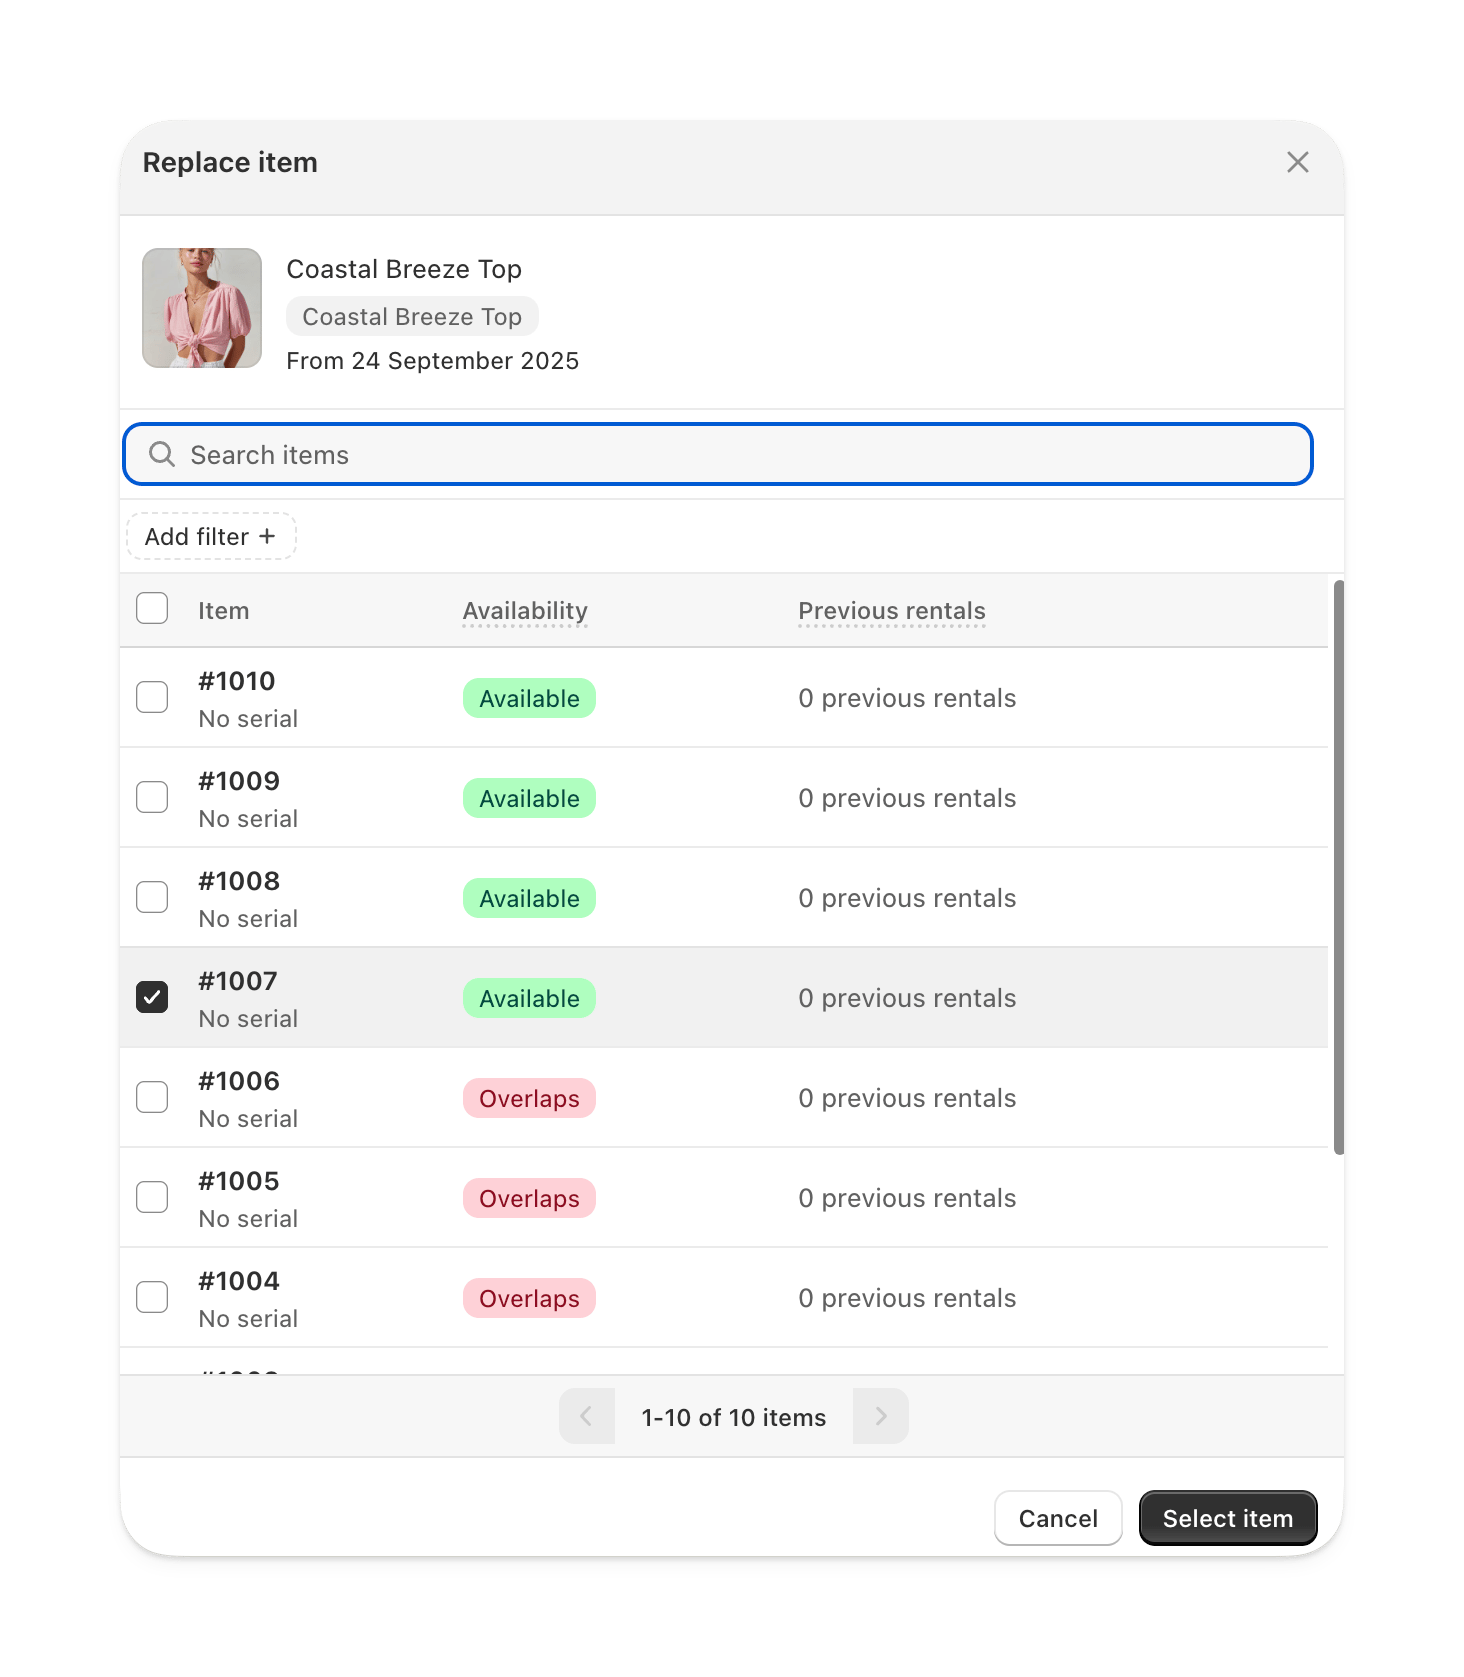
Save changes
Change item
From the Admin
From the Admin
Change rental item
Search for a new item
Save changes
Via Supercycle Scanner
Via Supercycle Scanner
Via the MCP
Via the MCP
update_cycle tool with:id- Cycle ID (e.g.SC-1234)item_id- The new item ID to assign
Via the API
Via the API
itemId parameter.Change rental period
You will need to handle any additional charges or refunds separately.
From the Admin
From the Admin
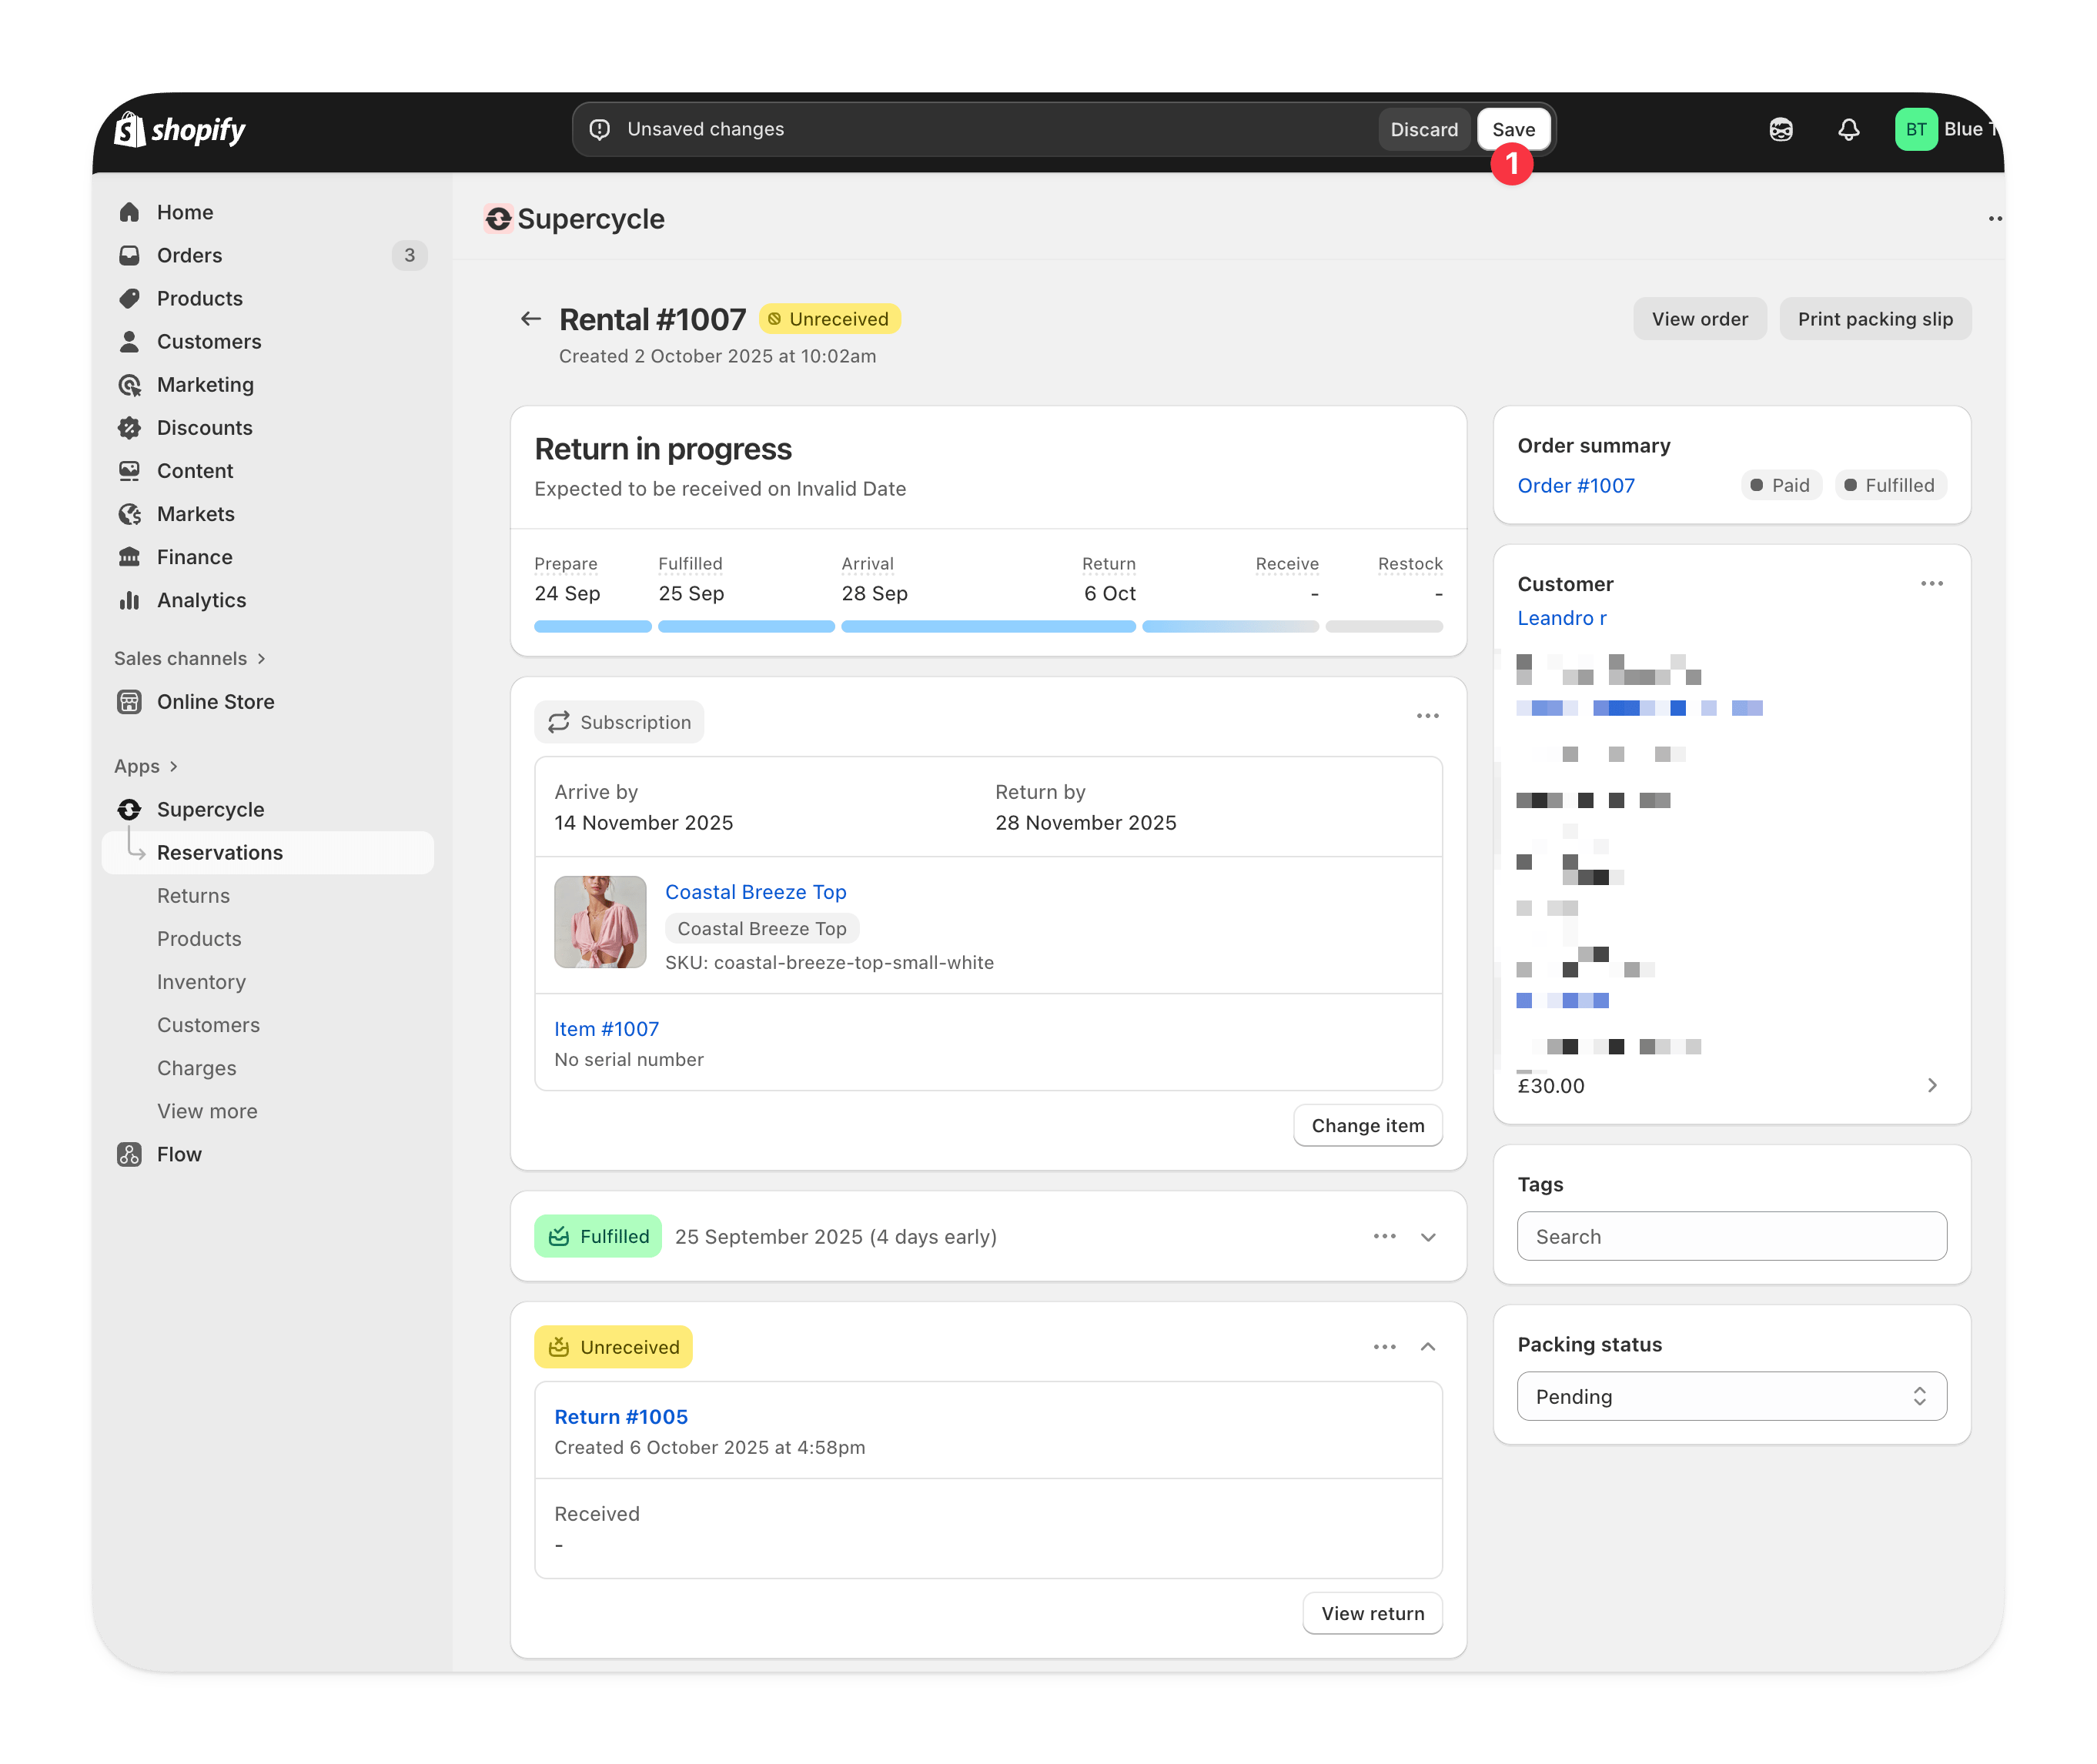
Edit rental logistics
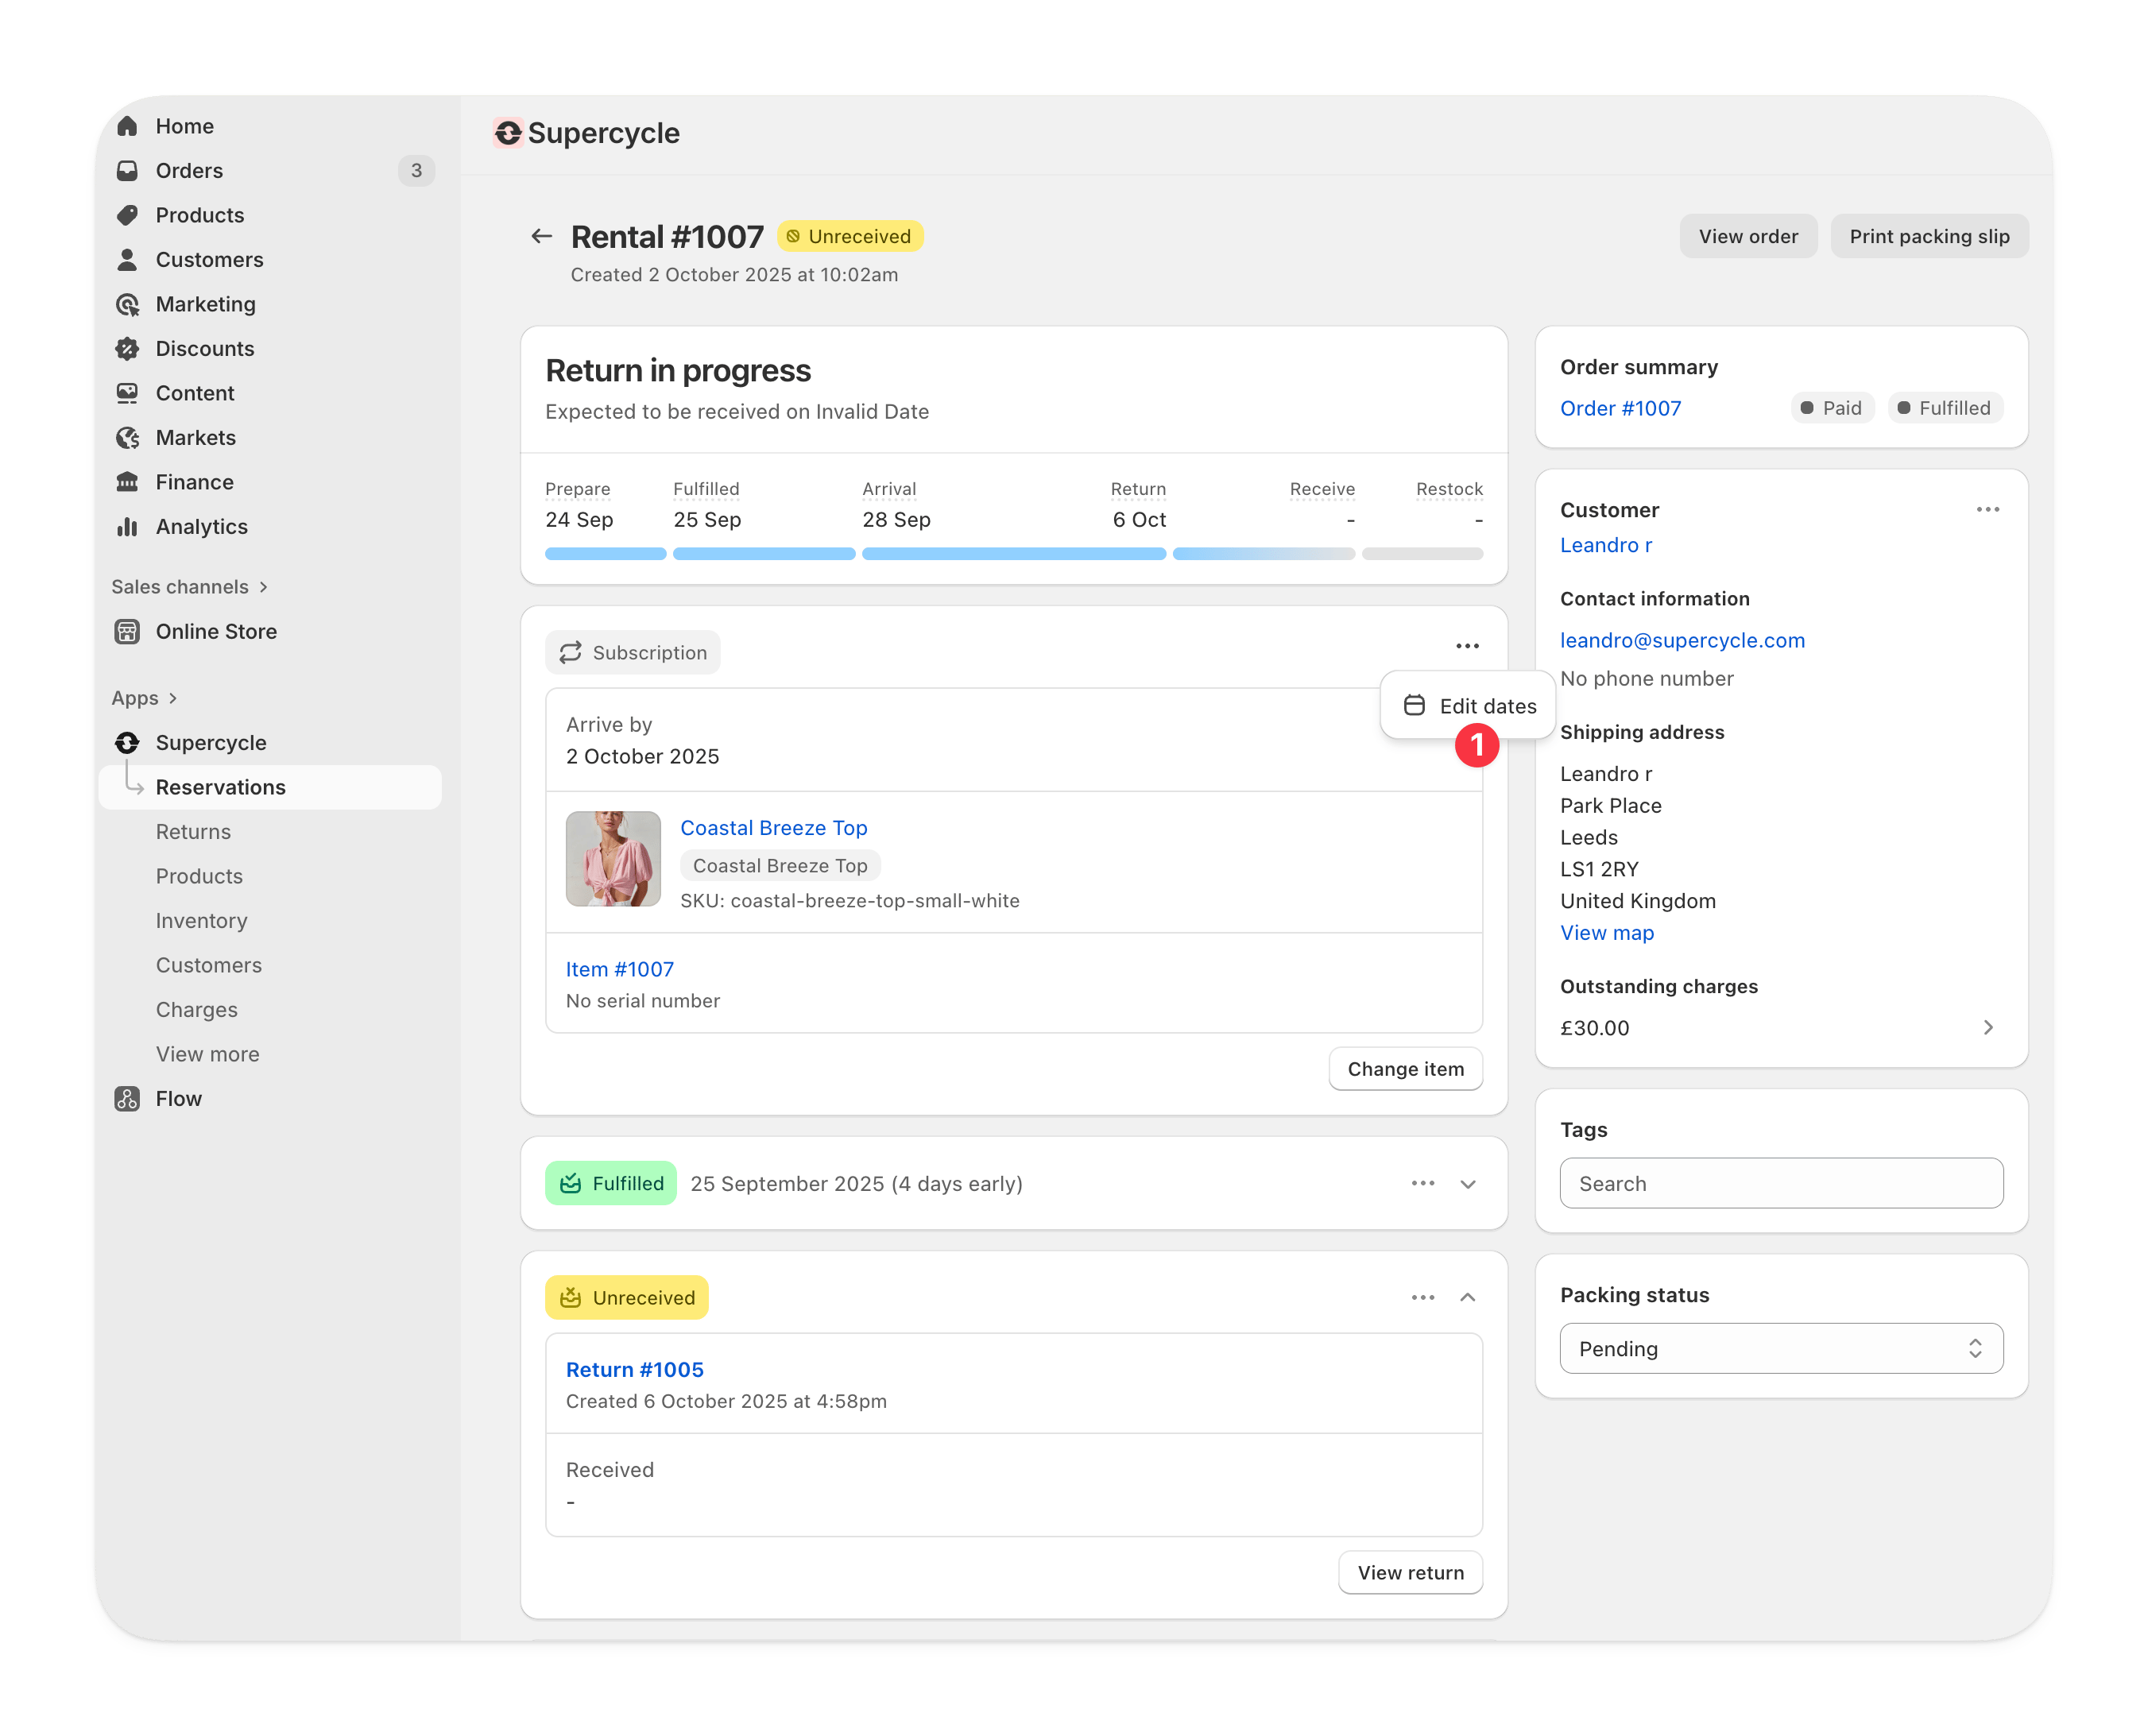
Select new rental dates
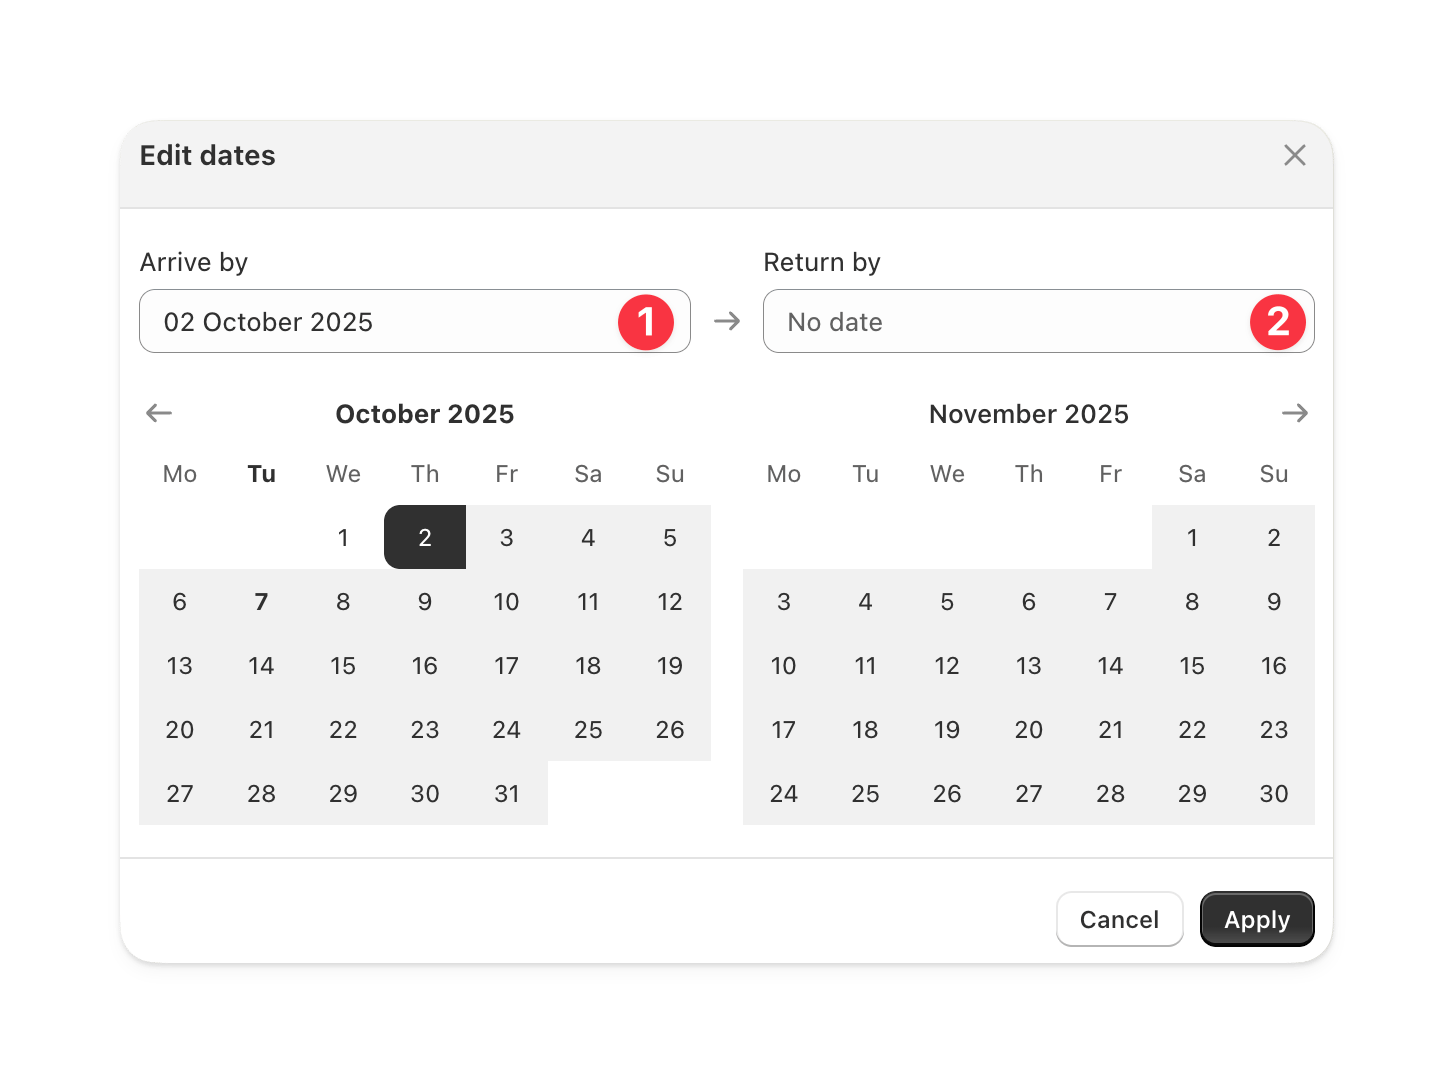
Save changes
Via the MCP
Via the MCP
update_cycle tool with:id- Cycle ID (e.g.SC-1234)rental_start/rental_end- New dates inYYYY-MM-DDformat
Via the API
Via the API
rentalStart and/or rentalEnd parameters.Change fulfillment date/time
From the Admin
From the Admin
Edit rental logistics
Select new rental dates

Save changes
From the Shopify order
From the Shopify order
In bulk, from Cycles
In bulk, from Cycles
Via the MCP
Via the MCP
update_cycle tool with:id- Cycle ID (e.g.SC-1234)fulfilled_at- Fulfilment date inYYYY-MM-DDformat
Via the API
Via the API
fulfilledAt parameter.Change receival date/time
From the Admin
From the Admin
Edit rental logistics
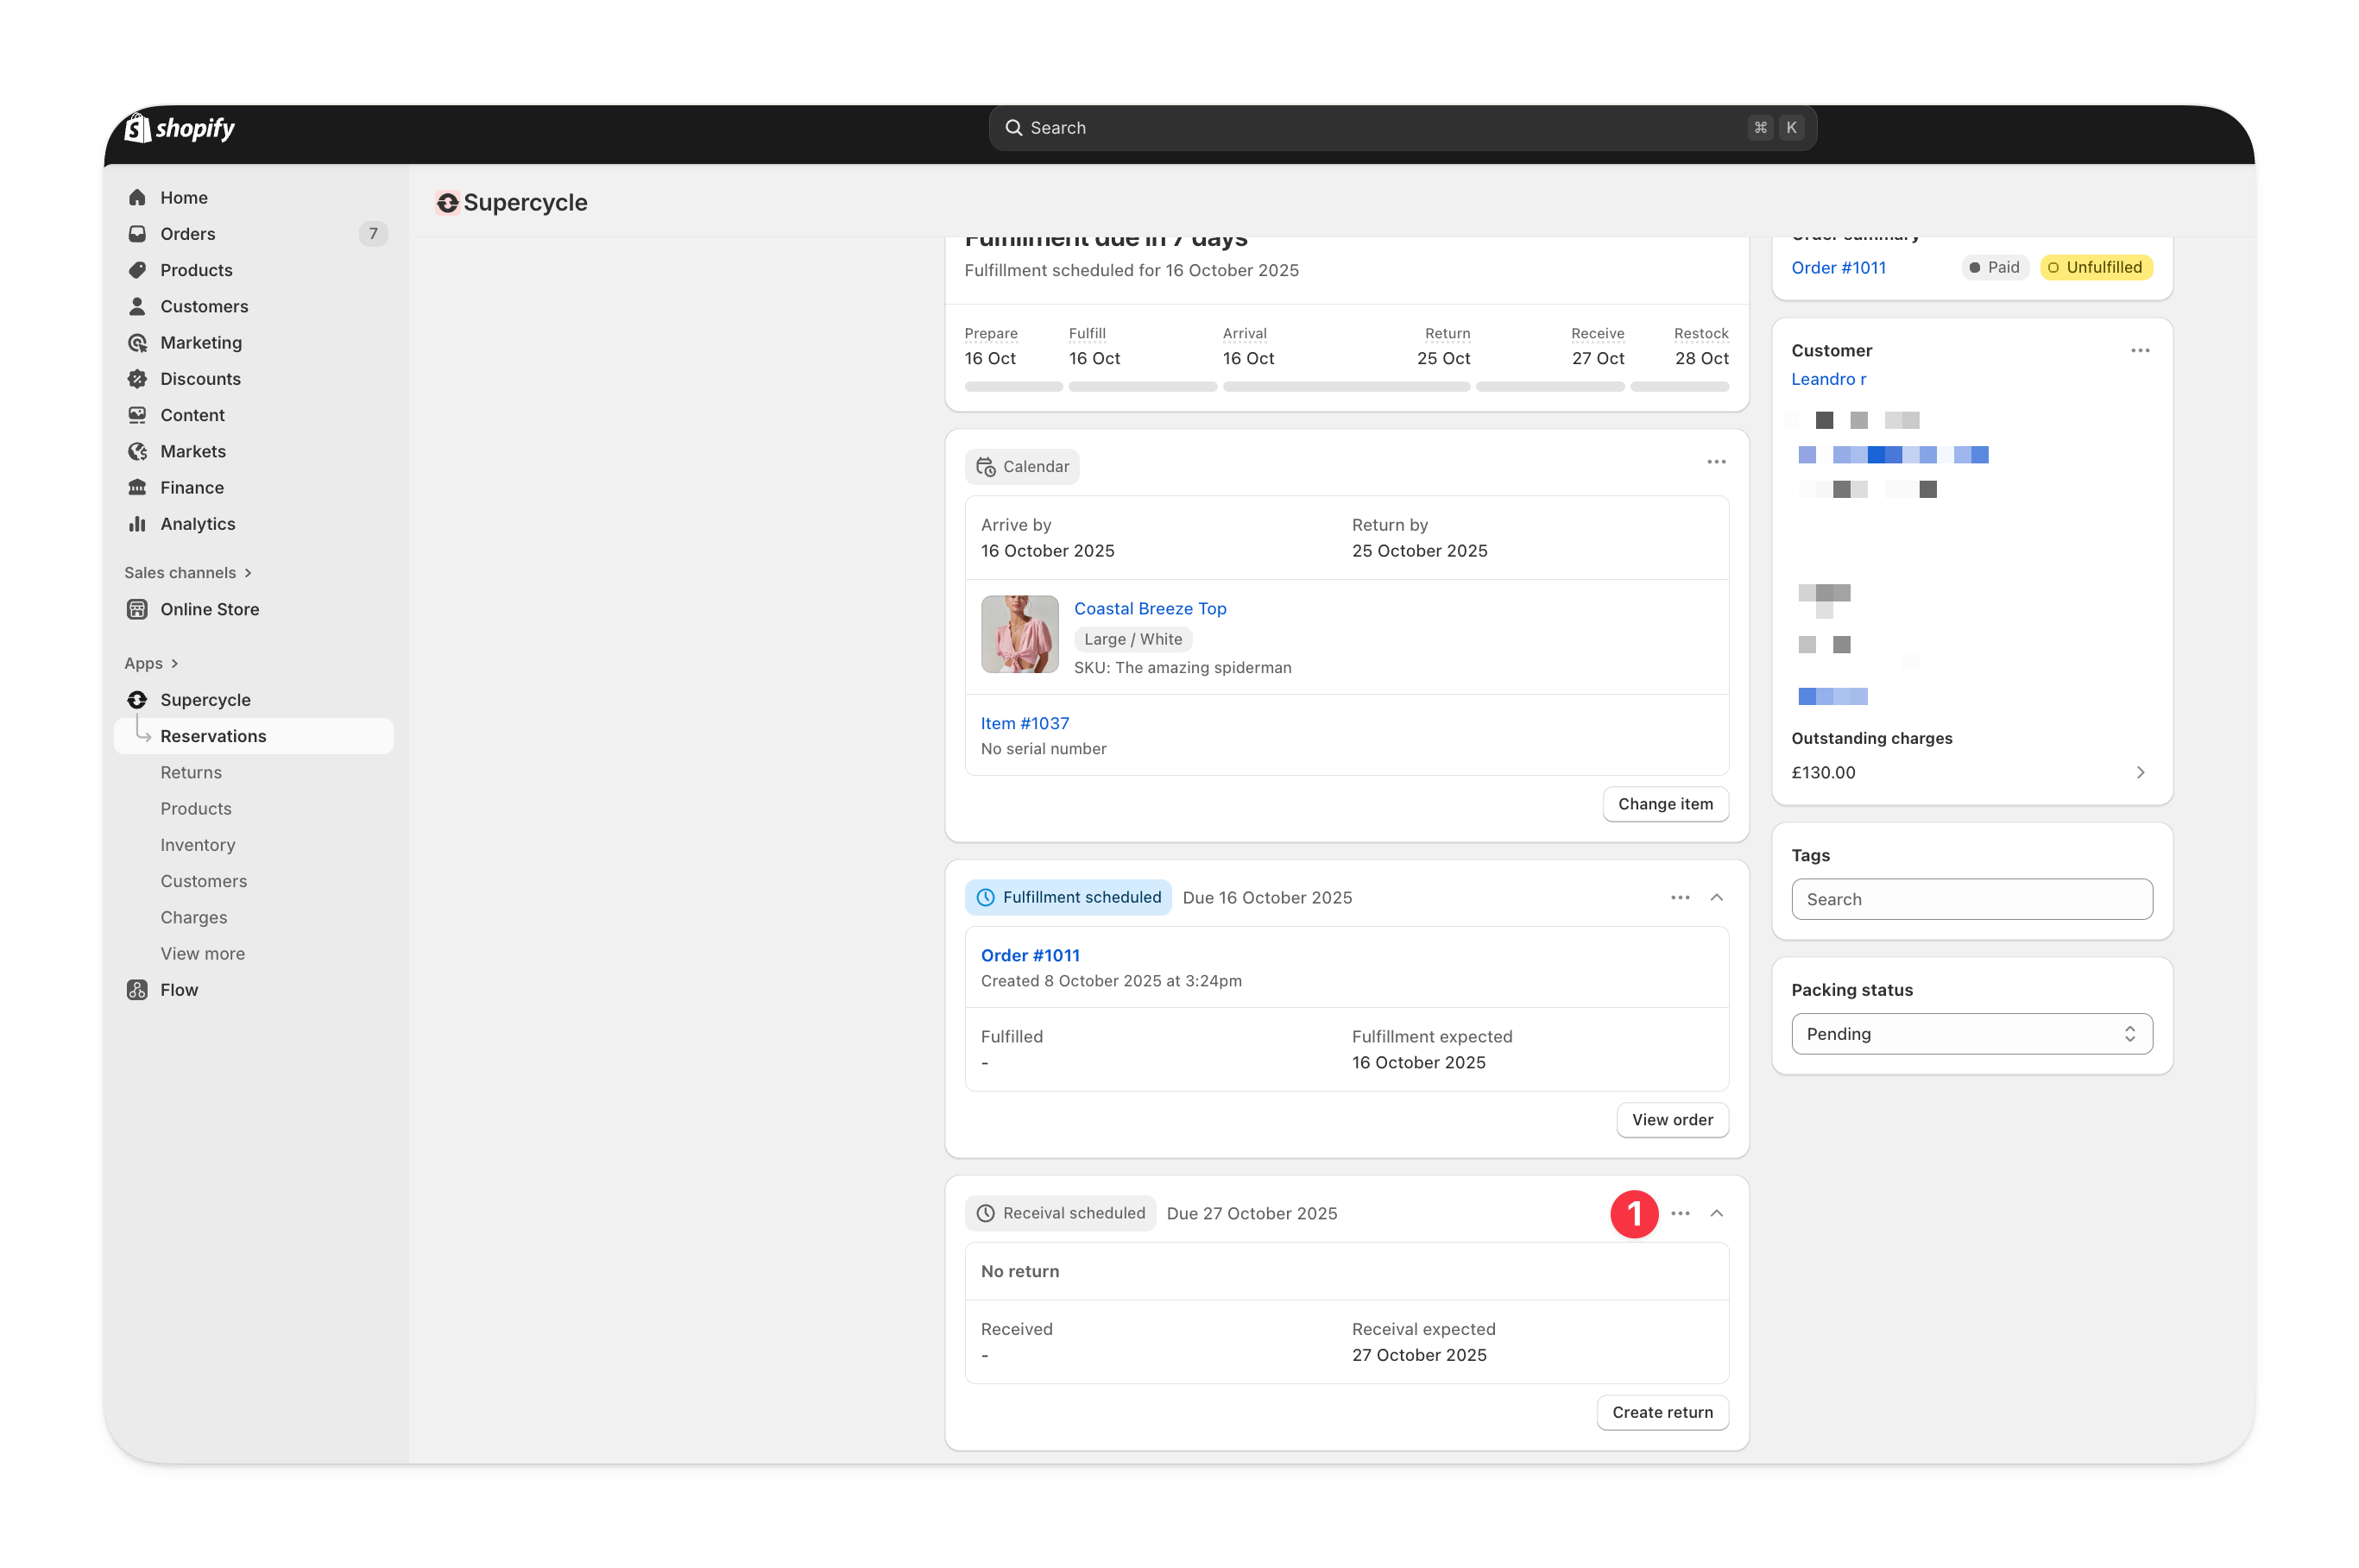
Select new rental dates
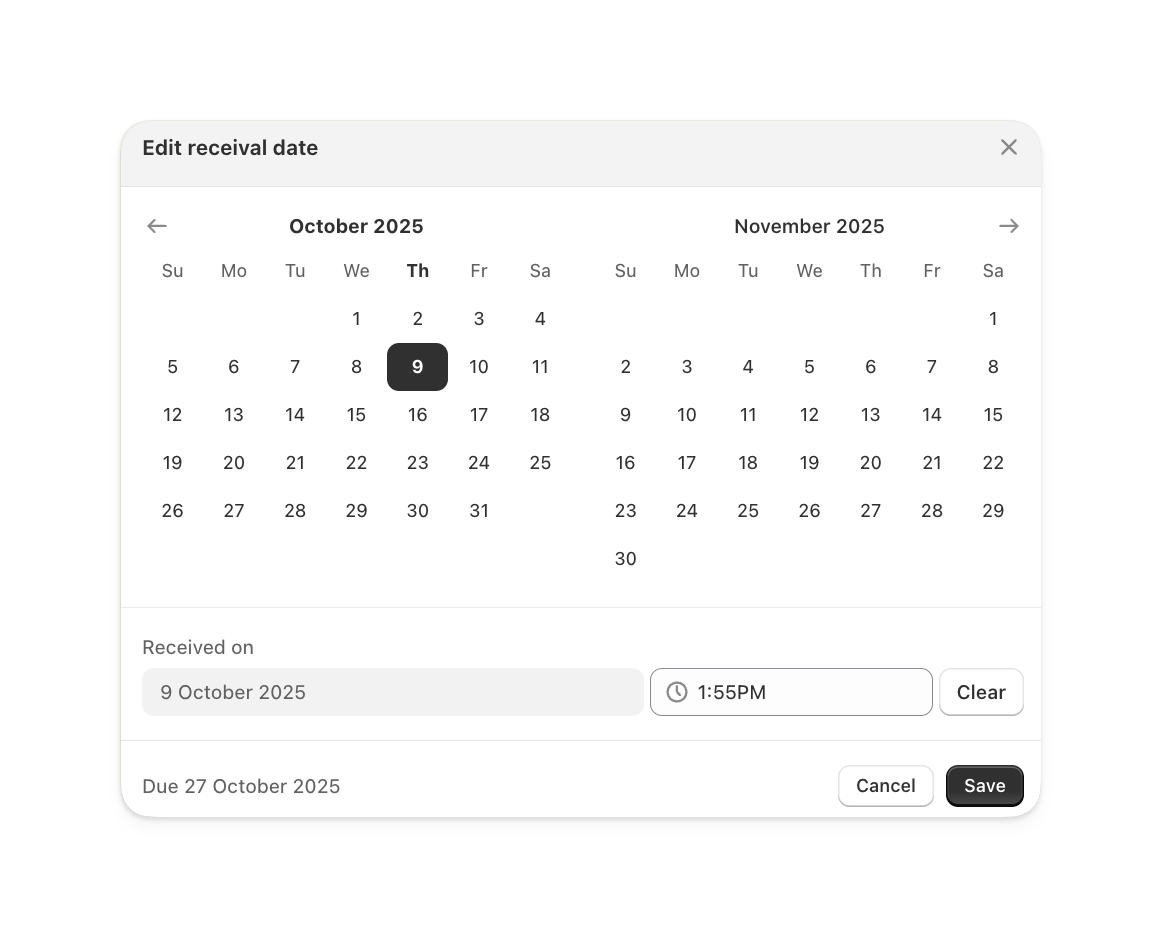
Save changes
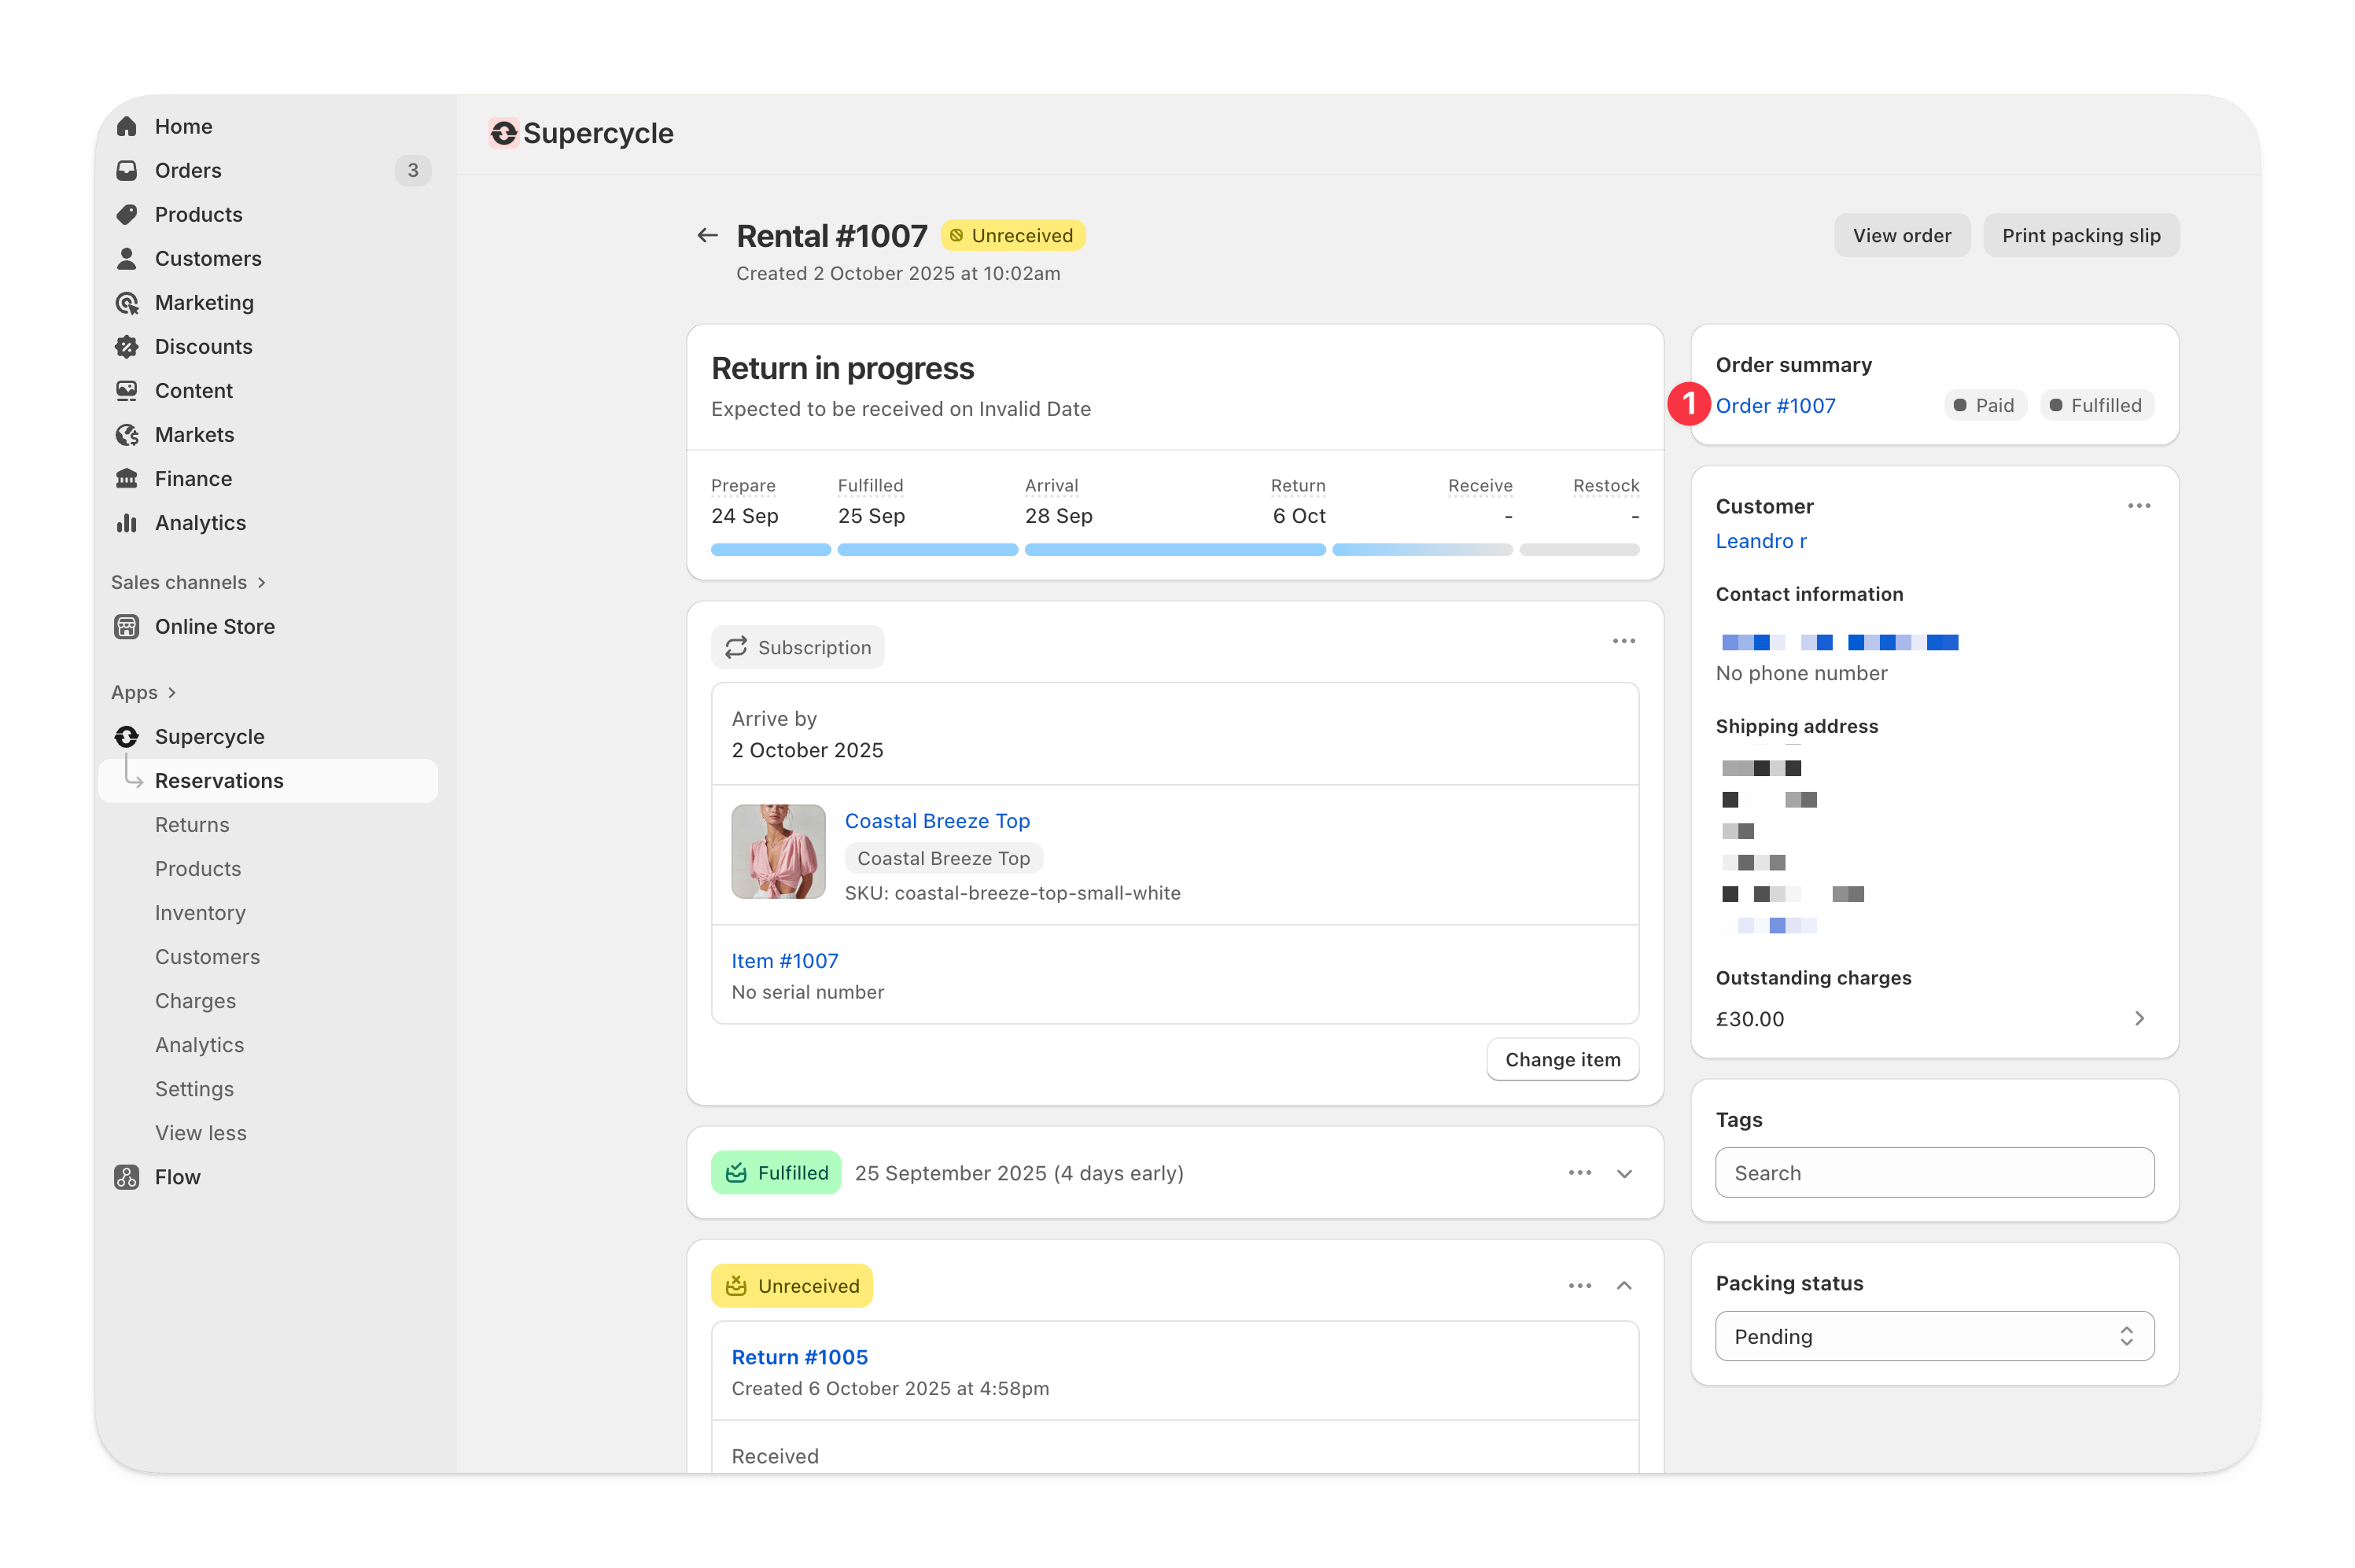
From the Return
From the Return
In bulk, from Cycles
In bulk, from Cycles
Via the MCP
Via the MCP
update_cycle tool with:id- Cycle ID (e.g.SC-1234)received_at- Receival date inYYYY-MM-DDformat
Via the API
Via the API
receivedAt parameter.Edit restock by and prepare from dates
Override the buffer dates for a single cycle when the item needs longer (or less) preparation or restock than the shop-wide logistics buffers would set. The date you set sticks until the leg’s anchor date next moves. Revert to automatic date recalculates it from your logistics settings.From the Admin
From the Admin
Open the cycle
Choose the edit action
Set a date or revert to automatic
Via the MCP
Via the MCP
update_cycle tool with:id- Cycle ID (e.g.SC-1234)prepare_from- Preparation start date inYYYY-MM-DDformat, ornullto revert to automaticrestock_by- Restock date inYYYY-MM-DDformat, ornullto revert to automatic
Via Shopify Flow
Via Shopify Flow
prepareFrom and restockBy fields. Pass null to clear the override and recalculate from the shop’s logistics settings.Via the API
Via the API
prepareFrom and restockBy parameters. Pass null to revert either buffer date to the automatic value.Cancel rental
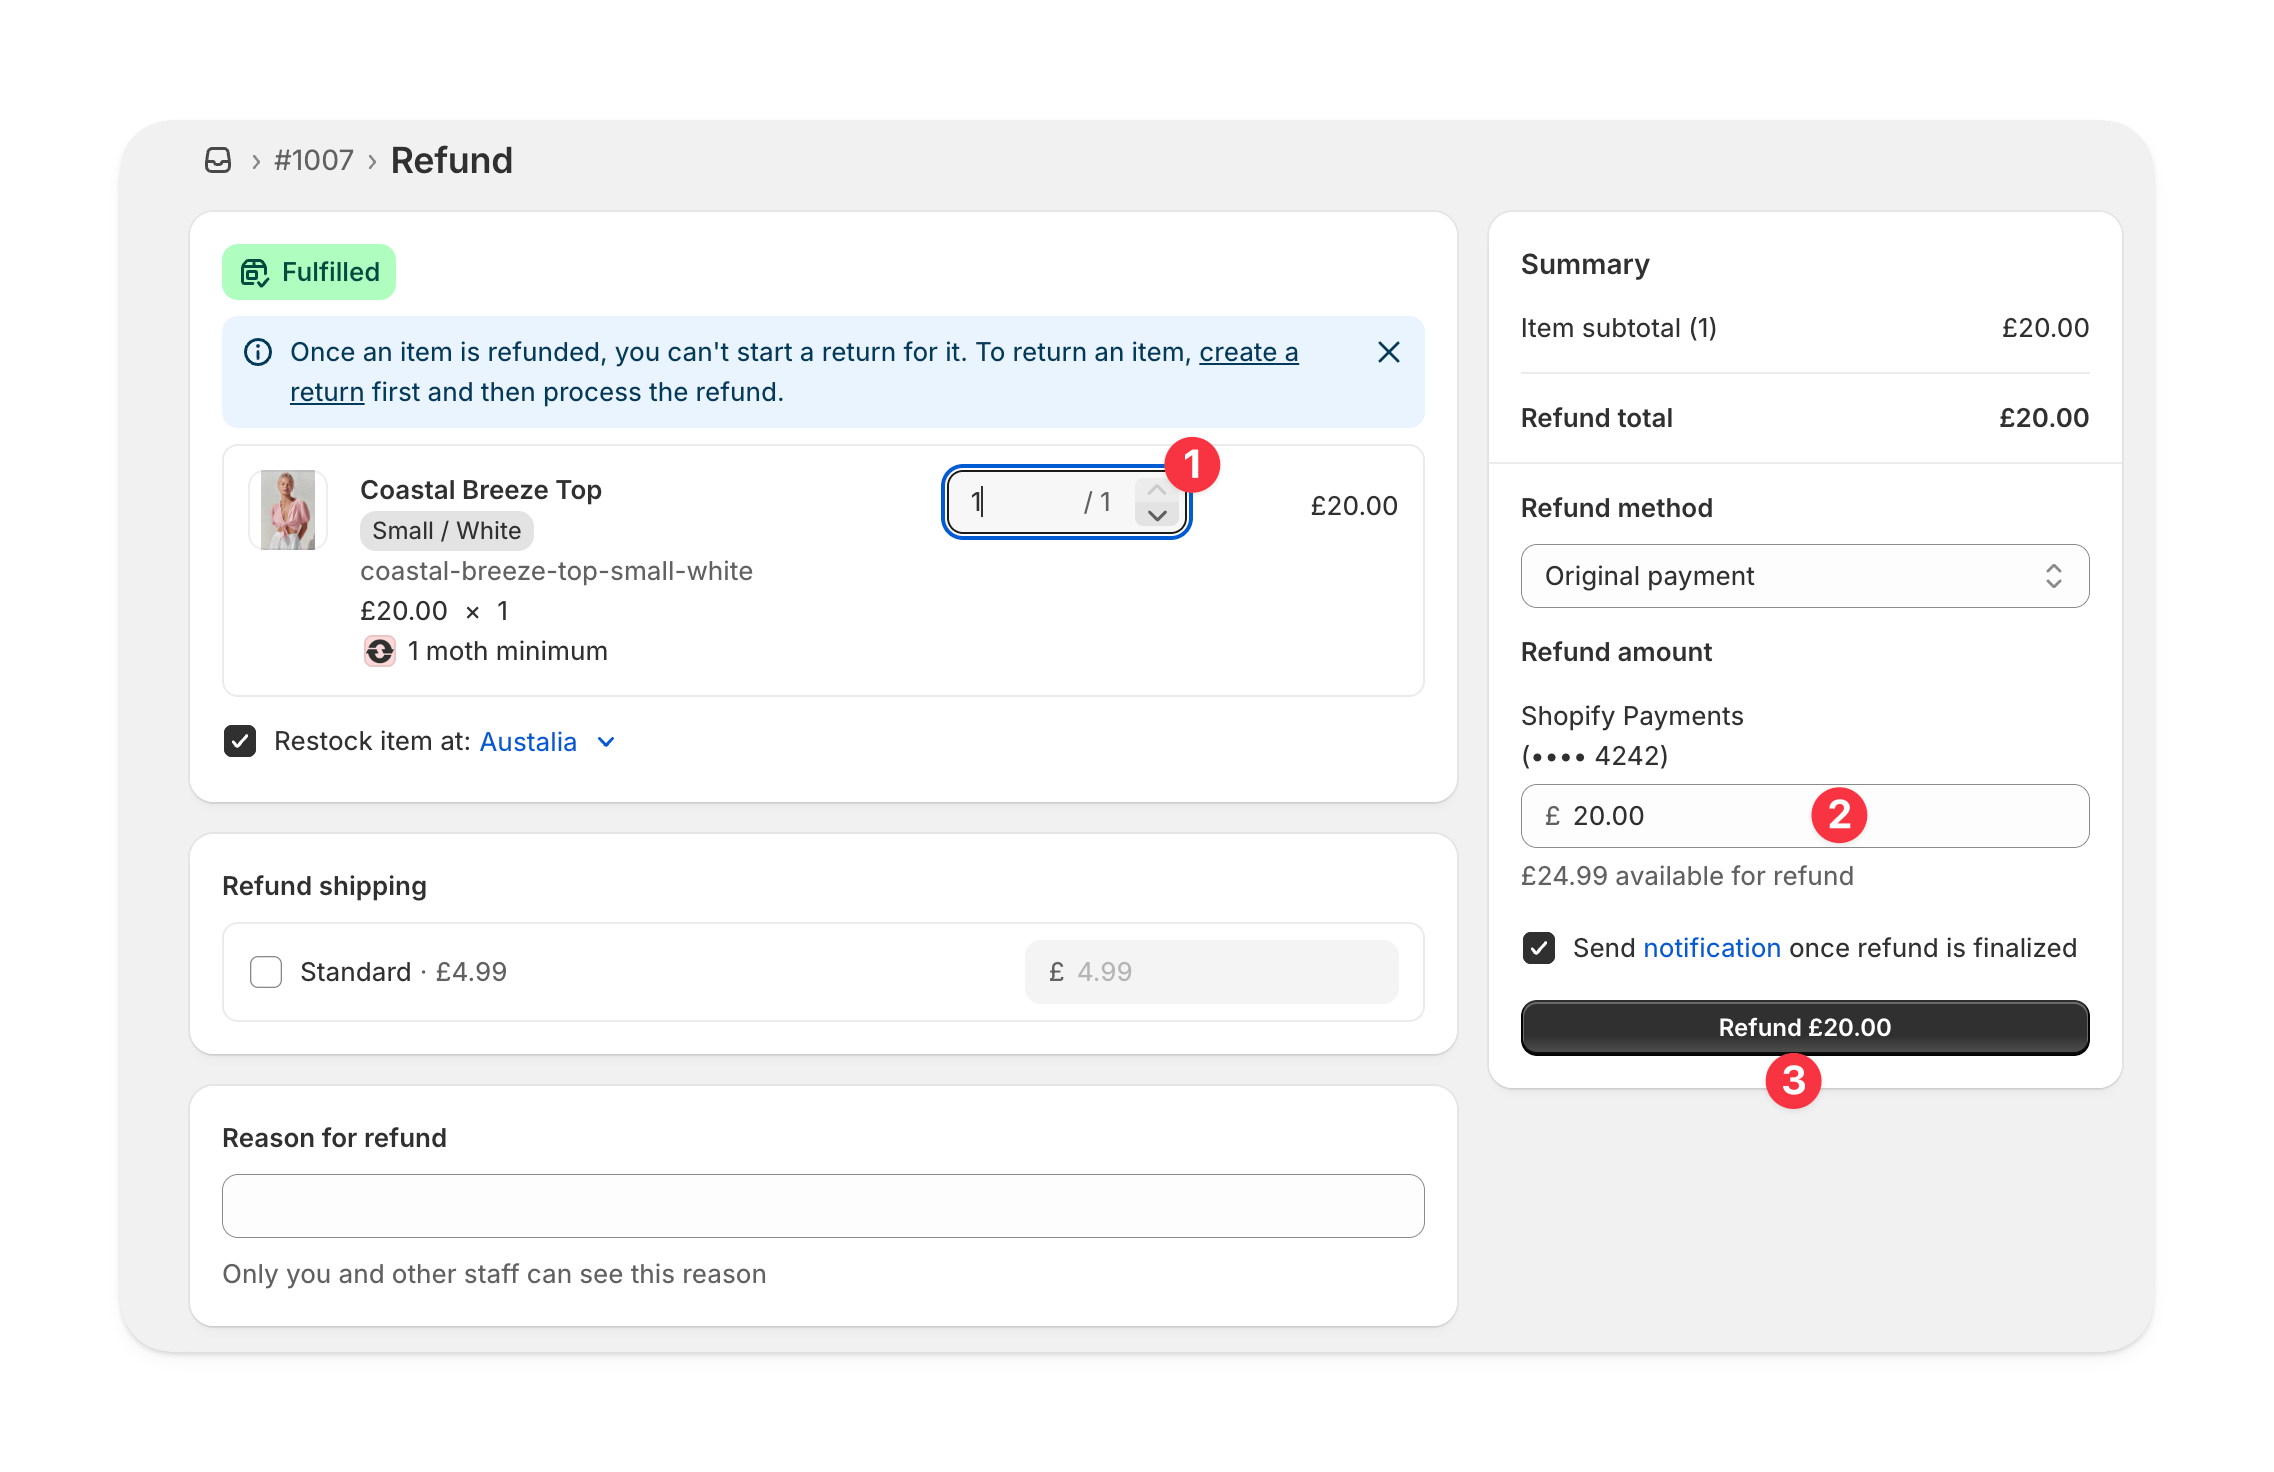
From the Shopify order
From the Shopify order
From the Shopify Admin, view the order containing the rental
Start a refund
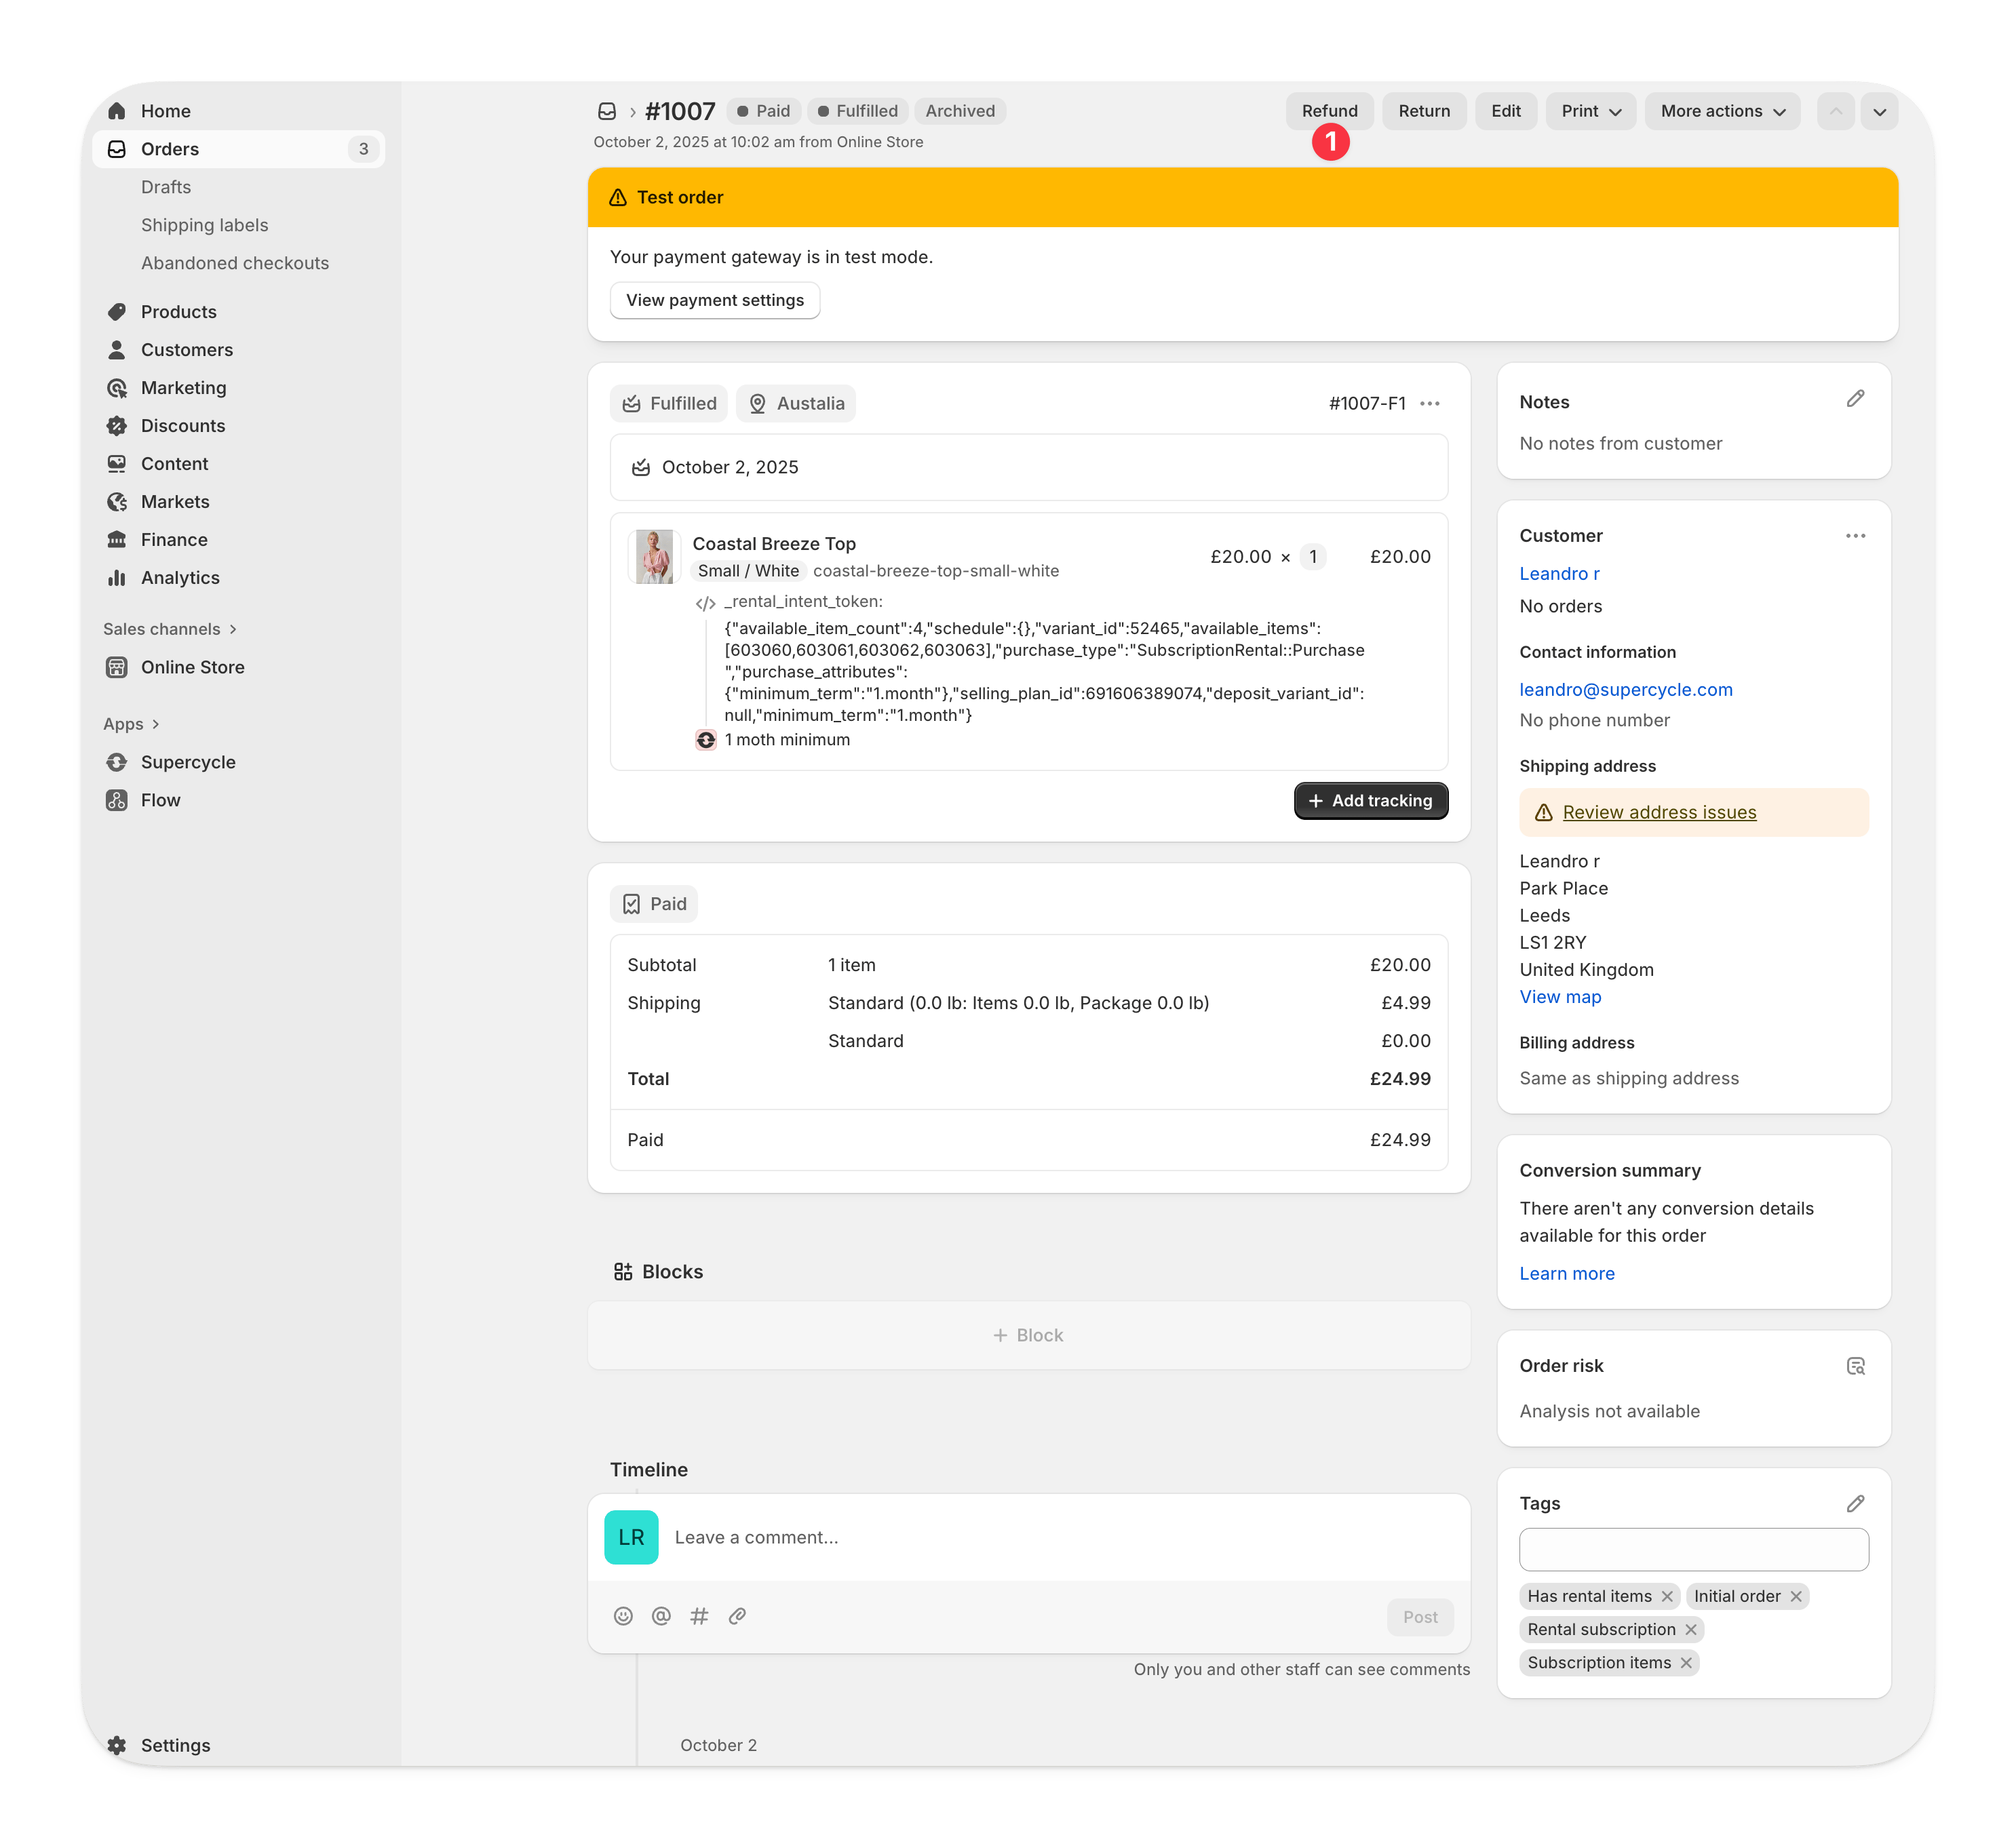
Process refunds against the line items