You can edit an existing rental order directly from Shopify without needing to create a new one. You can remove or add rentals, charge any difference, or issue refunds.

Removing a rental from an order

1

Go to the order in Shopify

In your Shopify admin, go to Orders and open the specific order you want to edit.
2

Edit the order

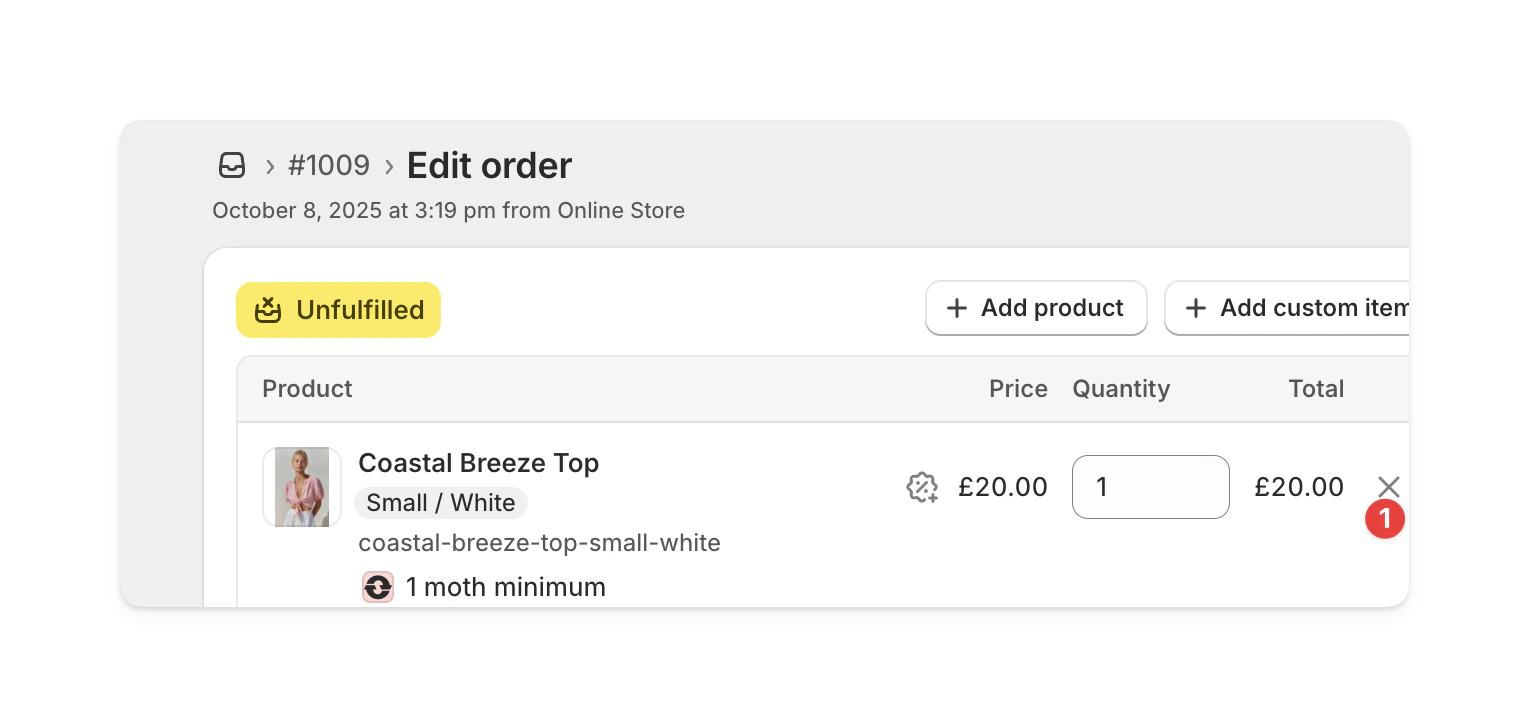
Select Edit.
3

Remove the rental item

Hover over the rental item you want to remove.
Select the X that appears, or set the quantity to 0.
4

Save the order

Click Save to confirm the change.

Adding a rental to an order

Setting up your Shopify product price for the Add rental flowWhen you add a rental to an existing order, Supercycle automatically applies a discount to bring the Shopify product price down to your configured rental price.This means your Shopify product price must be set higher than your most expensive rental option in Supercycle. If the product price is lower than a rental option, that rental price cannot be applied correctly on the order edit.
1

Go to the order in Shopify

In your Shopify admin, go to Orders and open the specific order.
2

Add a rental

Select More actions > Add rentals.
3

Choose a method and start date

You can:
  • Manually choose a rental method and start date, or
  • Select from one of the presets shown.
Presets are based on the existing rentals in the order.
For example, if the order includes a subscription and a calendar rental from October 10–21, you’ll see both a Subscription preset and a Calendar (Oct 10–21) preset.
4

Select and add the item

Choose the product you want to add.
Supercycle will check the item’s availability.
Once ready, click Add to order.

Reserving rental inventory on a draft order

When you build an order with rentals as a Shopify draft order, the customer hasn’t paid yet, so the rental units on the draft aren’t held unless you reserve them.

Reserve inventory automatically

By default, Supercycle reserves rental inventory automatically whenever rentals are added to a draft order, so a unit can’t be double-booked while the draft is still unpaid. No manual step is required. The reserve lasts for a set duration (7 days by default) from when the draft is created. Control this from Supercycle > Settings > Channels > Draft orders:
  • Reserve inventory automatically: toggle the behavior on or off.
  • Reserve inventory for: how long inventory stays reserved after the draft order is created.

Reserve manually

You can also reserve items on a draft directly with Shopify’s Reserve items, which is useful when auto-reserve is off or you want to set a specific expiry:
1

Open the draft order in Shopify

In your Shopify admin, go to Draft orders and open the draft containing the rental.
2

Turn on Reserve items

In the Reserve items card, set an expiry date and time and save. Shopify shows the reserve as active on the draft.
While a reserve is active, the rental unit is held with an internal block spanning the rental’s pick-up and return dates, and no other cycle can book it in that window. The reserve is released automatically when any of the following happens:
  • You turn Reserve items off on the draft.
  • The customer pays and the draft becomes an order (the rental picks an available unit as normal).
  • The draft is cancelled or deleted.
  • You remove the rental line from the draft.
  • The reserve expiry time passes.
Changing the rental dates on the draft updates the reserve window automatically.

Charging the difference

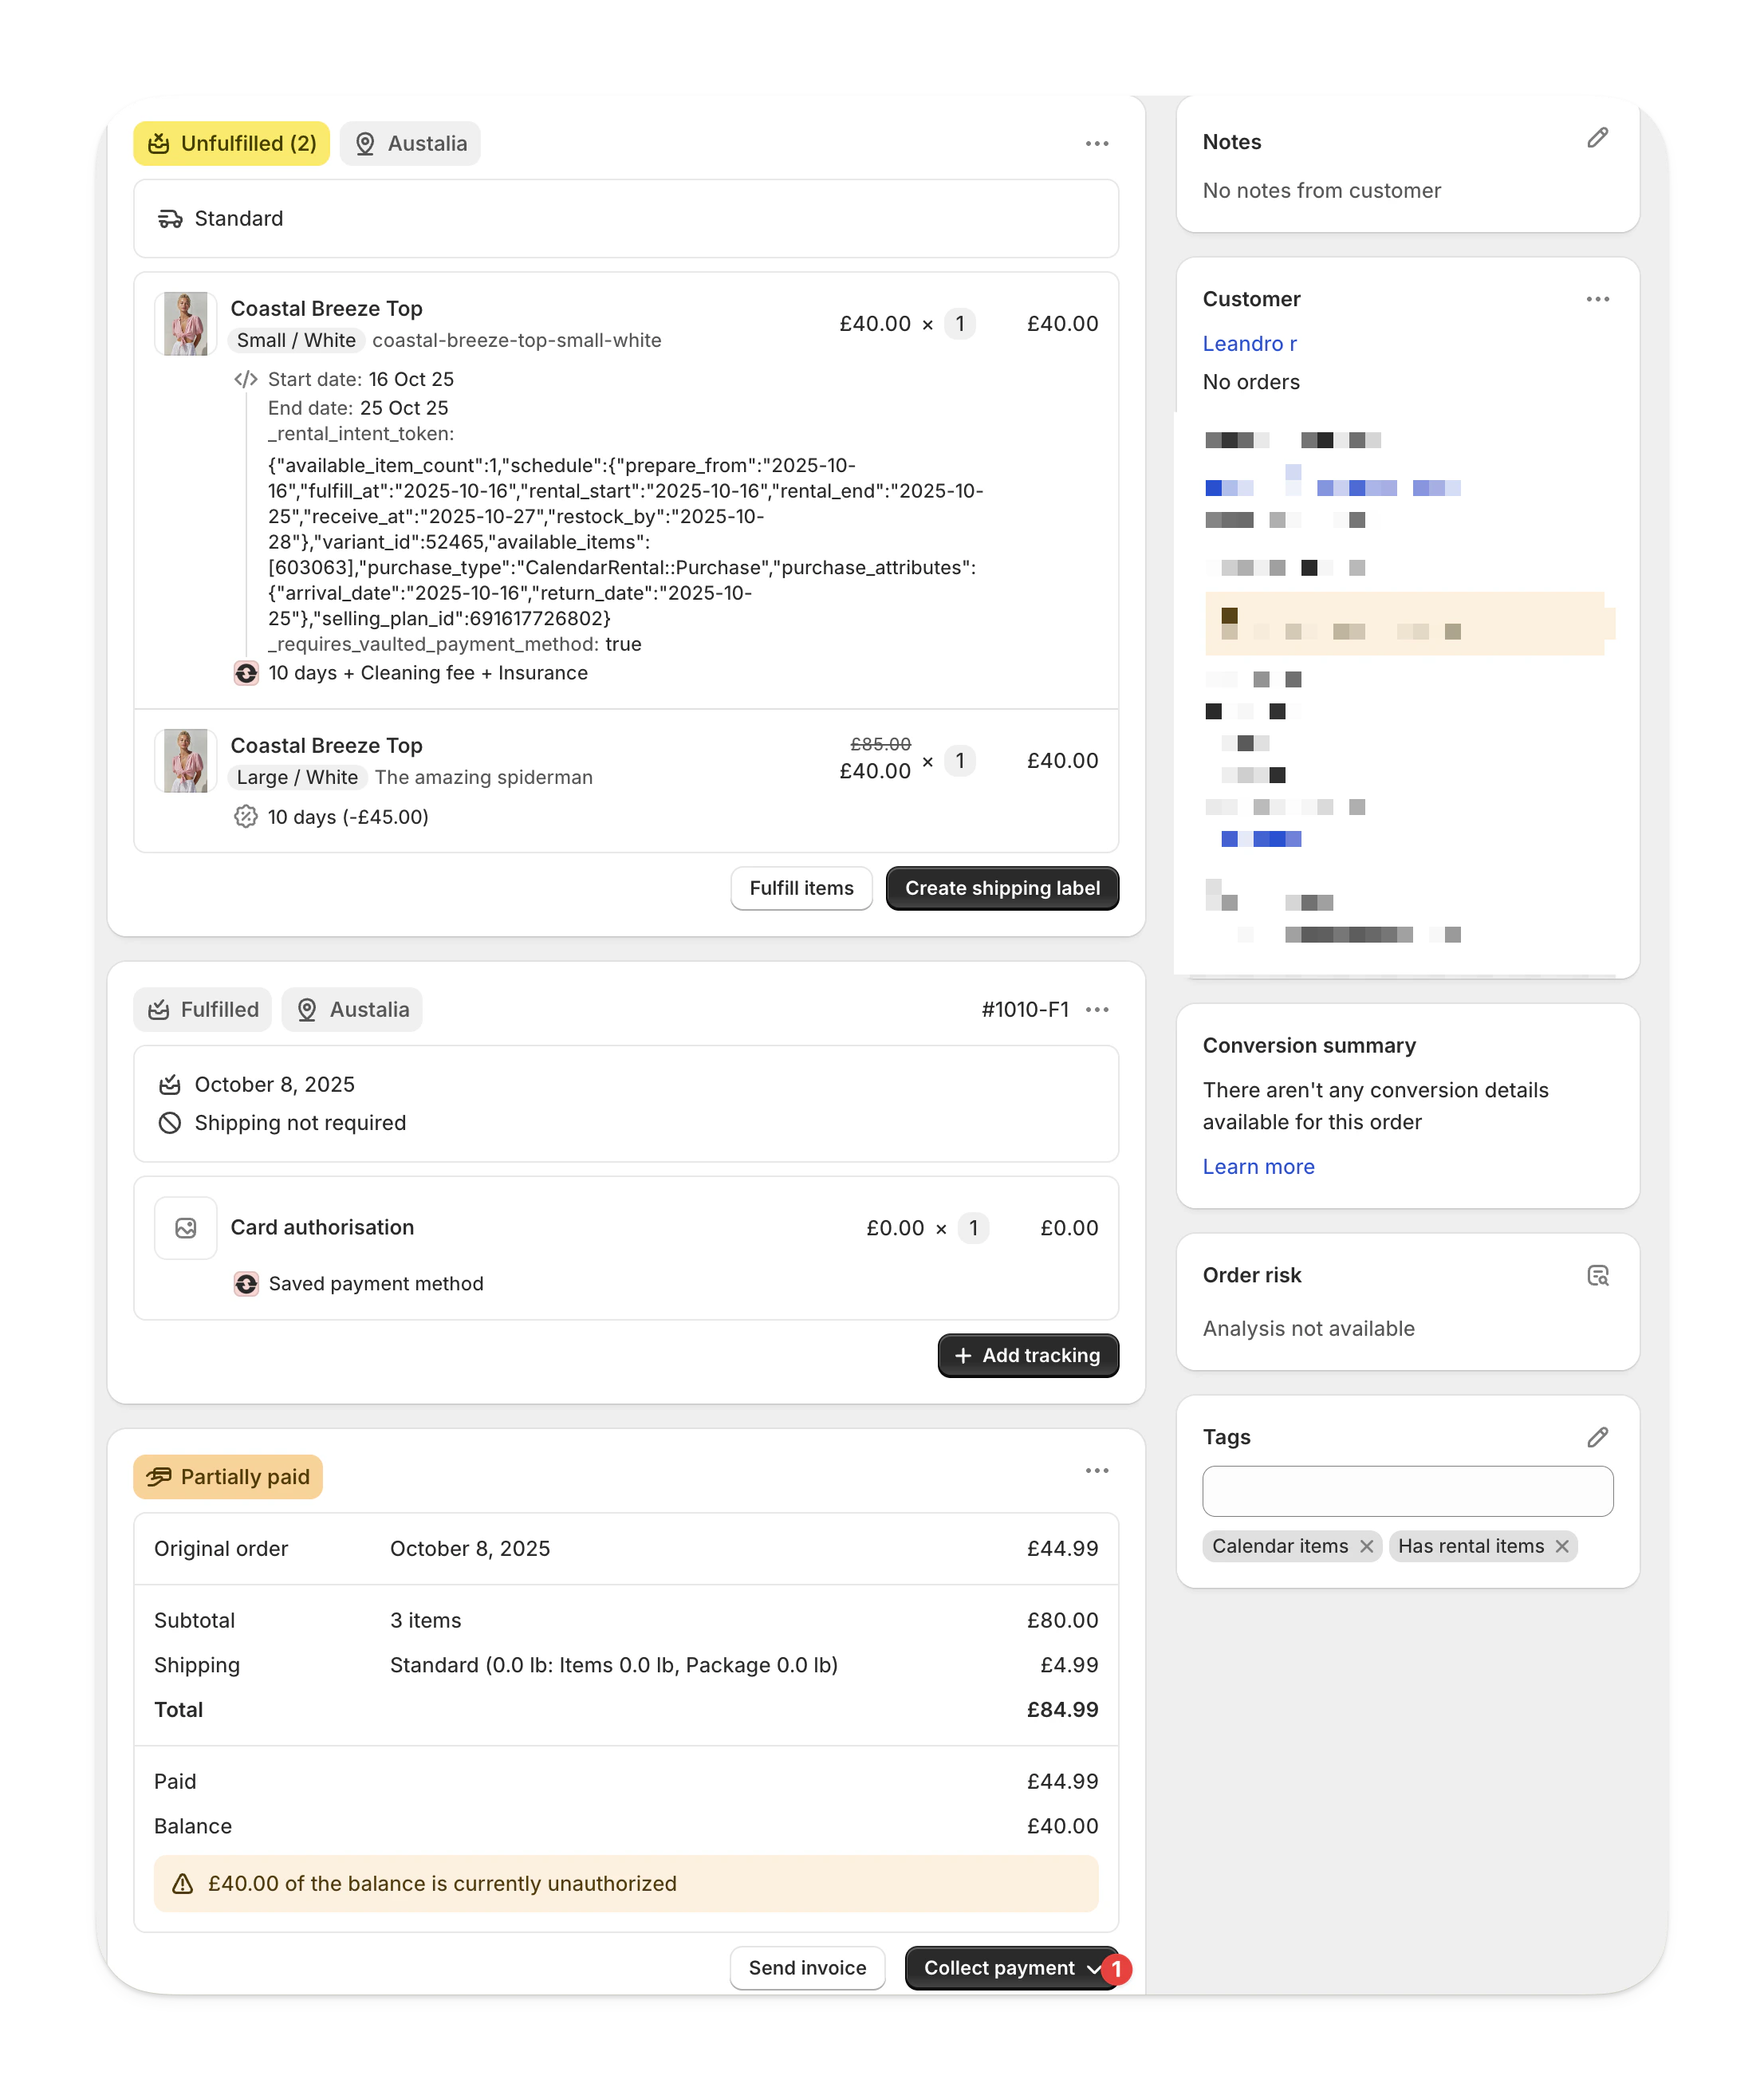
If adding rentals increases the total order value, Shopify will show the outstanding balance.
1

Review outstanding charges

After adding all new rentals, check the summary for the amount due.
2

Collect payment

You can either:
  • Send an invoice to the customer, or
  • Charge a saved card directly.

Refunding the difference

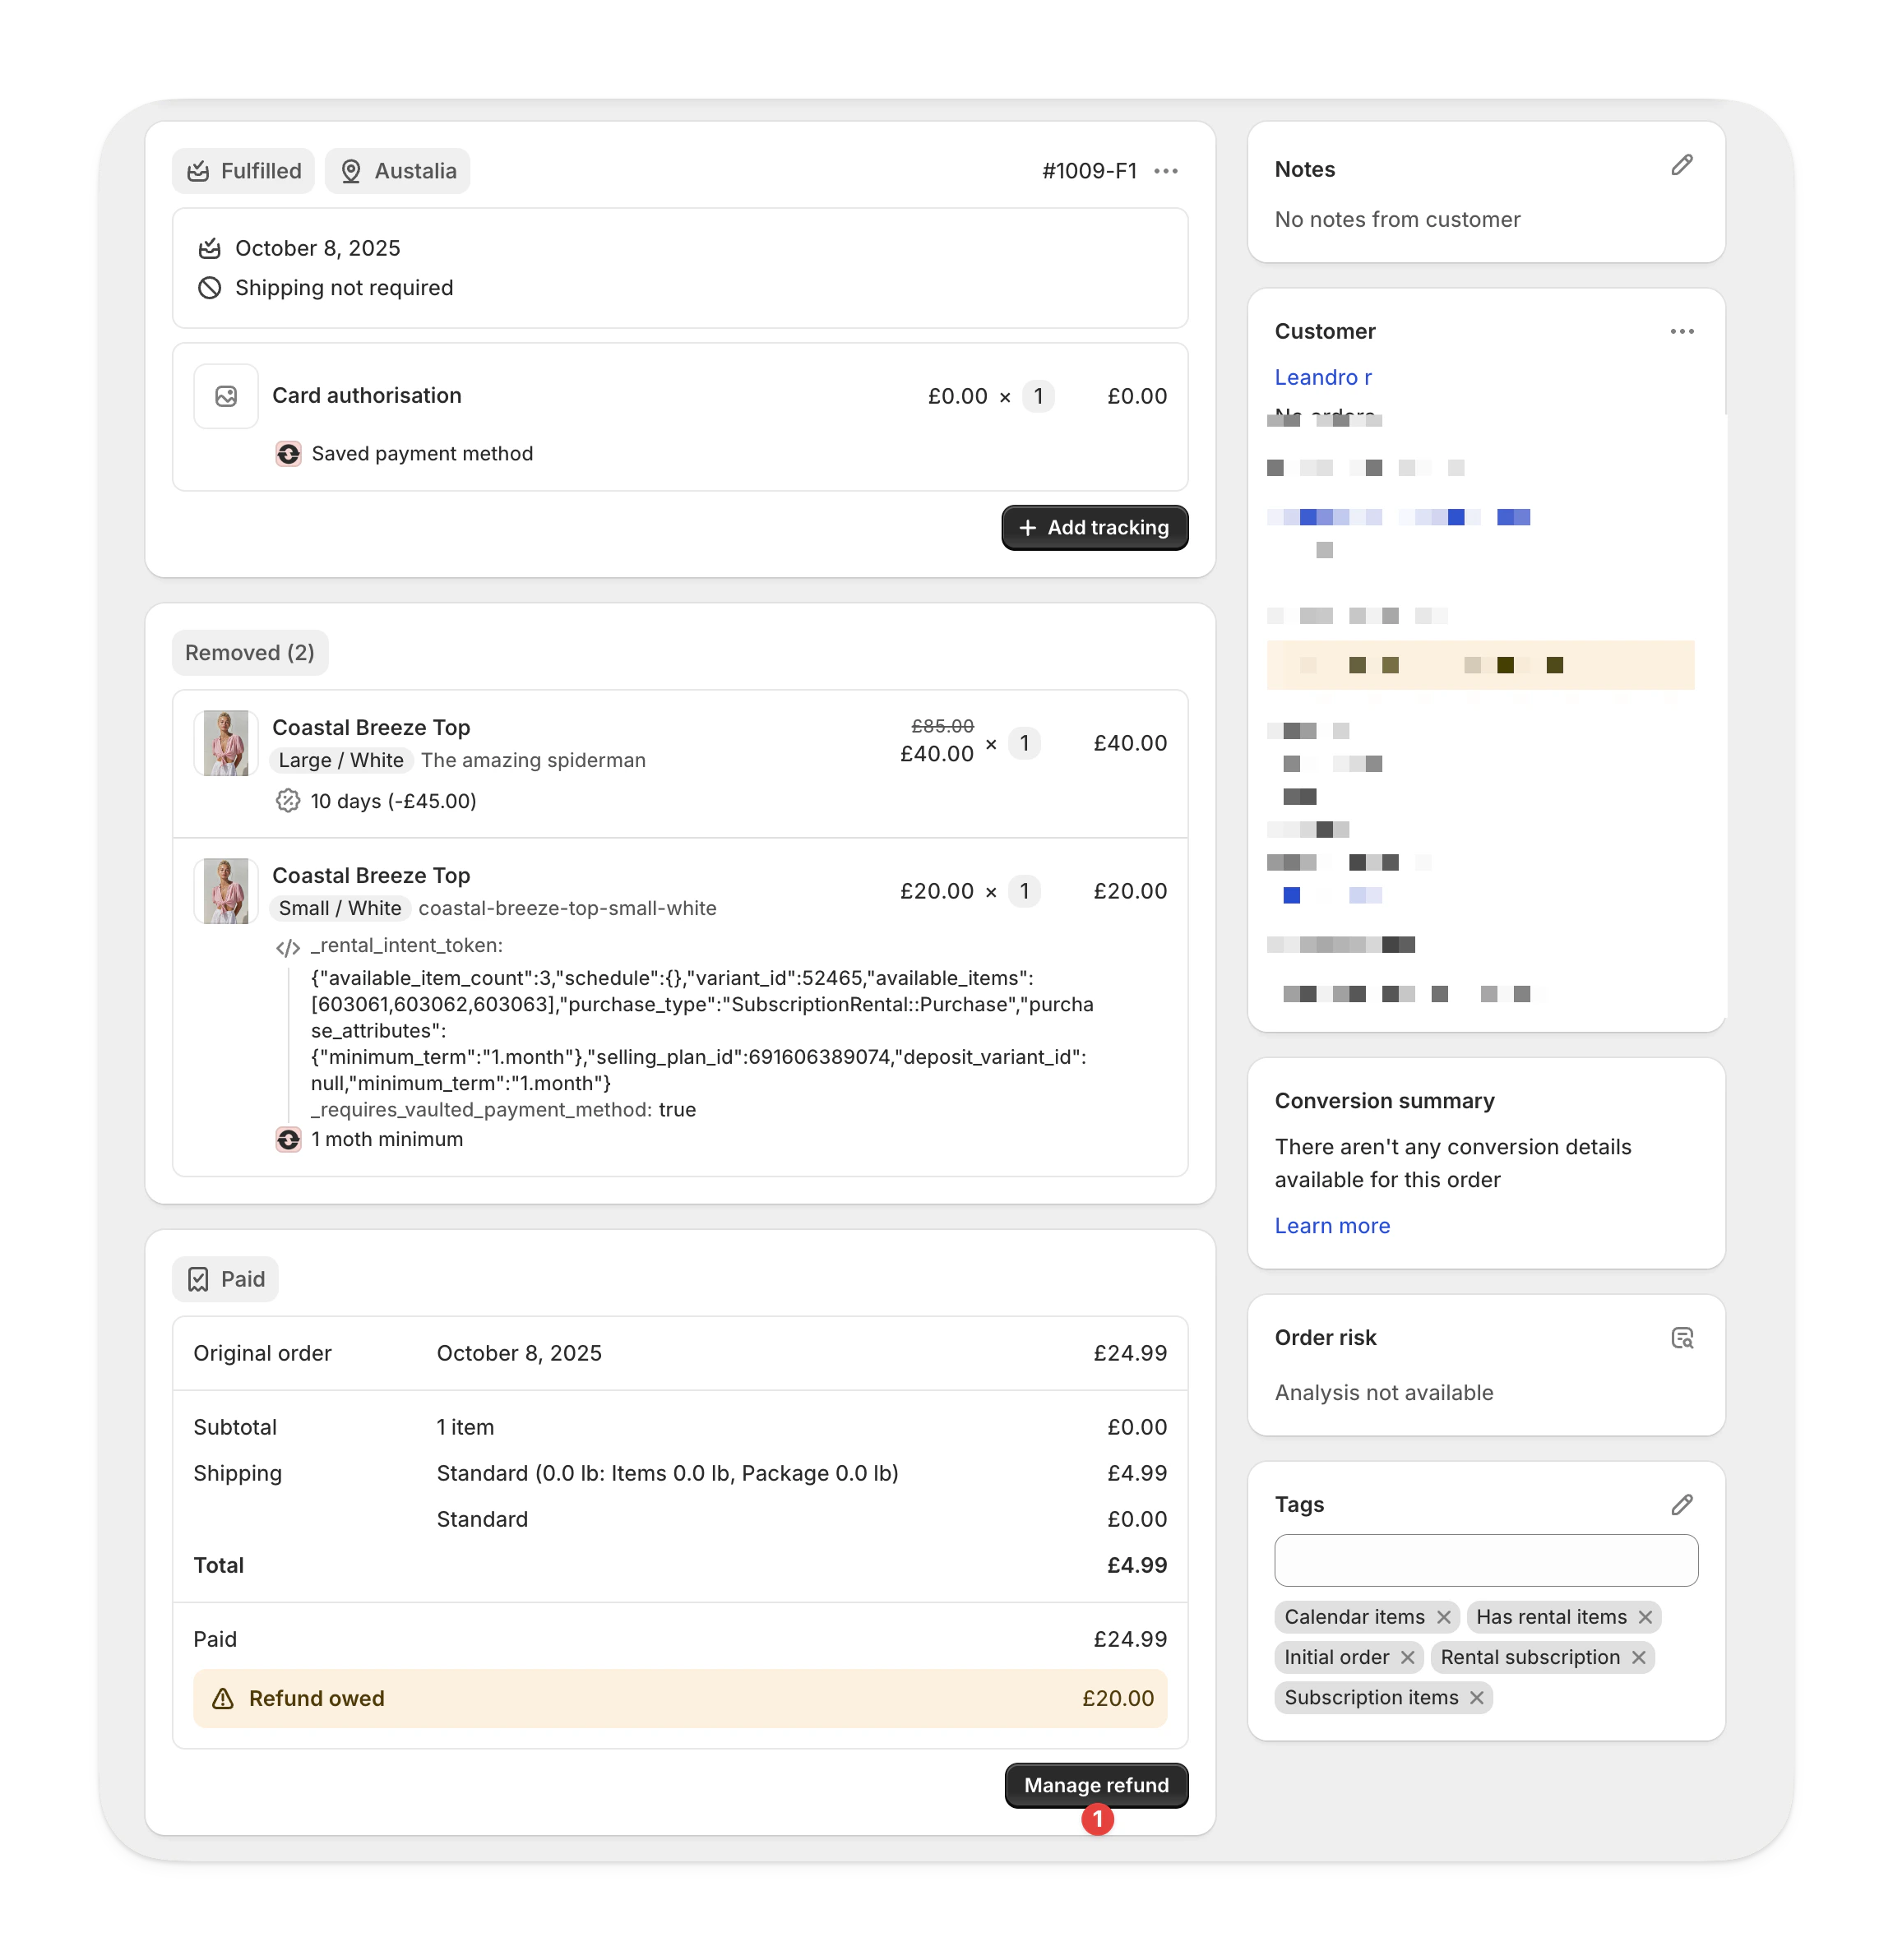
If removing rentals lowers the total order value, you’ll see a Manage refund button.
1

Open the refund screen

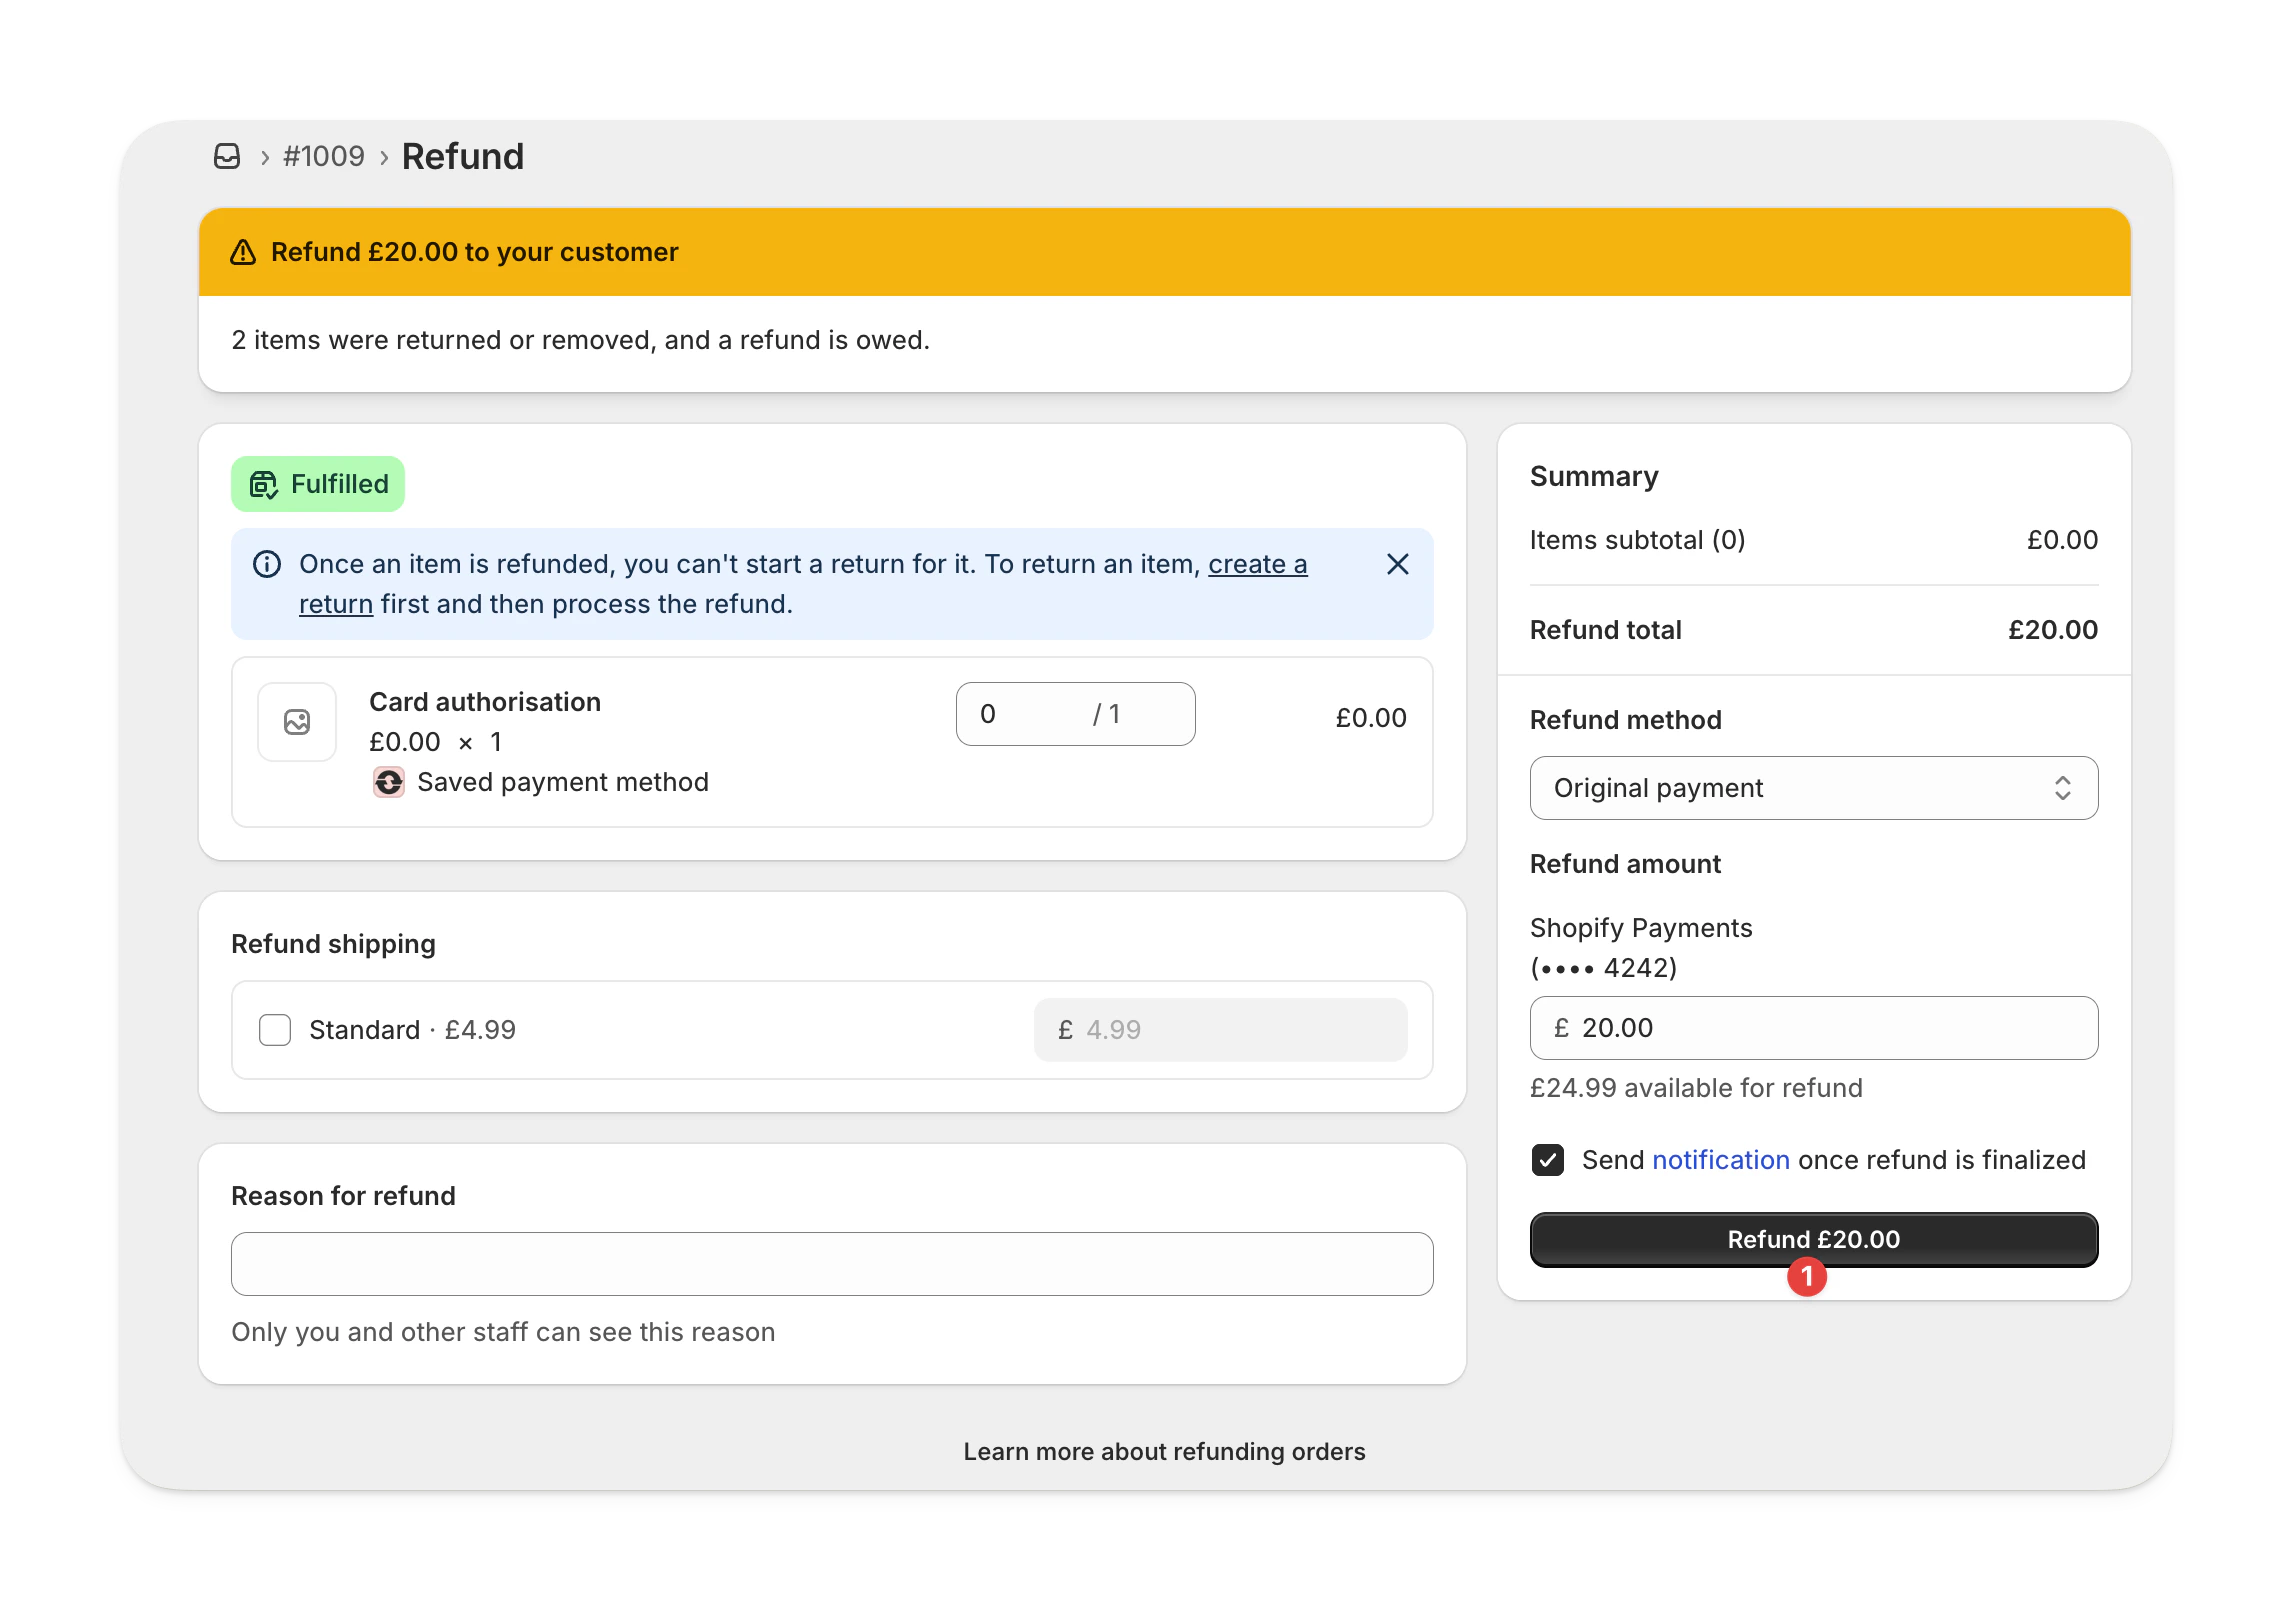
Select Manage refund. This opens Shopify’s refund page.
2

Process the refund

Review the refund details and confirm to process it directly in Shopify.

FAQs

To change the shipping address for an existing order, go to the order in Shopify.
Click the three dots next to the customer’s name, then select Edit address.
Any changes you make will automatically be reflected in Supercycle.