Create items
You should create inventory inside your Supercycle product, not your Shopify product, as Supercycle is responsible for inventory management after import.In bulk, from a Product
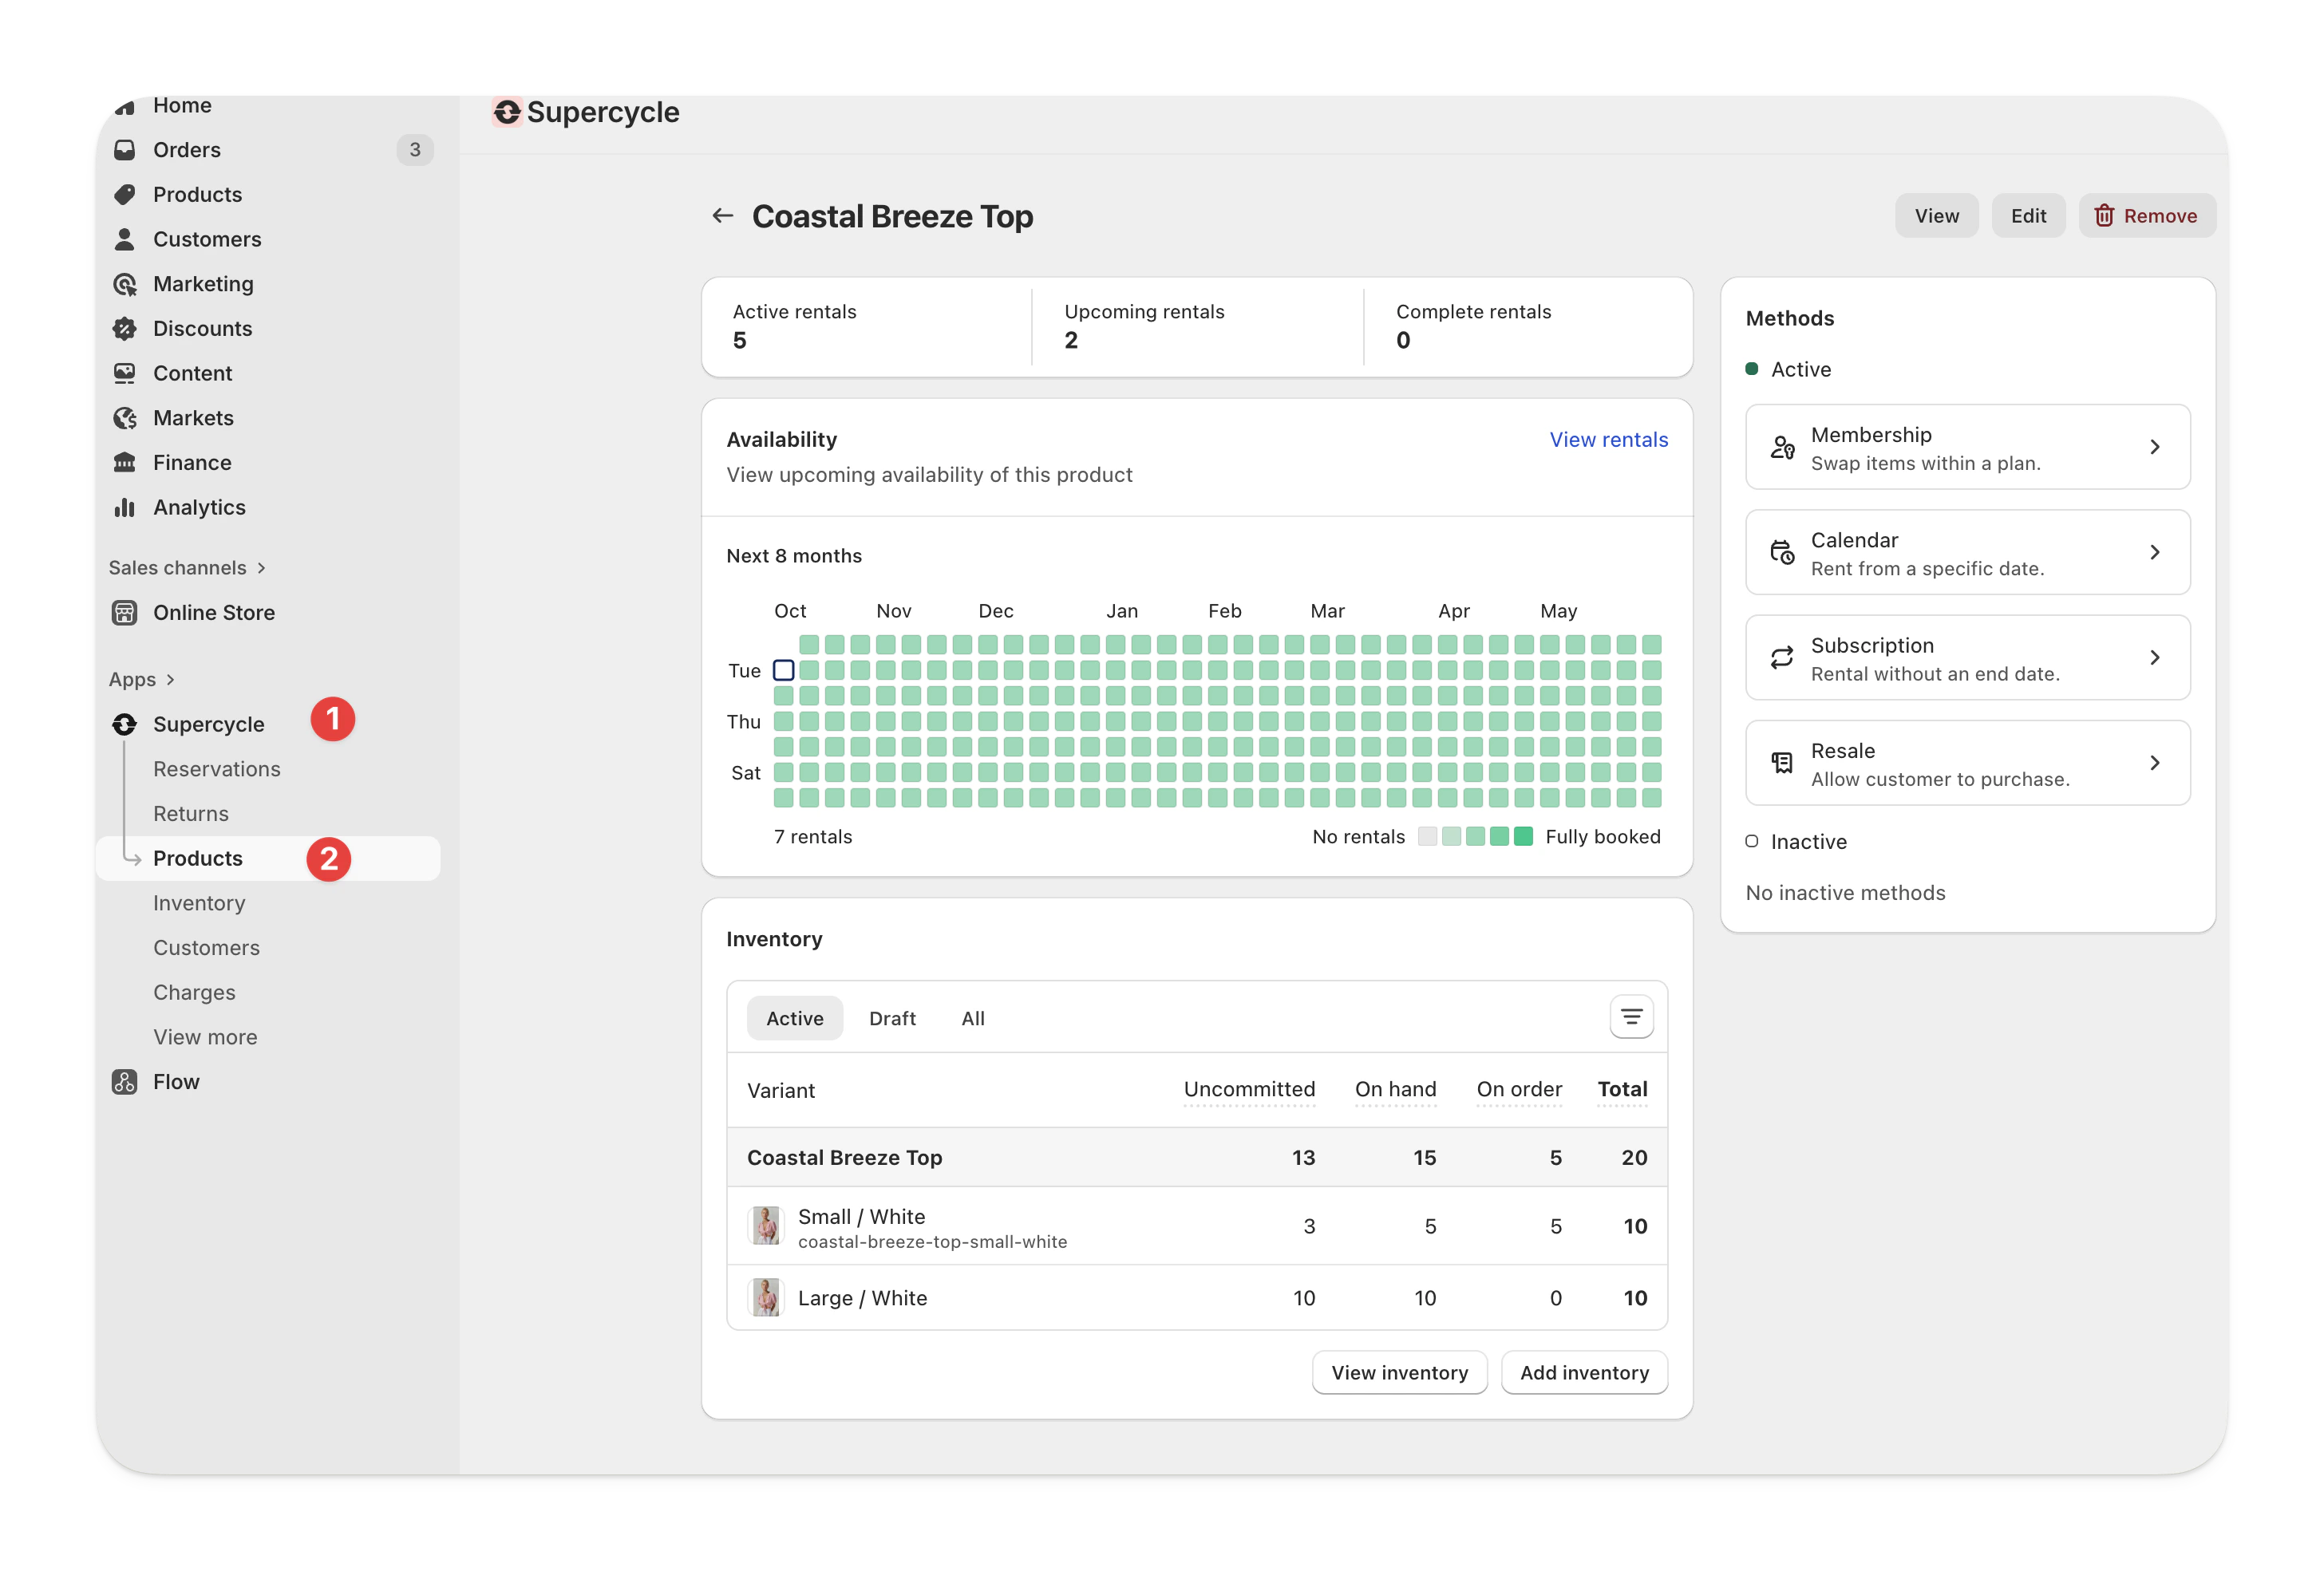
In bulk, from a Product
Navigate to the product
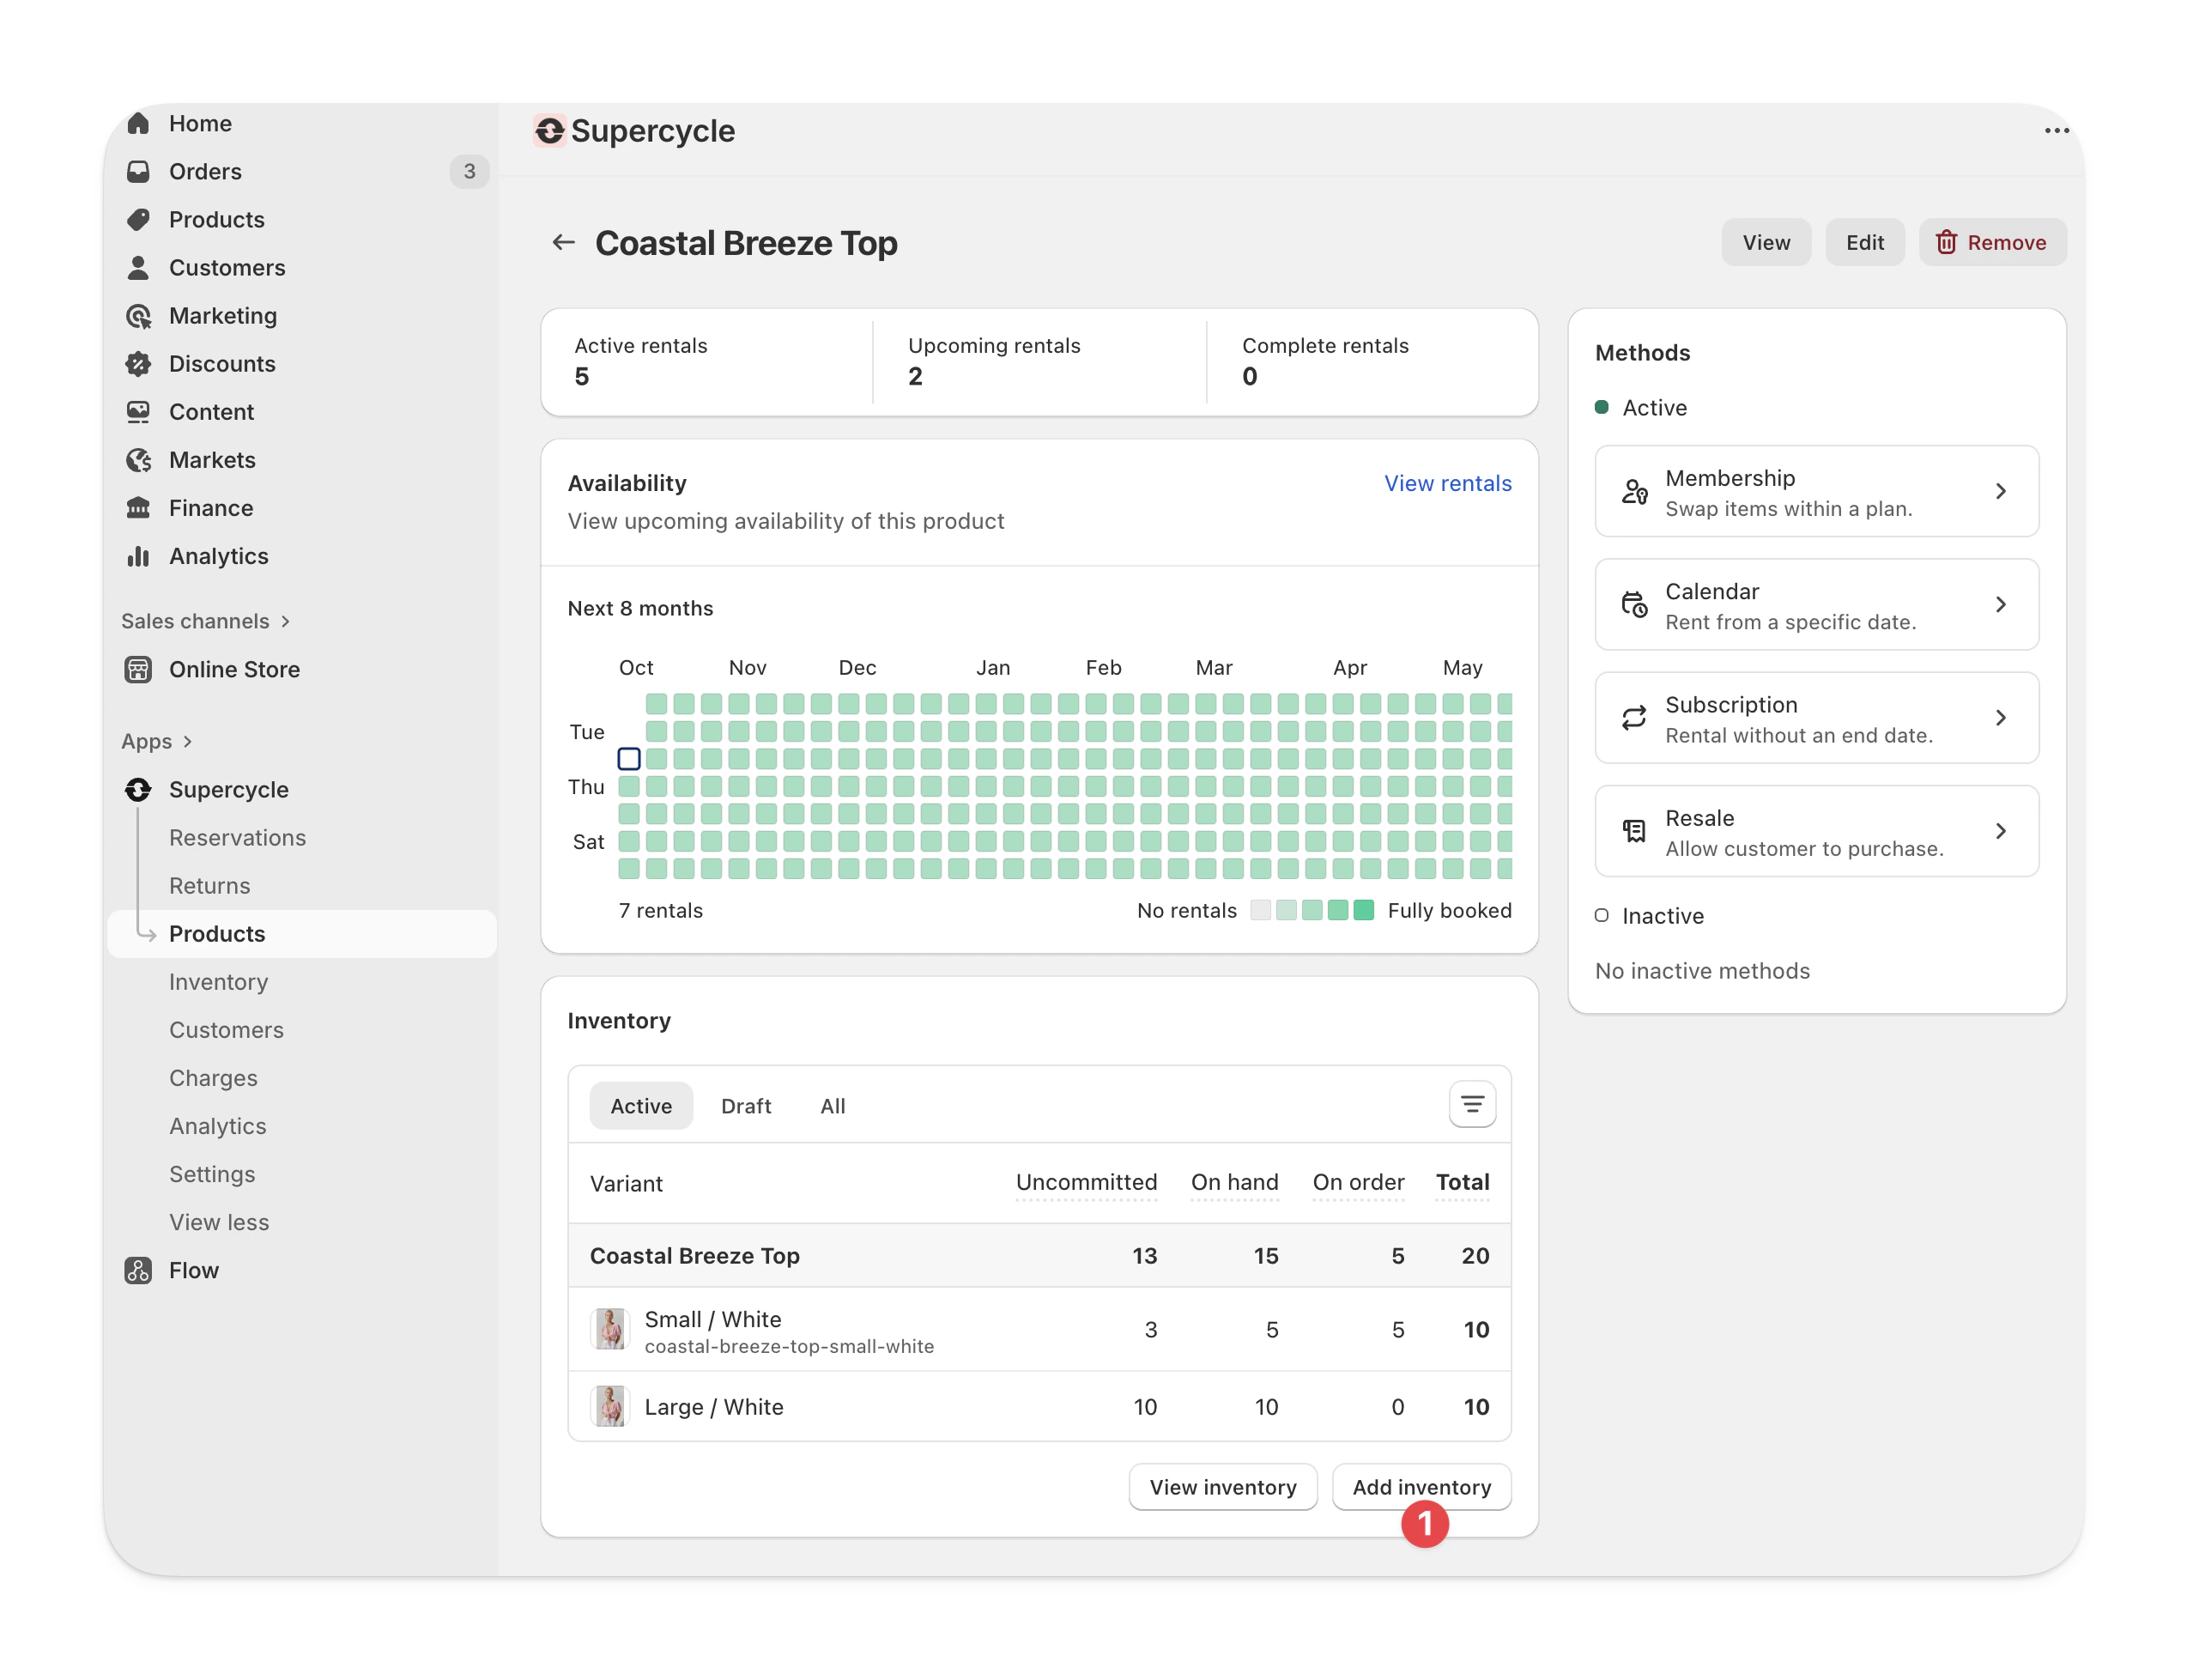
Add inventory
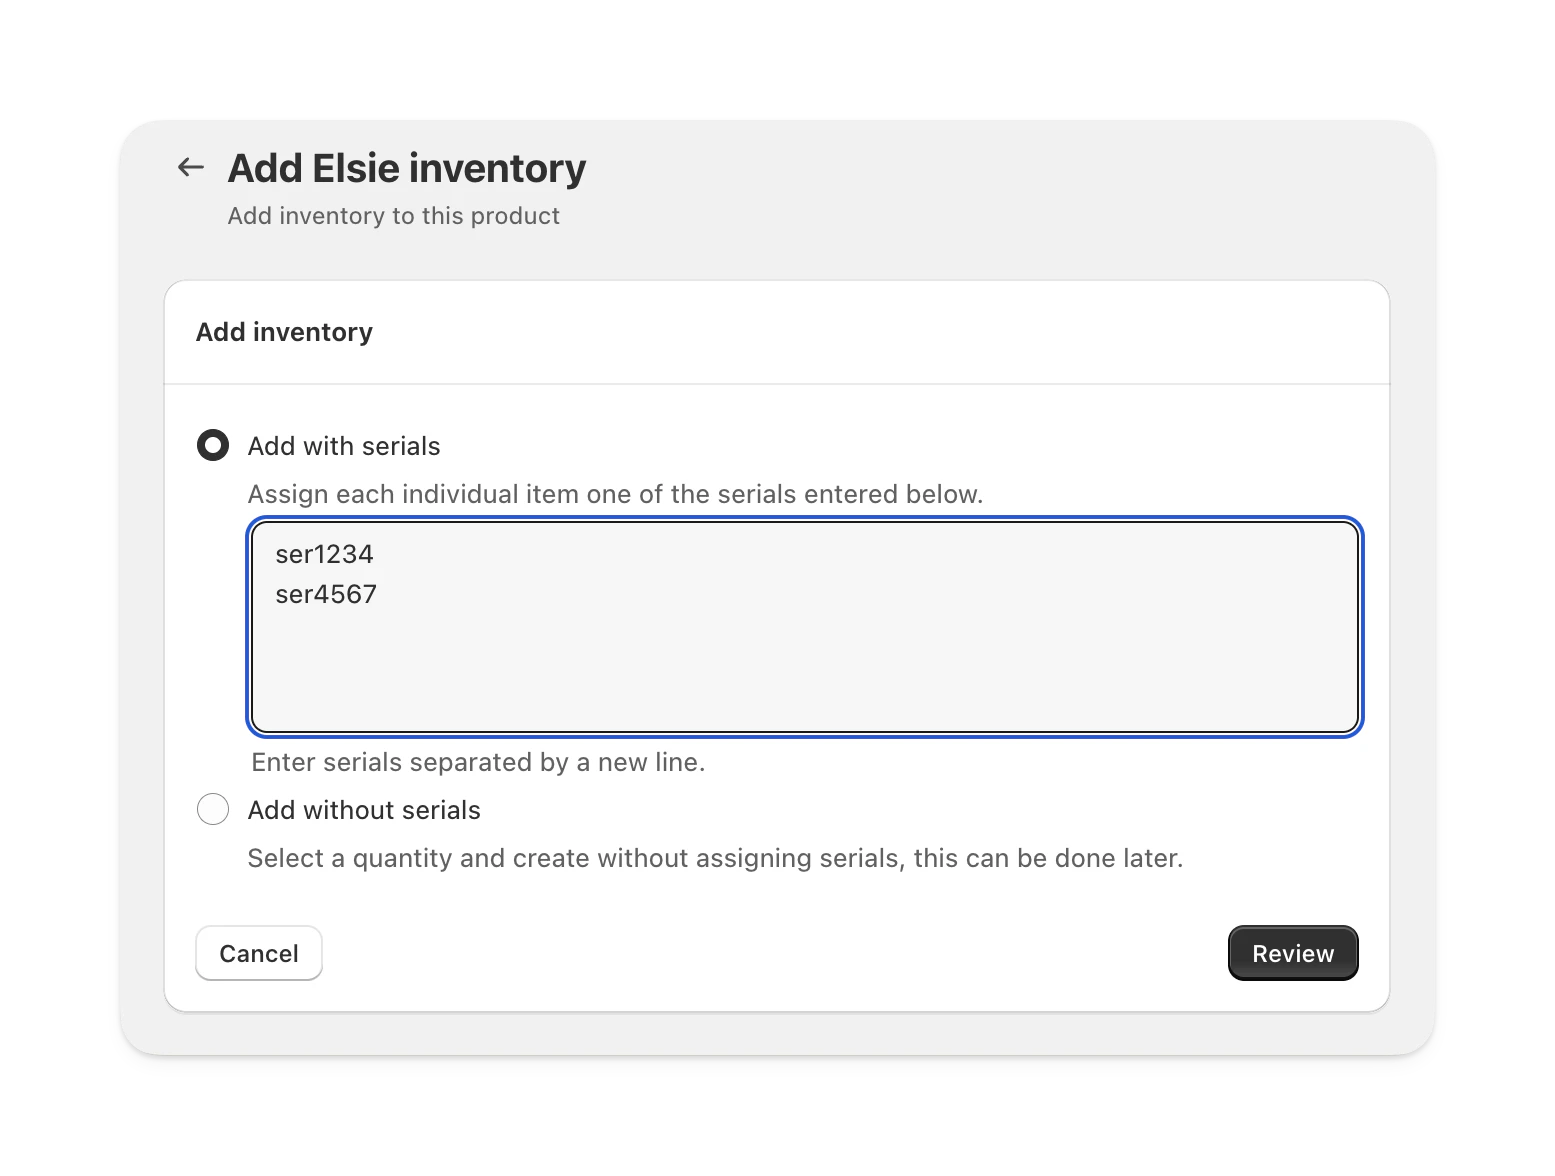
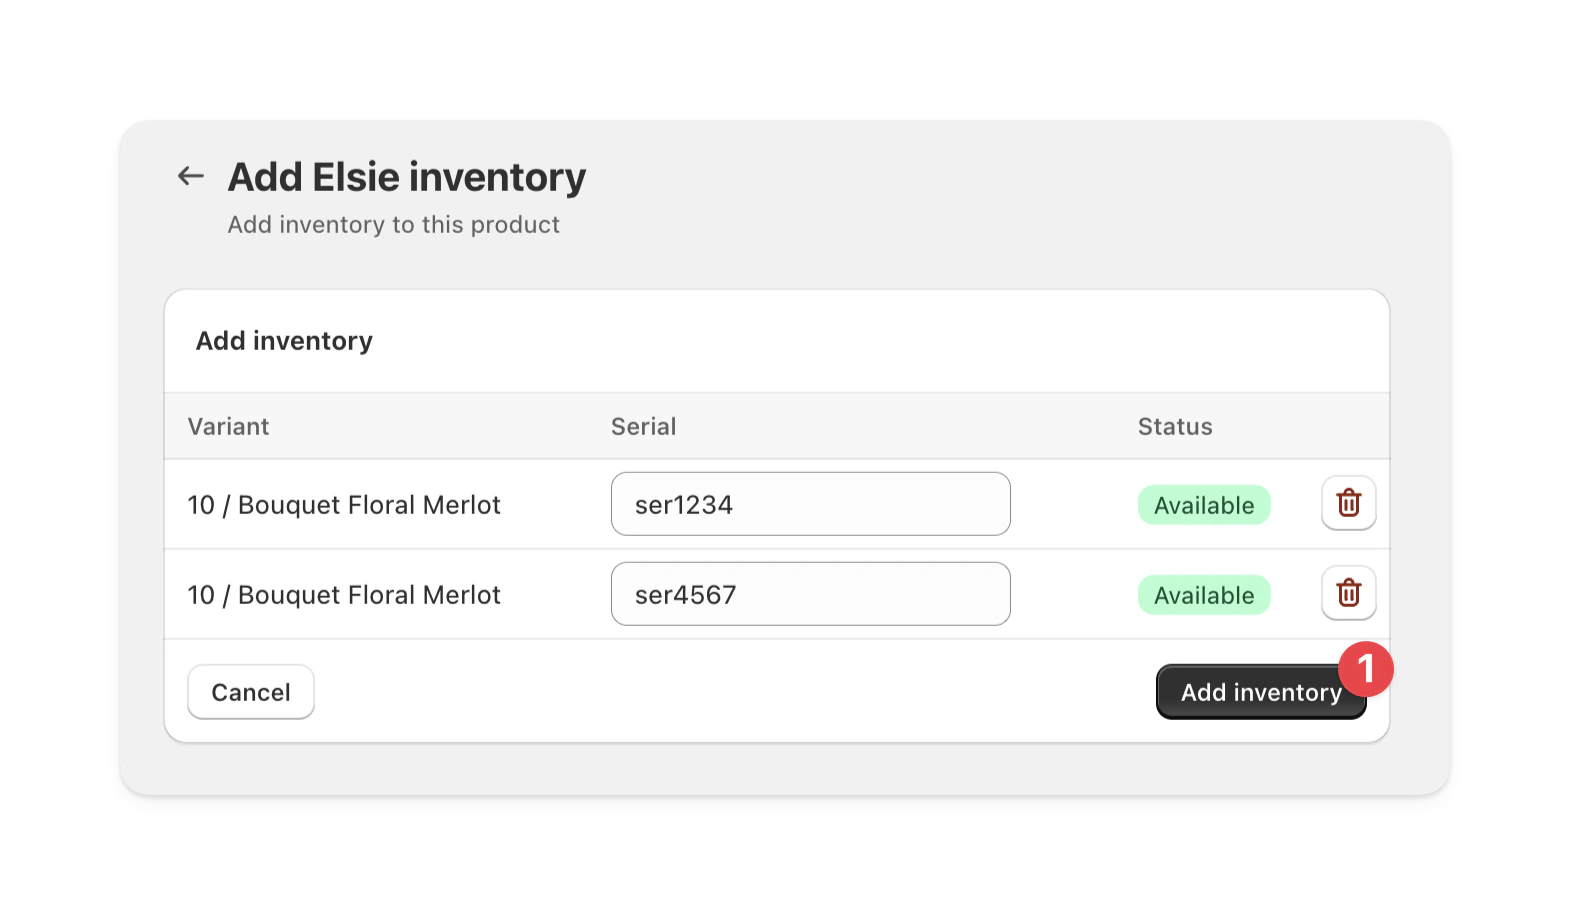
Add serials
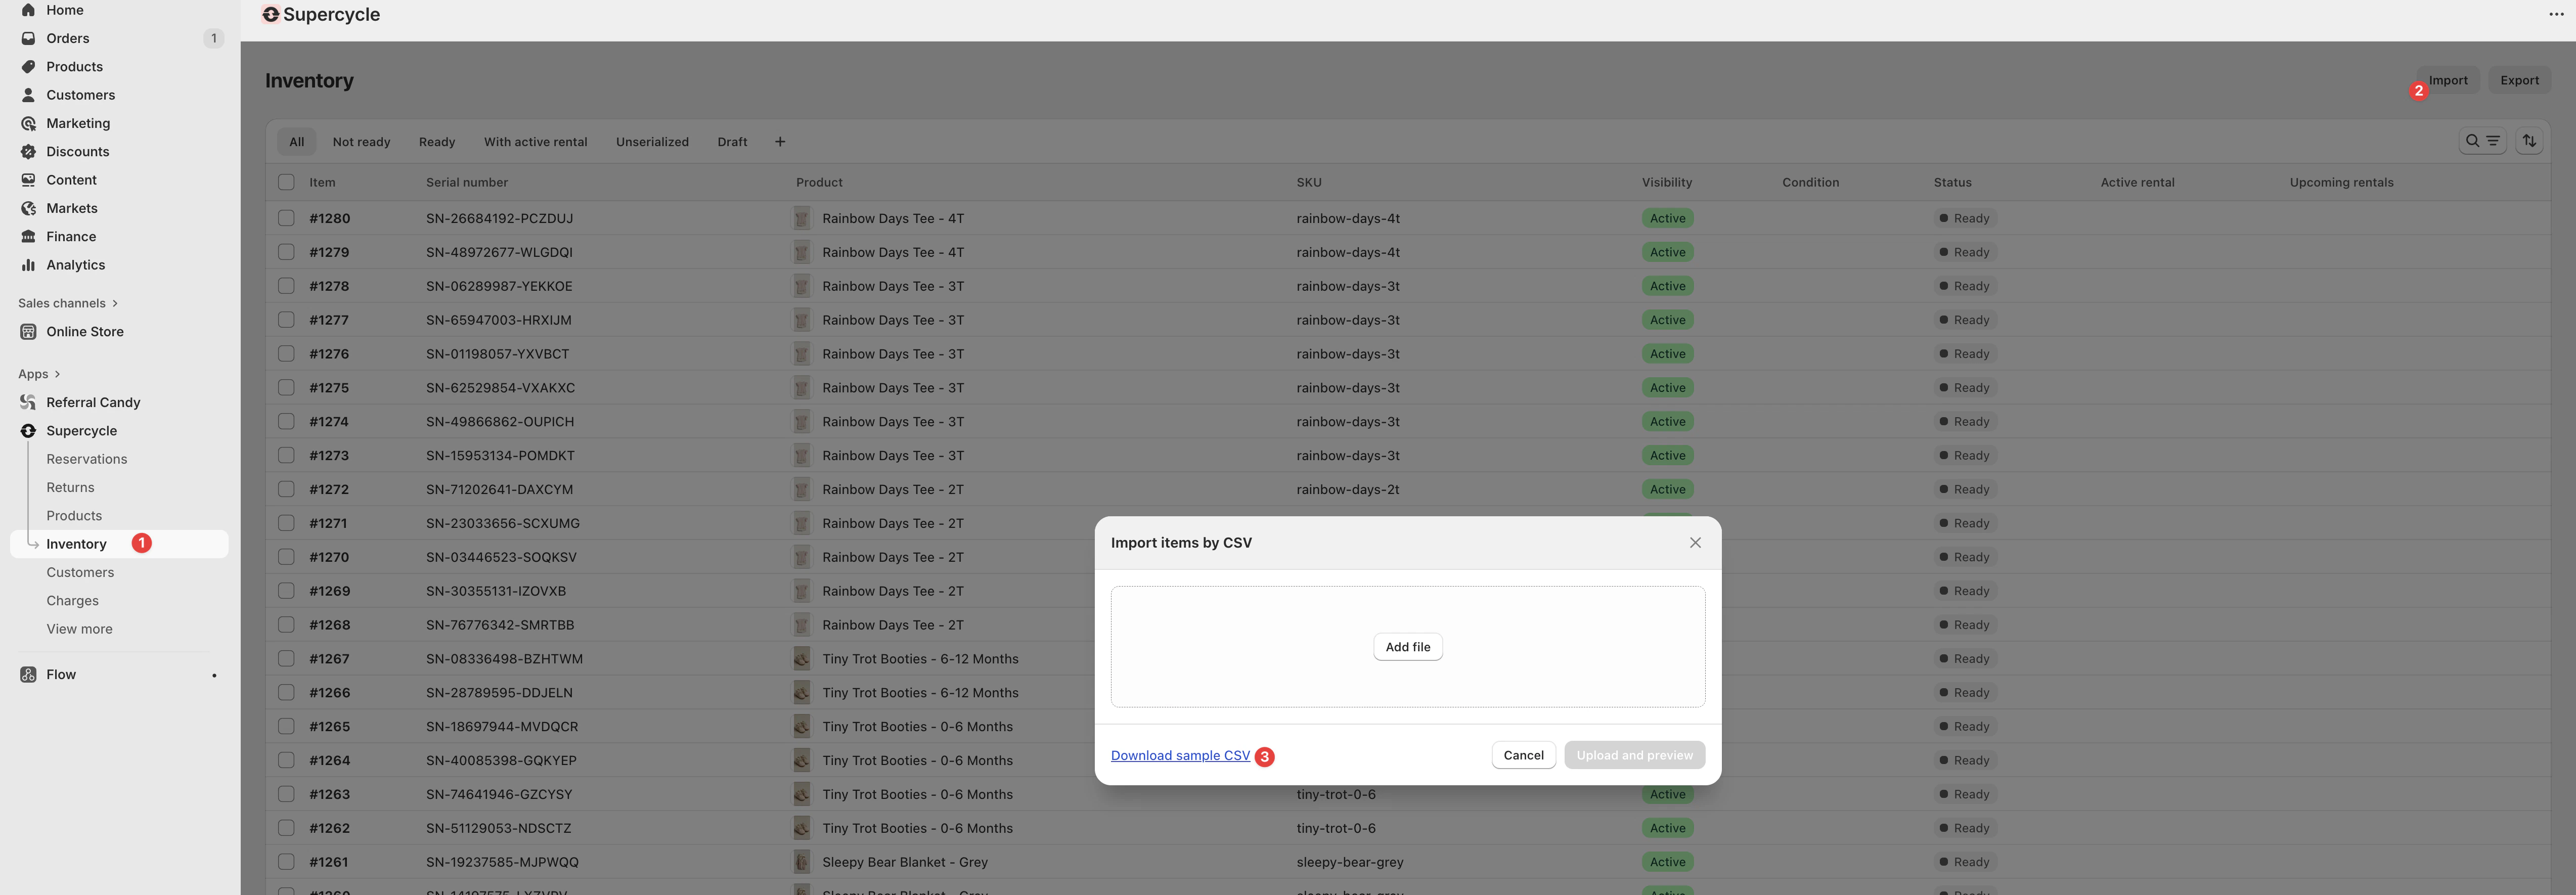
In bulk, from a CSV import
In bulk, from a CSV import
Download the import template
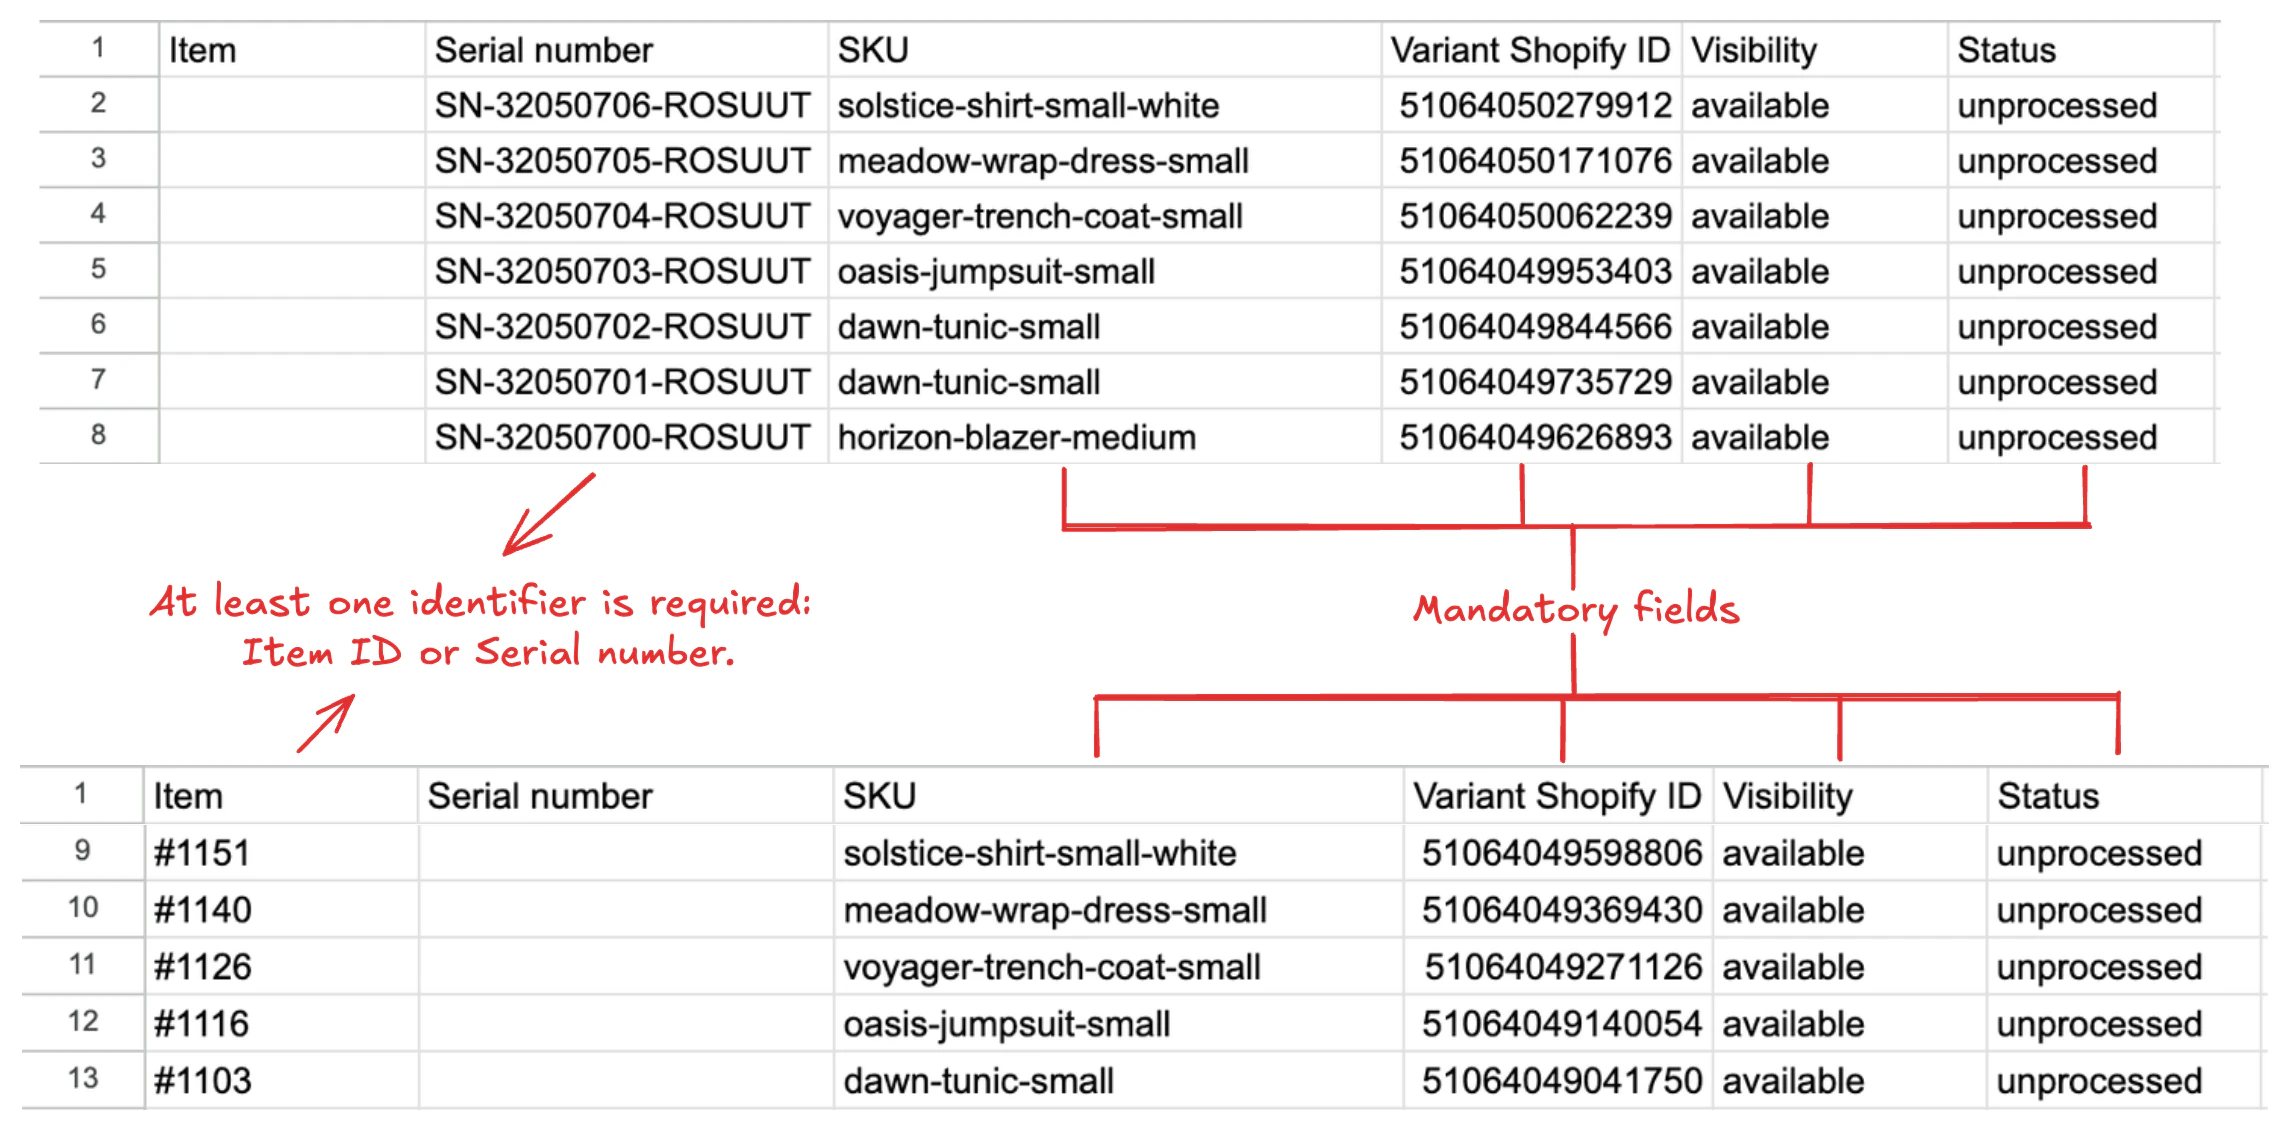
Fill in required columns
| Column | Purpose |
|---|---|
| Item | Unique ID for the item (for example, #2001). New ID = new item. Existing ID = update that item. |
| Variant Shopify ID | Links the item to its Shopify product variant. |
| SKU | Stock keeping unit. Recommended even if Variant ID is included. |
| Visibility | Sets whether the item is available or unavailable. |
| Status | Workflow state, such as processed, unprocessed, or retired. |
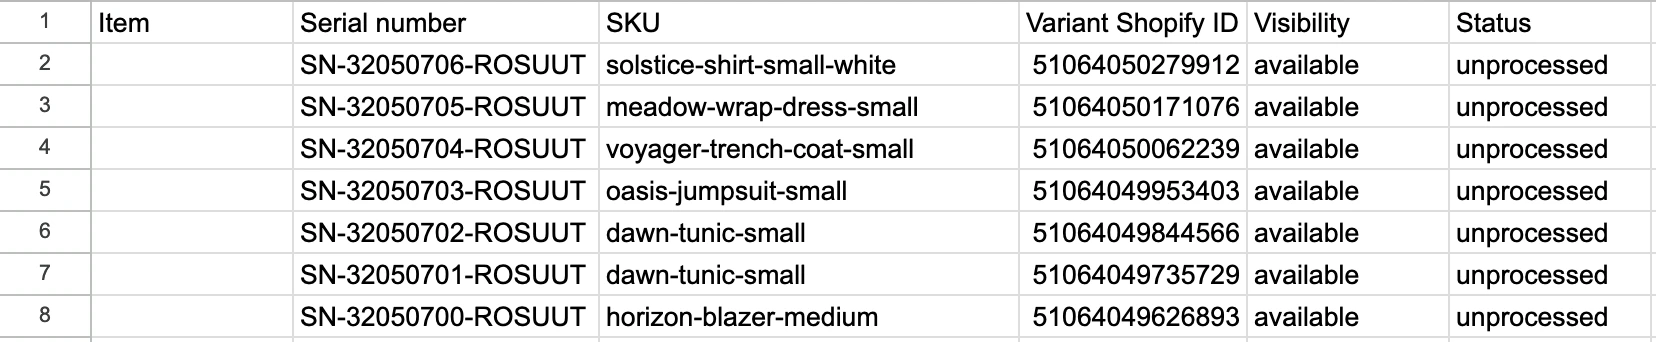
Add new items
Example:
Update existing items
Example:

Deactivate items
- Visibility =
unavailable - Status =
retired

Common mistakes
- Leaving Variant Shopify ID and SKU blank → item cannot be linked.
- Reusing an Item ID for a new unit → overwrites instead of creating.
Individually or in bulk, via Supercycle Scanner
Individually or in bulk, via Supercycle Scanner
Single item
Single item
Scan a barcode, QR code or RFID tag
Select a product
In bulk, from a multi-scan session
In bulk, from a multi-scan session
Press Create item in the bulk action bar
Pick a product and status
Make item unavailable
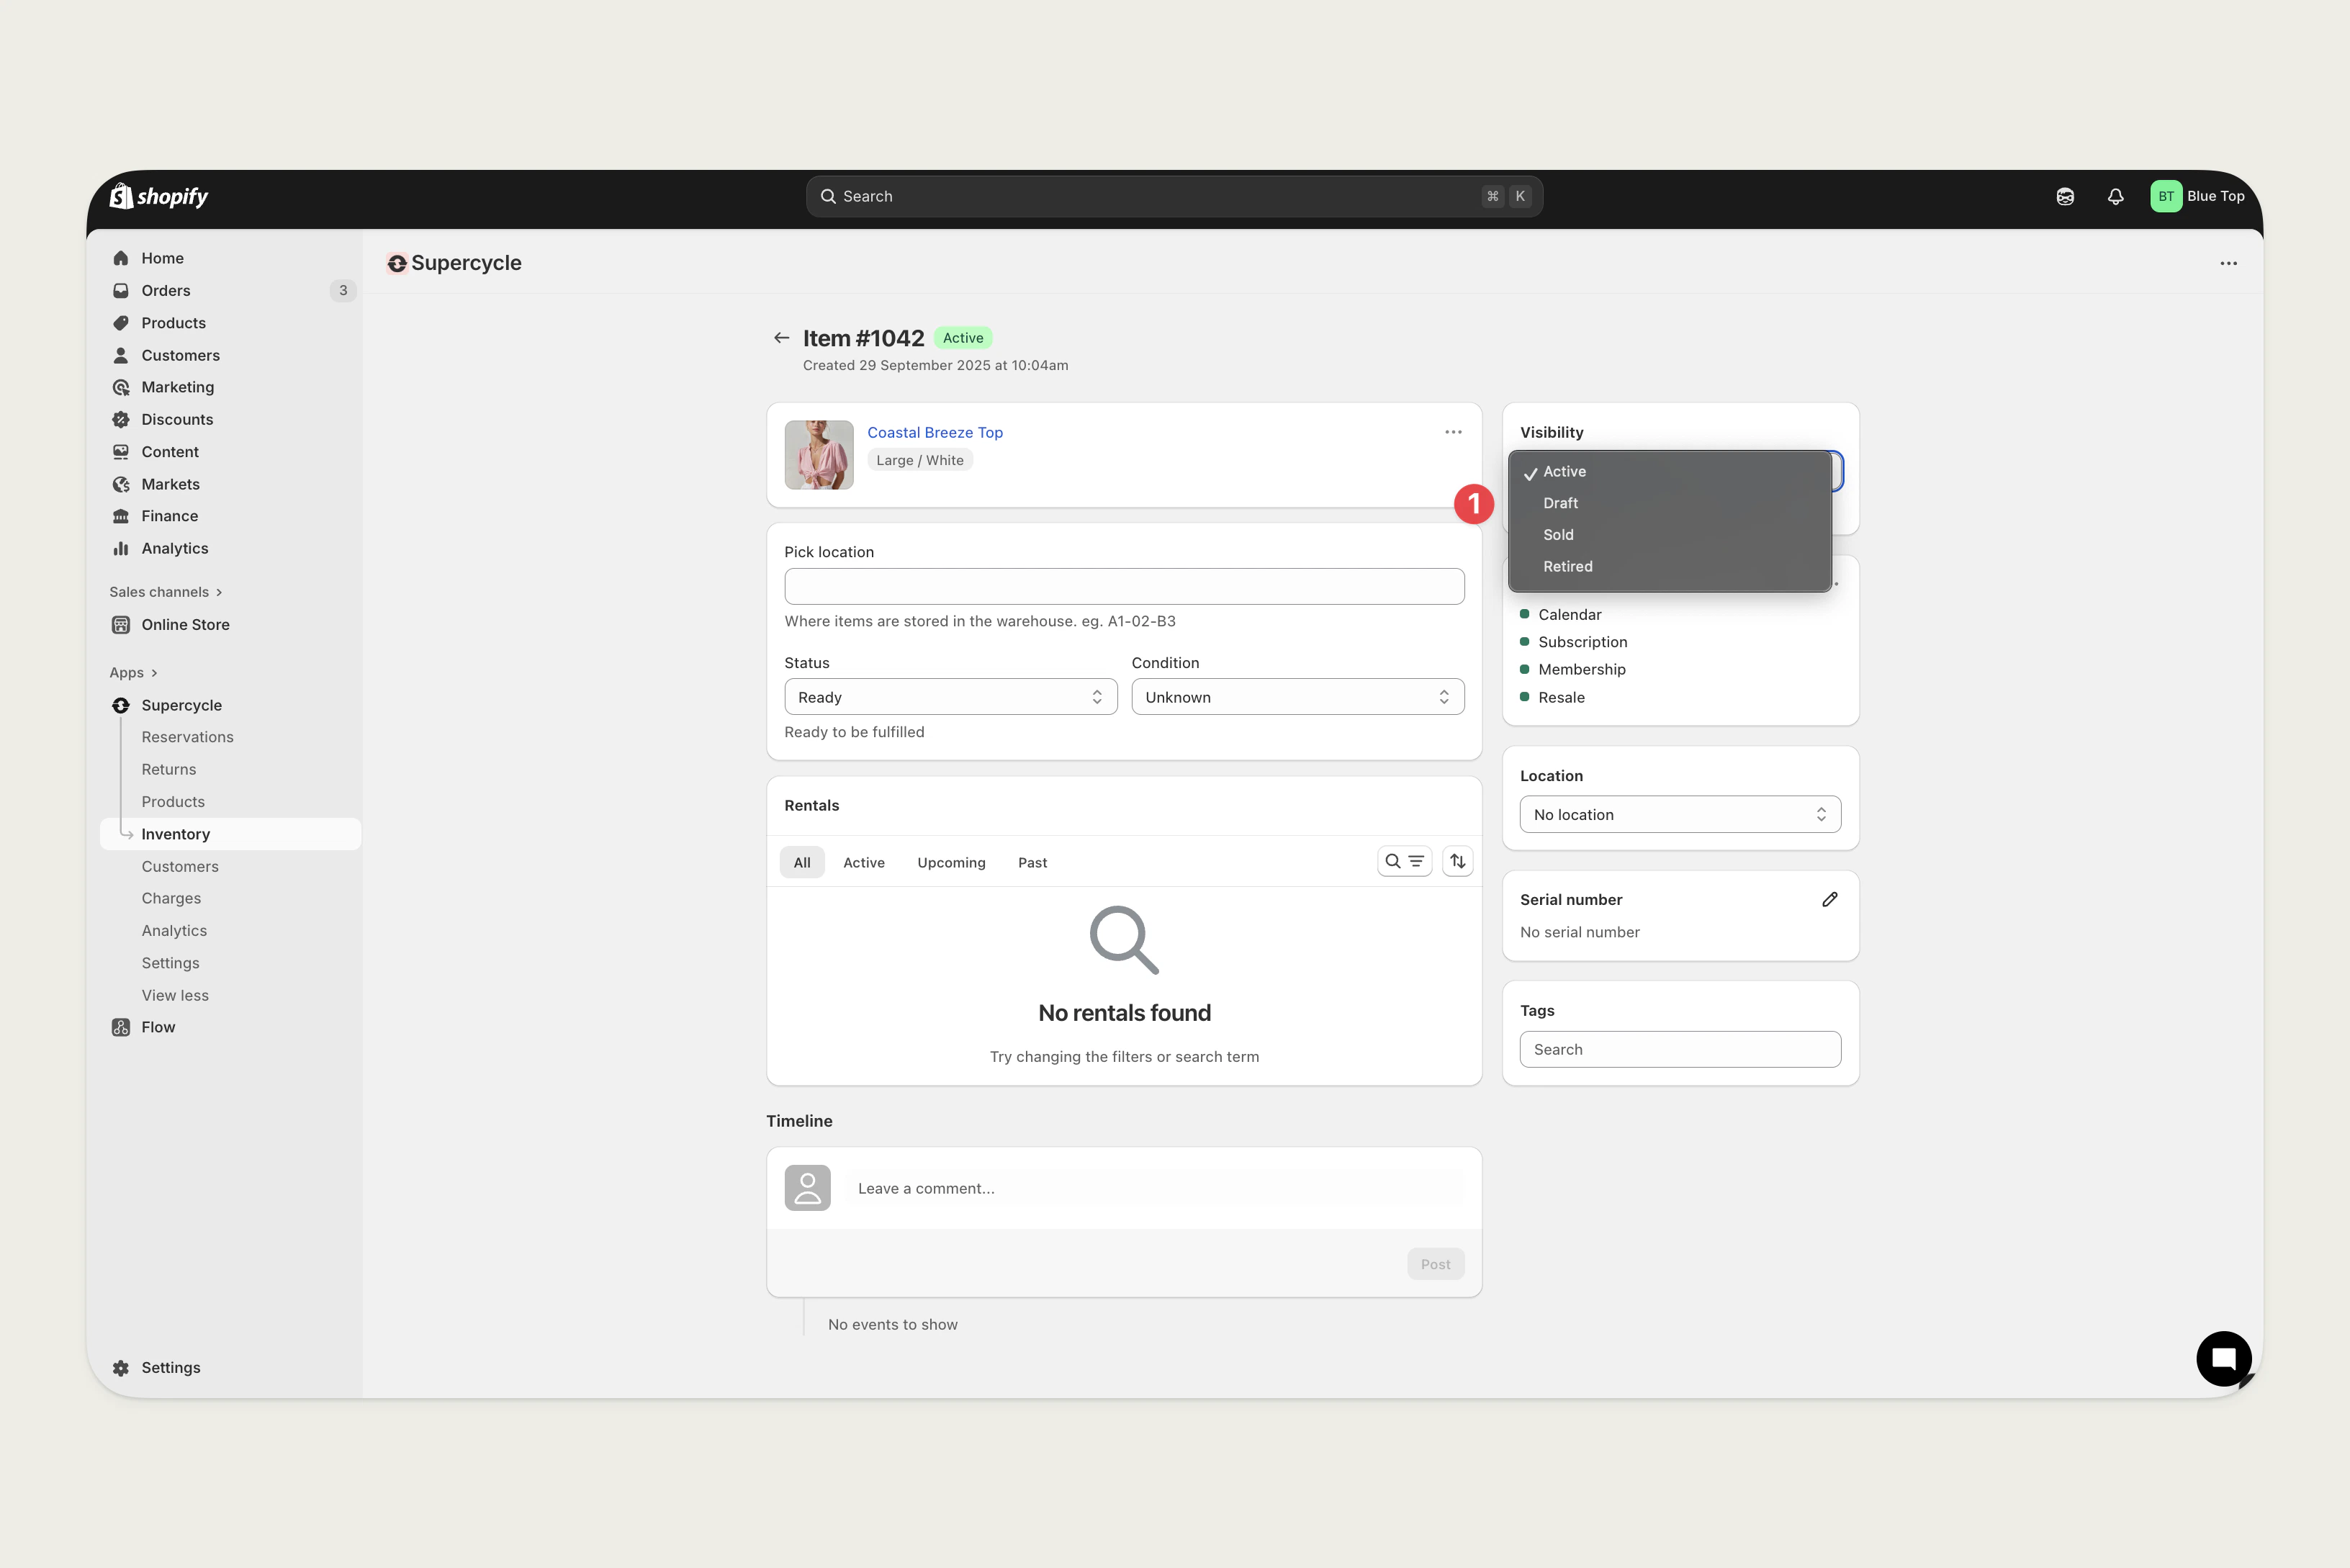
If there’s something wrong with an item and you need to stop future rentals from being placed on it temporarily, you can make it unavailable.From the Item
From the Item
Individually or in bulk, via Supercycle Scanner
Individually or in bulk, via Supercycle Scanner
Active, Draft, Retired, or Sold — from the scanner.Single item
Single item
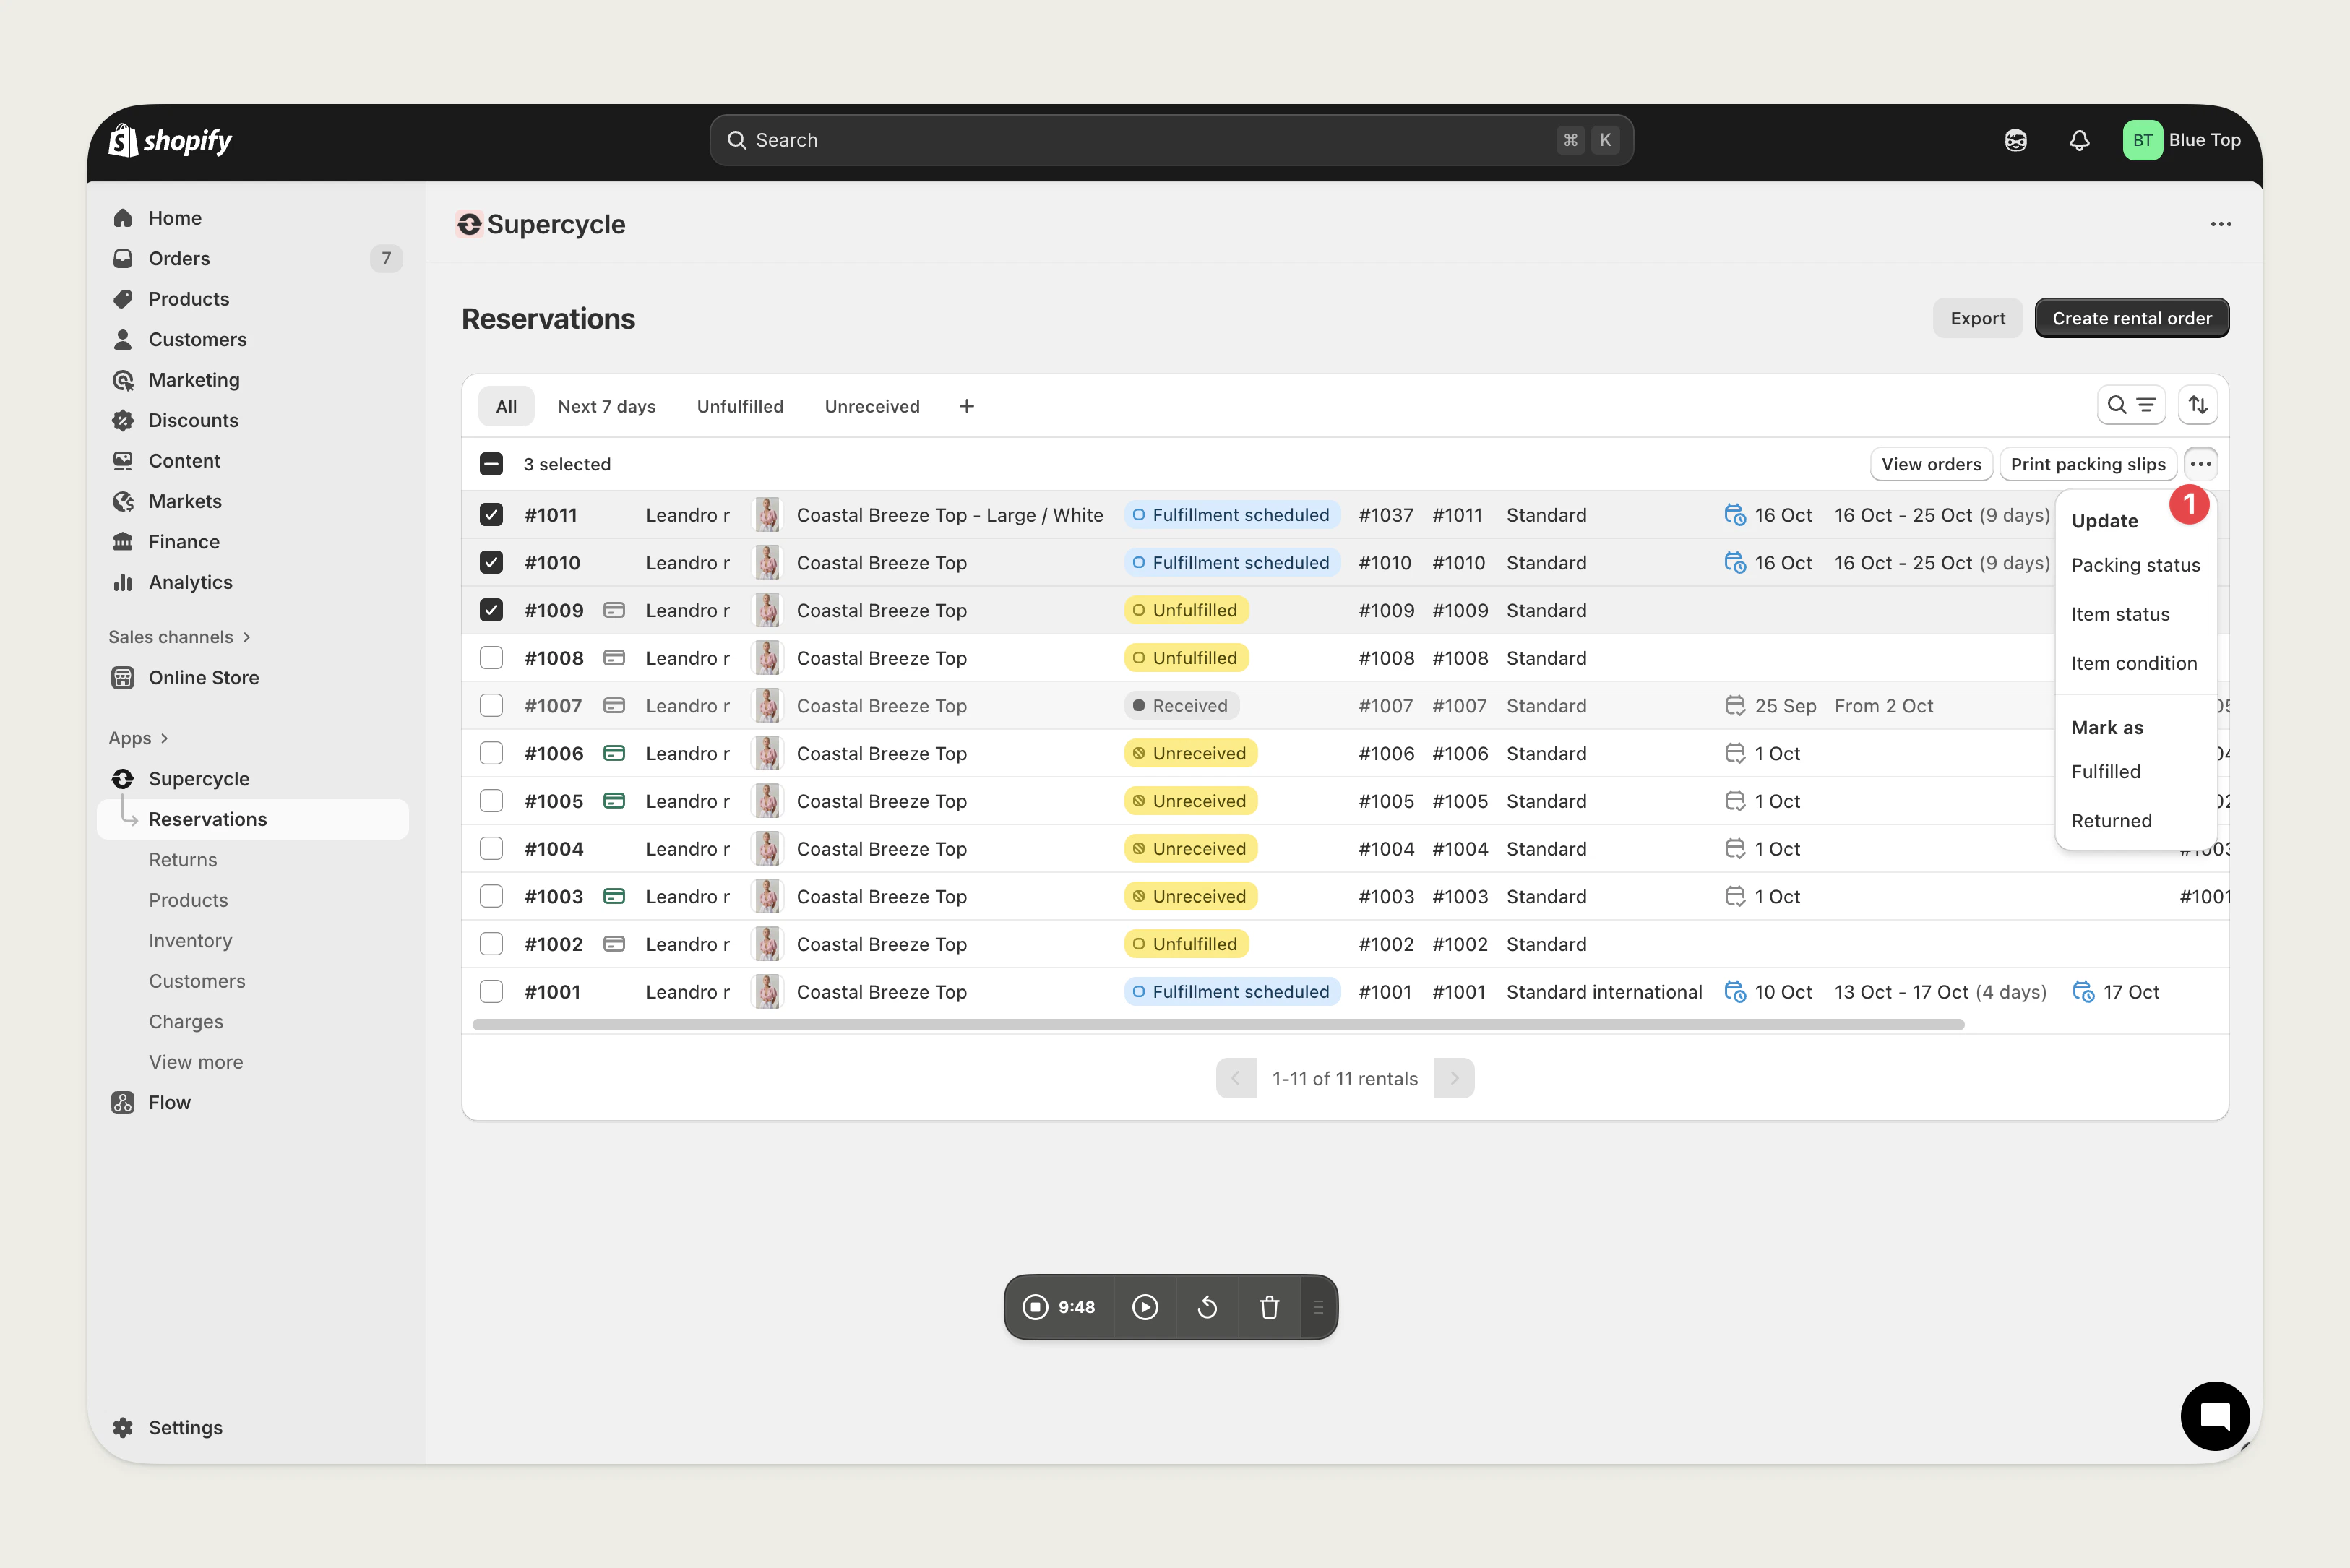
In bulk, from a multi-scan session
In bulk, from a multi-scan session
Update blocked dates
Blocked dates take items, variants, or products out of availability for a specific period. You can change the From and To sides of those date ranges in bulk from the Blocked dates table.In bulk, from the Blocked dates table
In bulk, from the Blocked dates table
- Set a value to overwrite that side on every selected row.
- Leave a field empty to clear that side on every selected row.
- Leave both fields empty to clear both sides.
Delete items
If an item has no previous rentals on it, you can delete it. We recommend only using this for items created accidentally, as all of the item’s data will be permanently deleted (affecting analytics on stock utilization).In bulk, from the Inventory table
In bulk, from the Inventory table
Retire item
Retiring an item will prevent future rentals from being placed against it. Retiring can be reversed, although if you intend to remove an item from circulation temporarily we recommend making it unavailable instead.From the Item
From the Item
Individually or in bulk, via Supercycle Scanner
Individually or in bulk, via Supercycle Scanner
Active, Draft, Retired, or Sold — from the scanner.Single item
Single item
In bulk, from a multi-scan session
In bulk, from a multi-scan session
Update item condition
From the Item
From the Item
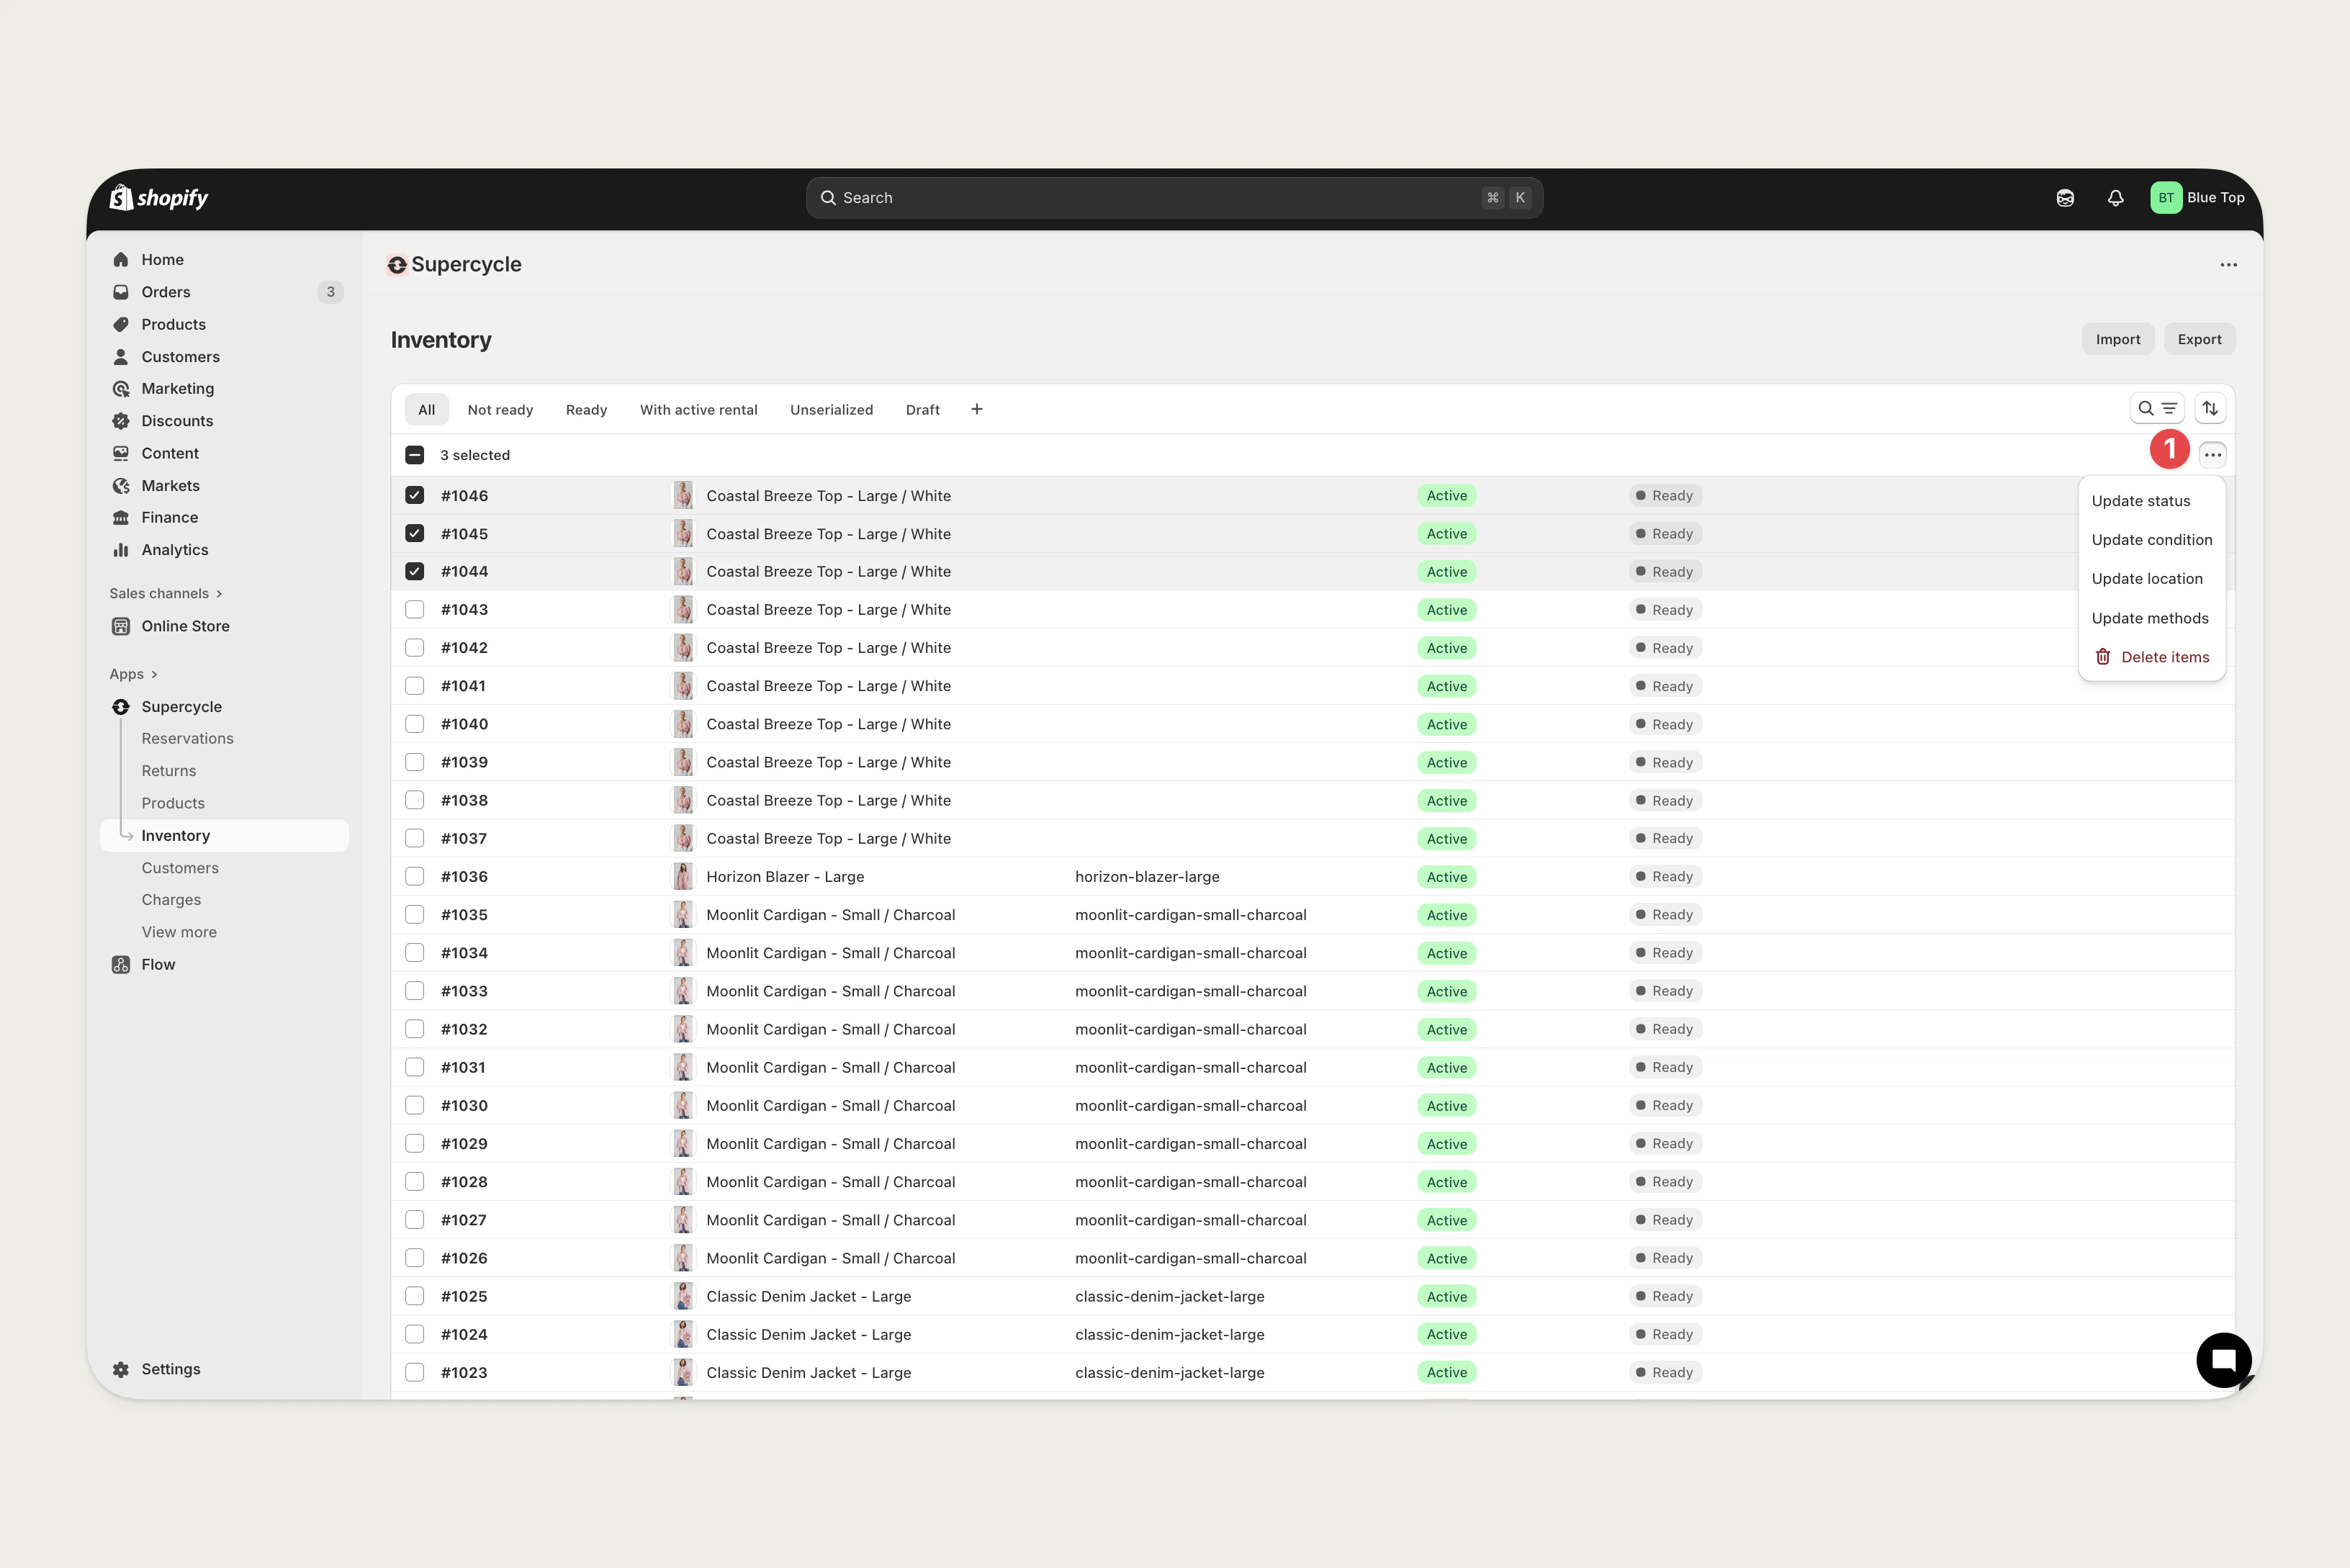
In bulk, from the Inventory table
In bulk, from the Inventory table
In bulk, from the Cycles table
In bulk, from the Cycles table
Update item processing state
From the Item
From the Item
In bulk, from the Inventory table
In bulk, from the Inventory table
In bulk, from the Cycles table
In bulk, from the Cycles table
Update item warehouse location
From the Item
From the Item
In bulk, from the Inventory table
In bulk, from the Inventory table
Individually or in bulk, via Supercycle Scanner
Individually or in bulk, via Supercycle Scanner
Single item
Single item
In bulk, from a multi-scan session
In bulk, from a multi-scan session
Update item tags
From the Item
From the Item
Via the MCP
Via the MCP
add_tag or remove_tag tool with:resource_type-itemresource_id- Item ID (e.g.#1042)tag- Tag title to add or remove
Via the API
Via the API
tagsAttributes parameter.Update item product
You can reassign one or more items to a different product/variant. This is useful when items have been mis-tagged against the wrong product, when a product has been split or merged in Shopify, or when you want to consolidate items under a single canonical variant. When you change the variant on an item, the underlying product link is updated automatically — the product is derived from the chosen variant, so you only need to pick the variant. Affected products are re-ingested so their availability and inventory counts stay in sync.From the Item
From the Item
In bulk, from the Inventory table
In bulk, from the Inventory table
Pick a variant