To add a description to the plan, find the plan product in Shopify and add the description.
This will then automatically display on the storefront in the membership app block.
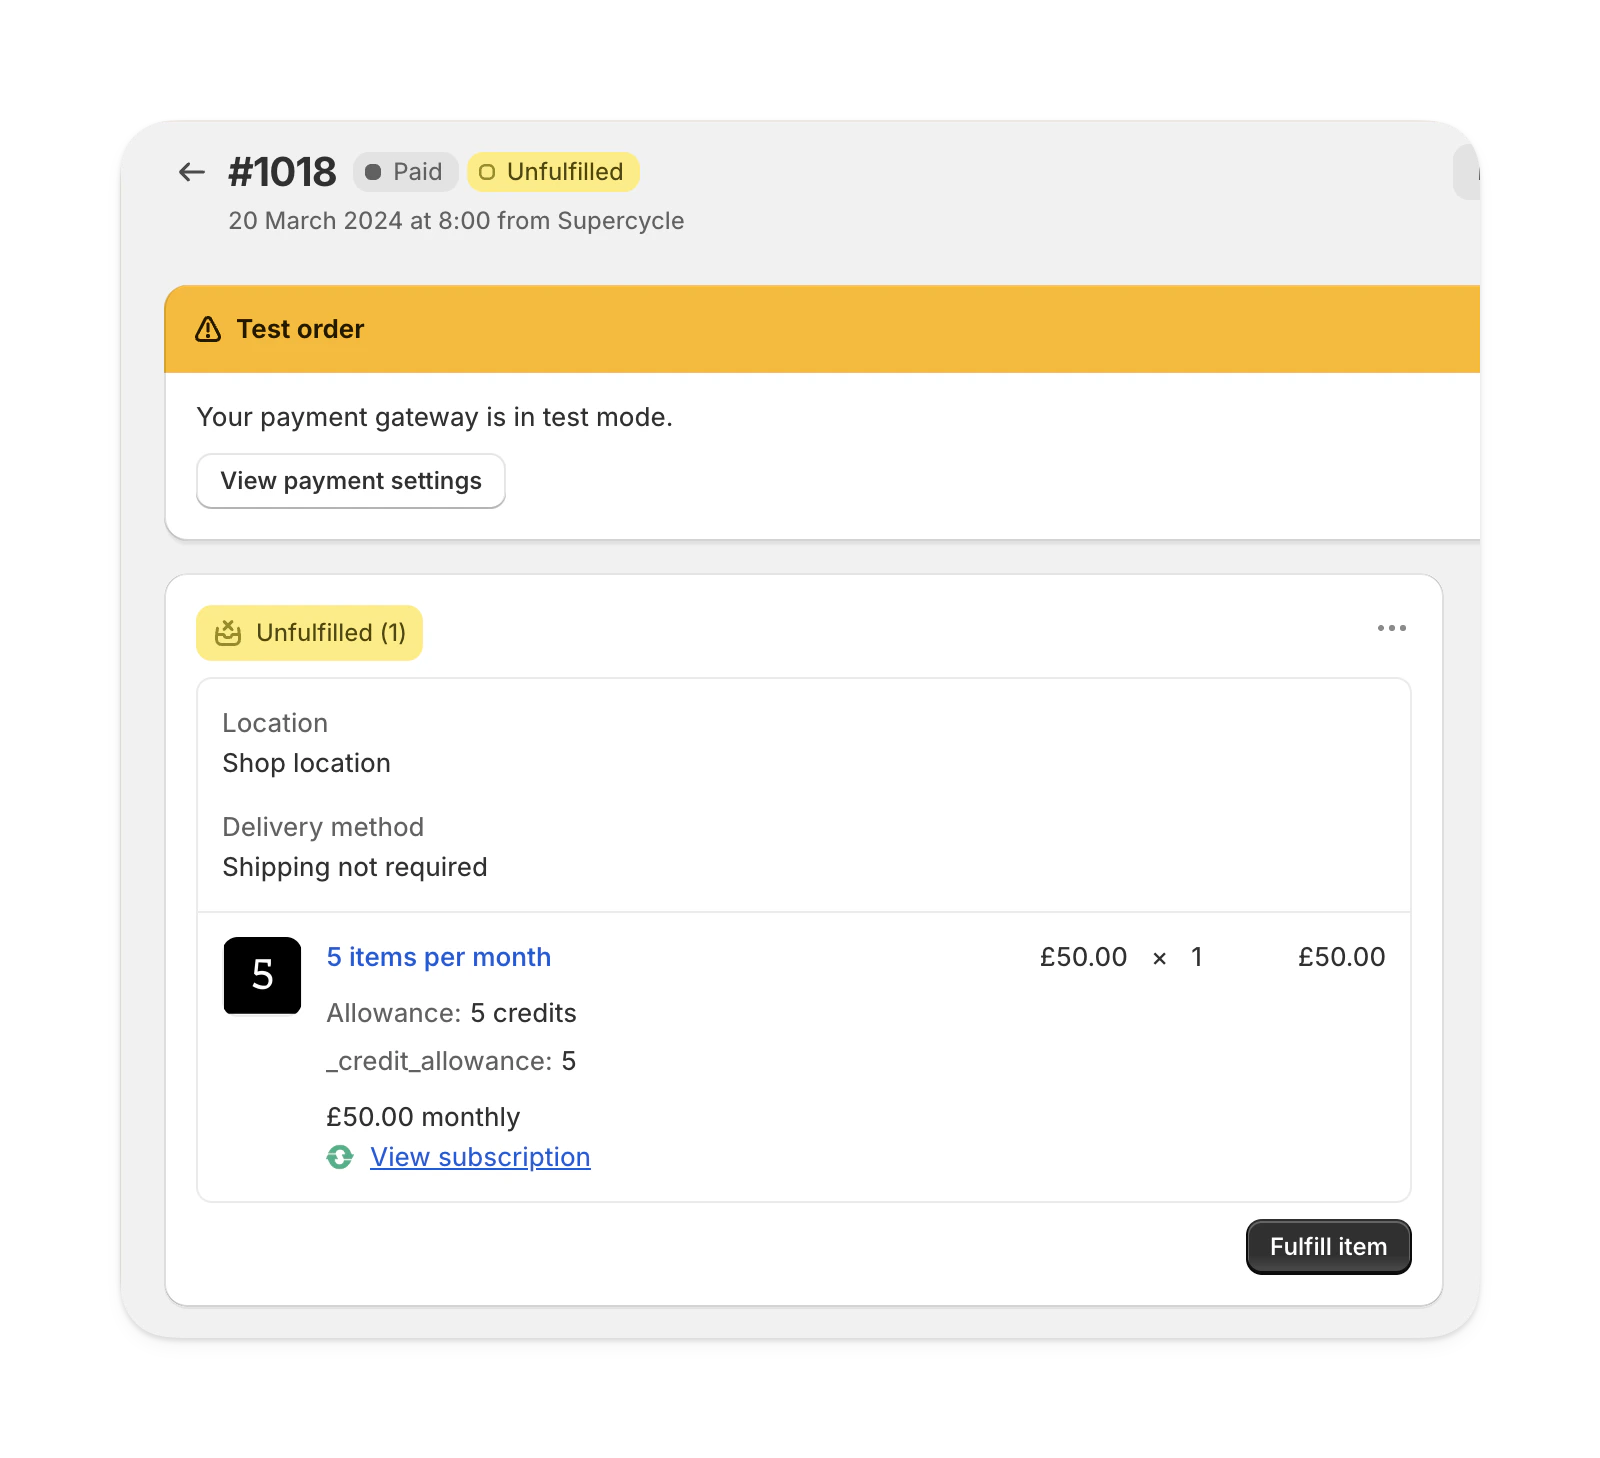
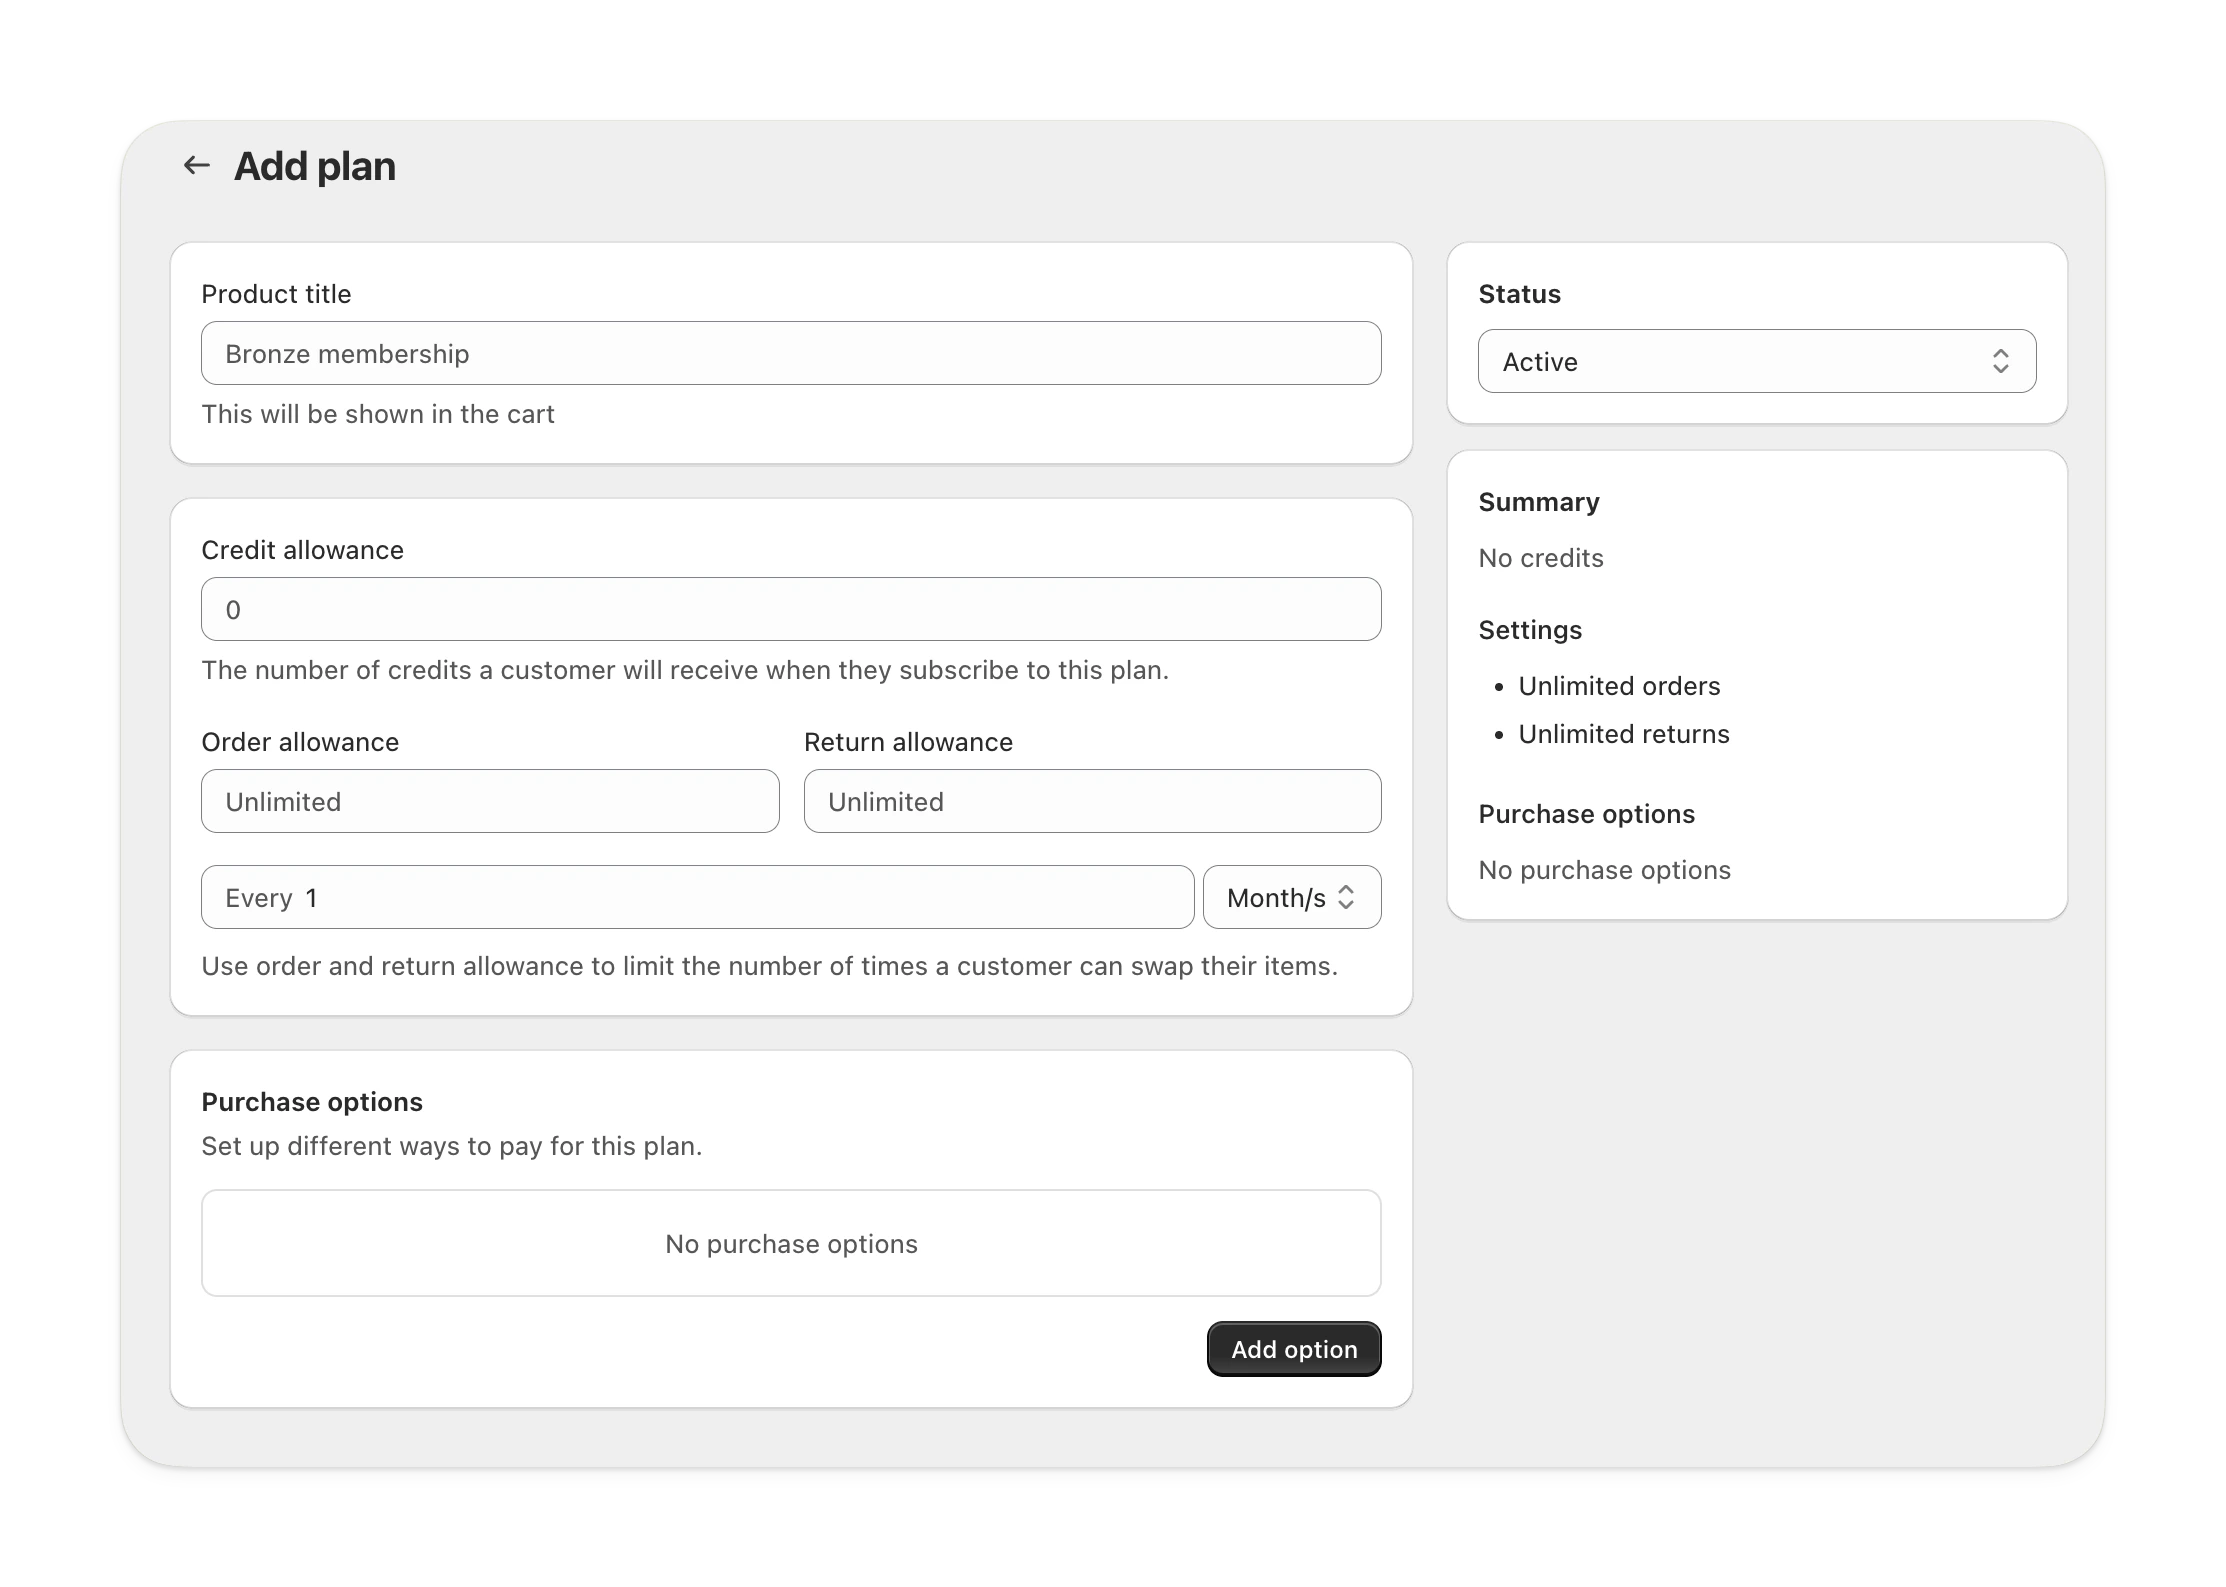
Plan title
Plan title
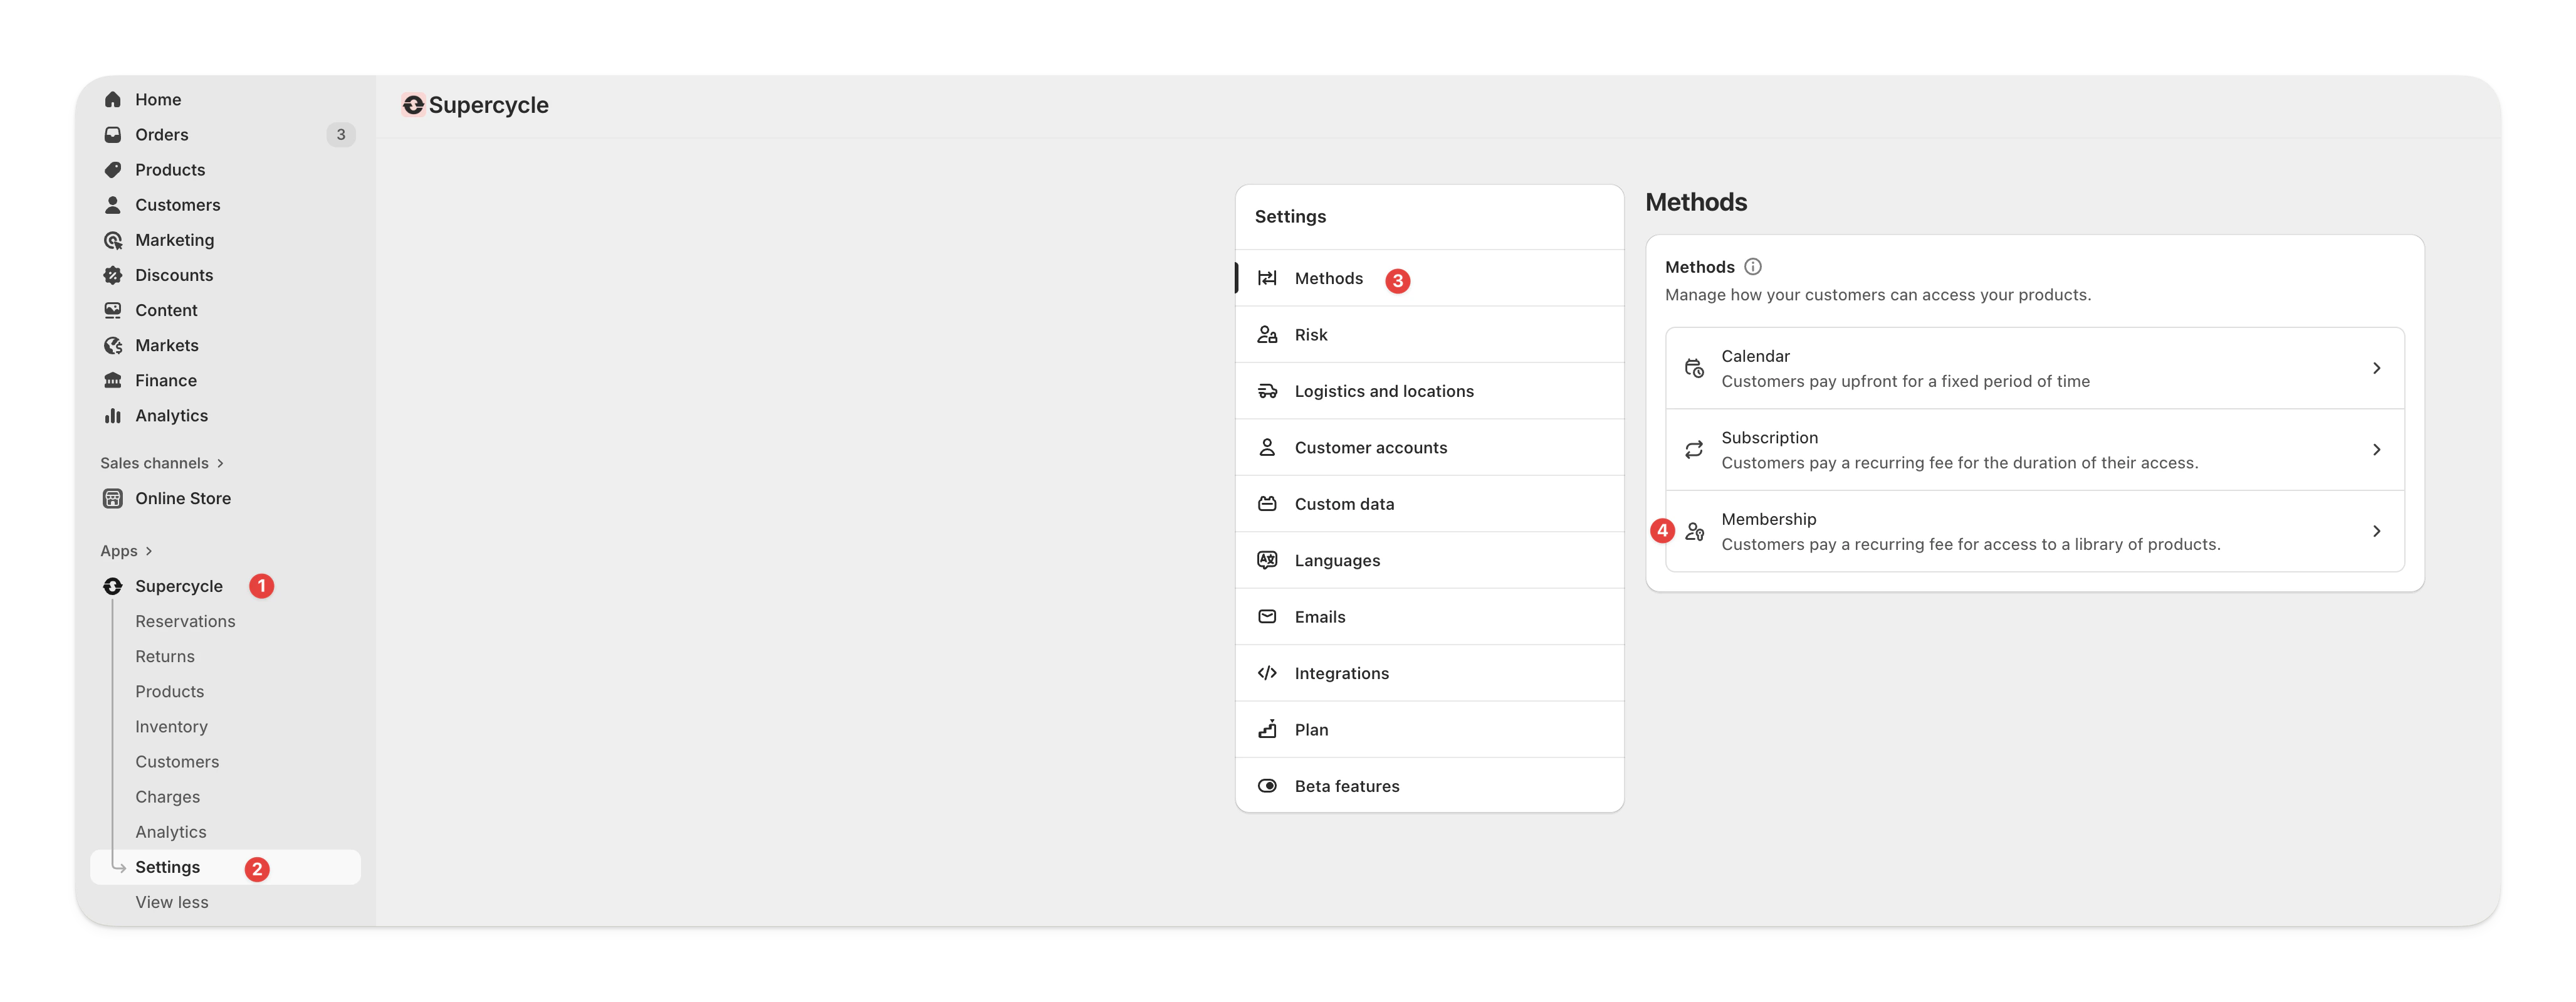
We create a corresponding Shopify product when you create a membership plan in Supercycle to handle billing.
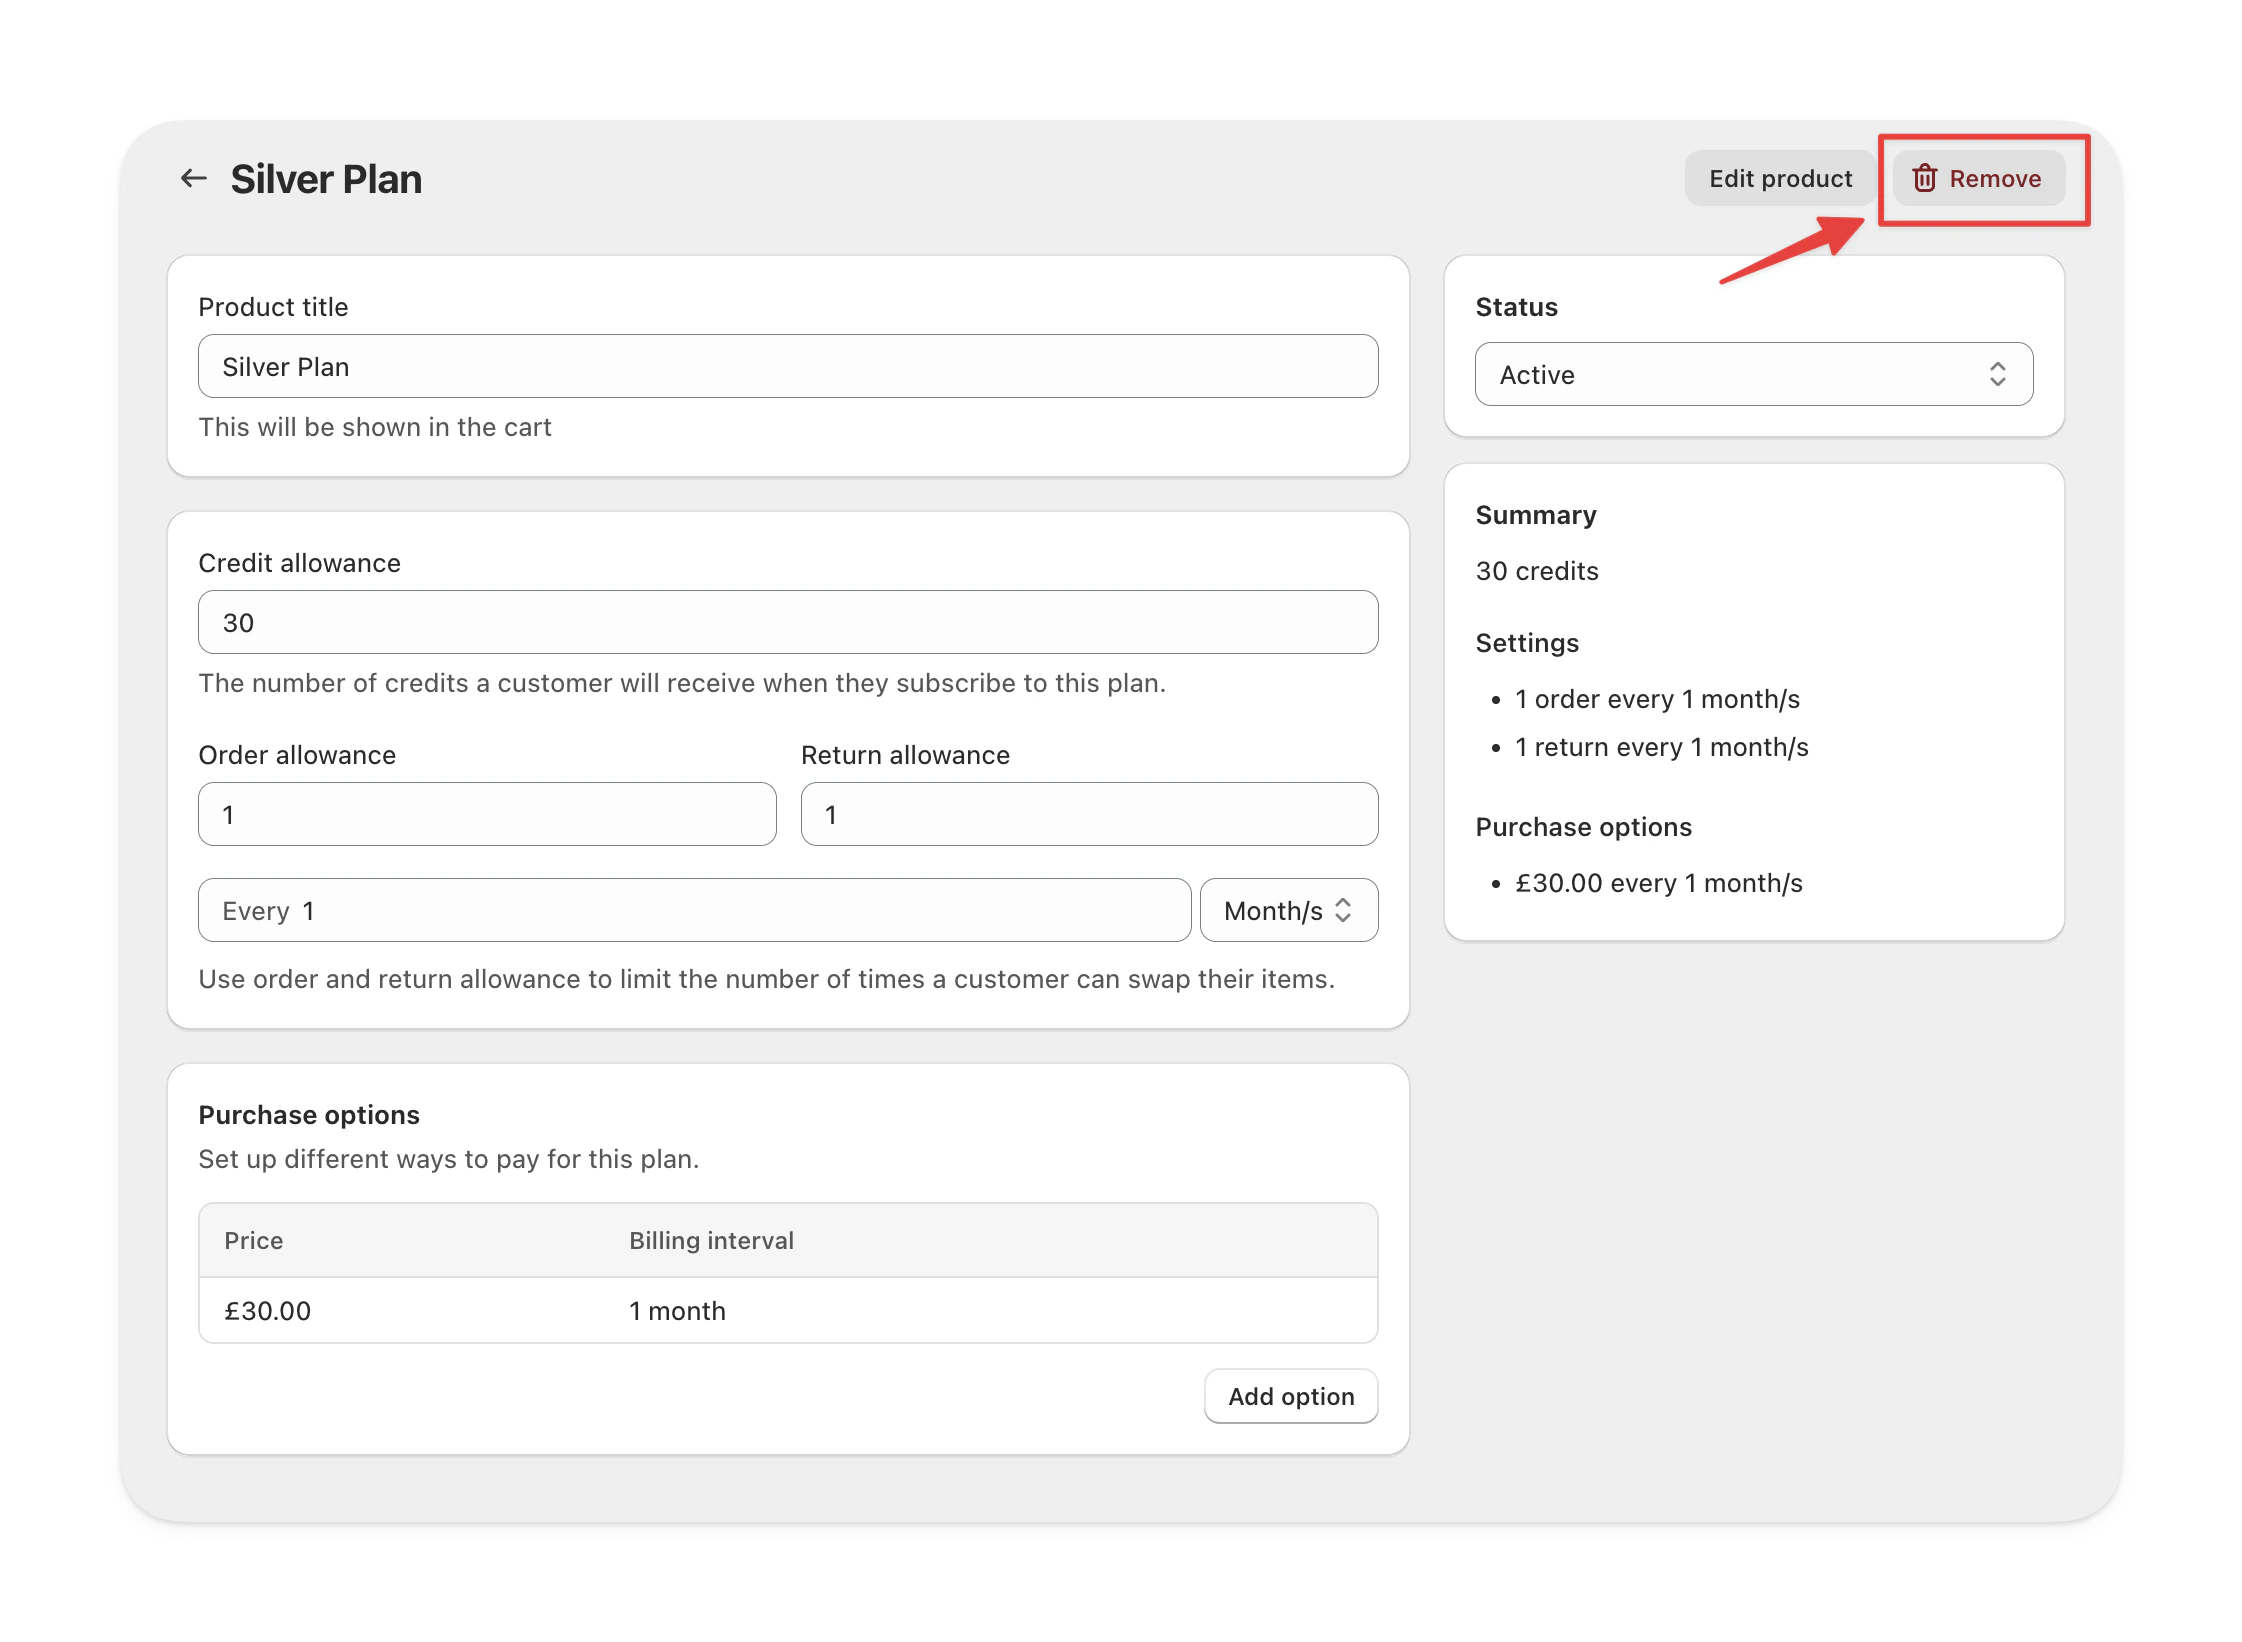
The plan title is the Shopify product title and is displayed in the cart, checkout, transactional emails, and orders in Shopify admin.
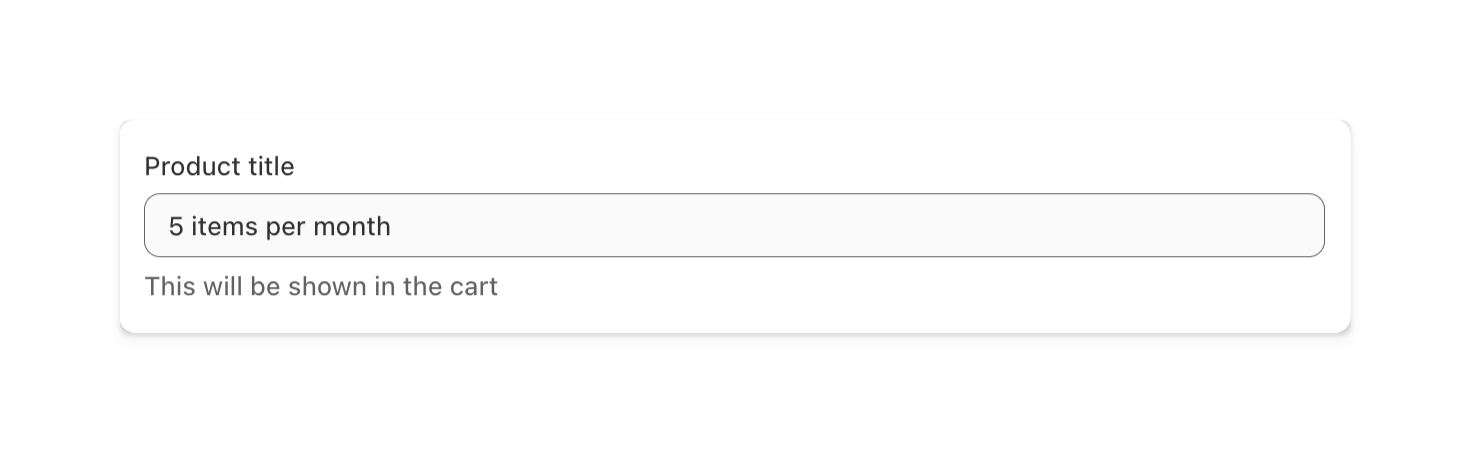
Credit allowance
Credit allowance
The maximum number of credits (or items) that a customer can spend at any one time.
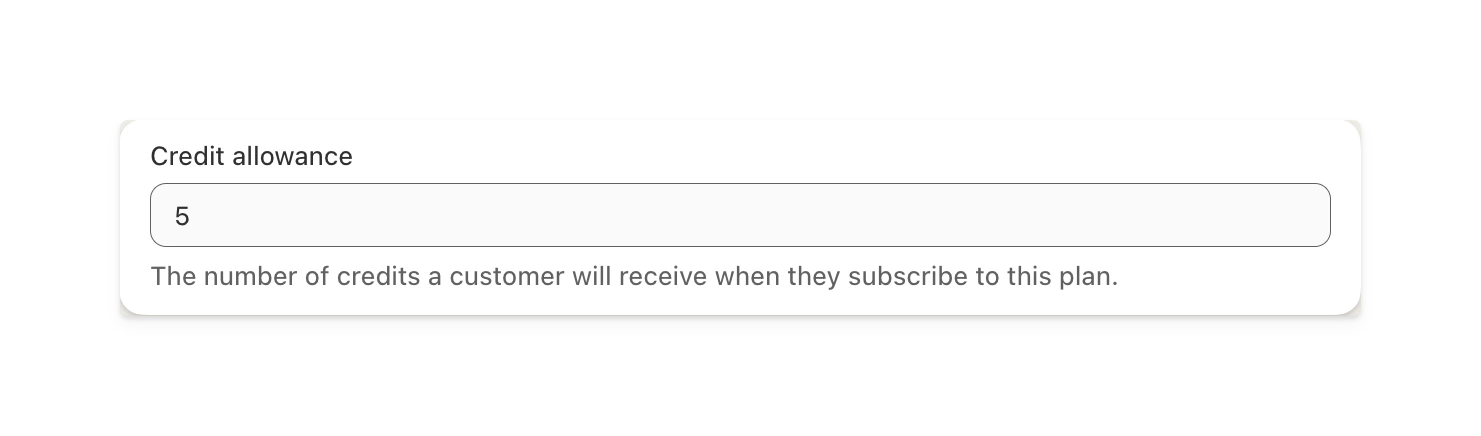
Swap allowance
Swap allowance
The order and return allowances determine how often a customer can swap items on their membership.
Allowances are aligned with the billing anniversary but you can set a different cadence.
For example, a customer is on a plan that is billed monthly and they took the membership out on 1 January.
You’ve set the swap allowance so they are allowed 1 order and 1 return every 3 months.
They take 3 items out on 1 January and can return them anytime, but their order allowance won’t reset until 1 April,
meaning they can’t rent new items until then. They’ll continue to be billed monthly on 1 February and 1 March.
Swap allowances protect your margins. The majority of rental costs are in logistics, so it’s best to balance customer flexibility with cost control.
In an ideal membership, the customer keeps the same item indefinitely.
Purchase options
Purchase options
Purchase options define the different billing cycles you want to offer your customers.
A plan can have multiple purchase options.
For example, you may offer a plan on a £50 monthly payment or a £500 yearly payment,
giving customers the equivalent of 2 months free in exchange for a 12-month commitment.
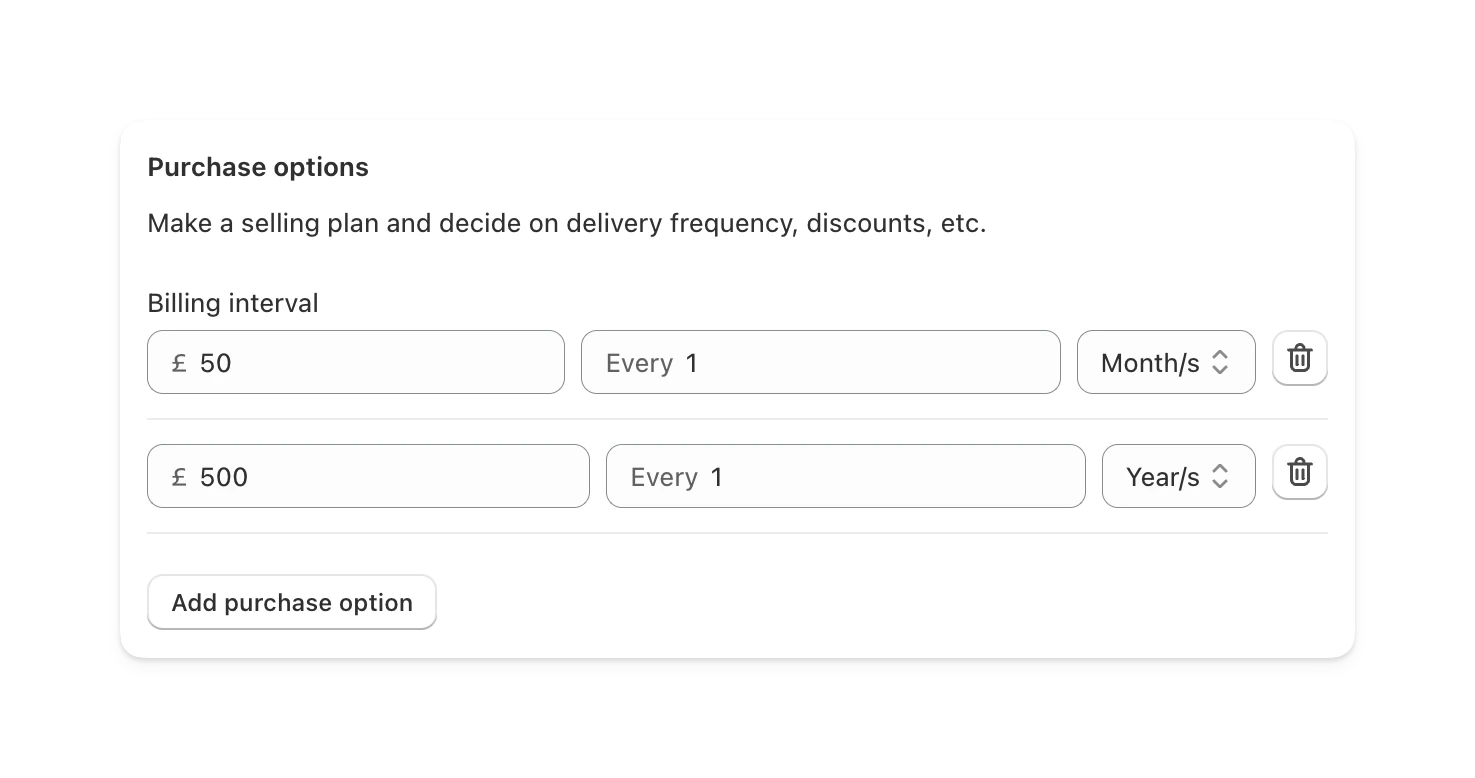
The billing cycle a customer chooses doesn’t affect how regularly they can swap items.
Add or update a membership plan
Navigate to the plan in Supercycle
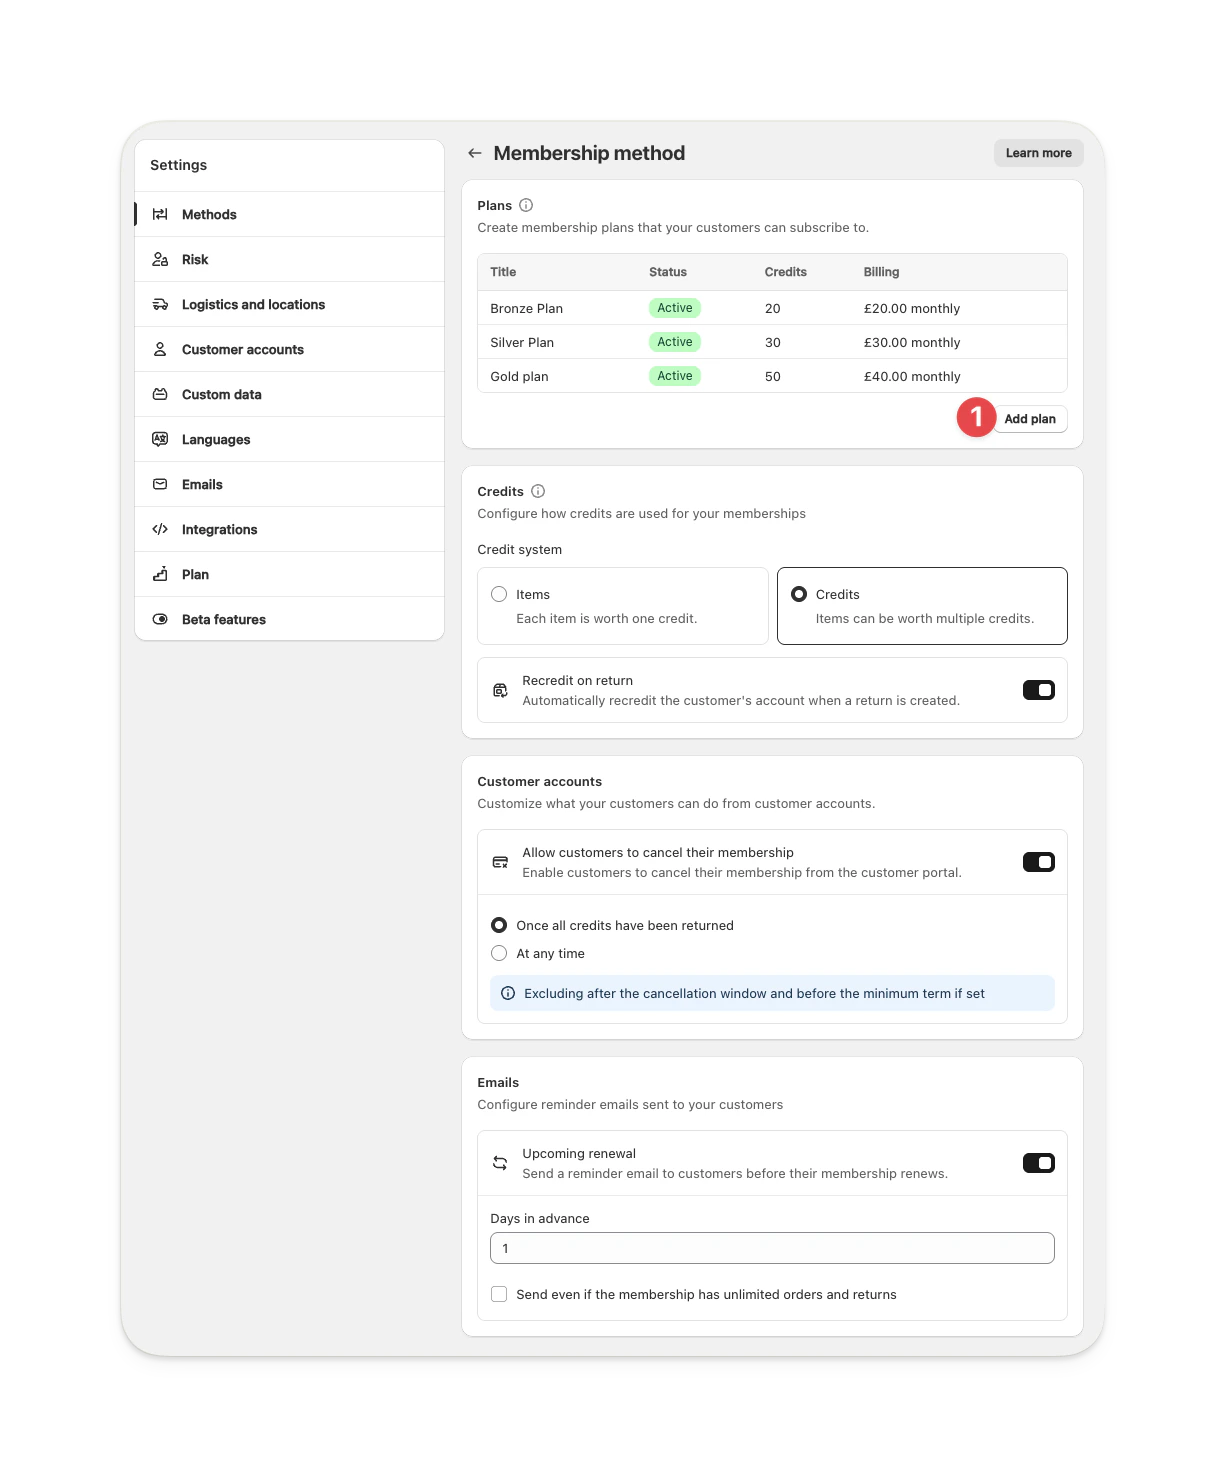
Add plan settings
Delete a membership plan
When you delete a membership plan, it’s permanently removed from Supercycle and cannot be restored.A plan can only be deleted if no customers are currently subscribed to it.
What if a customer purchases a plan product directly?
If a customer somehow purchases a plan product directly (e.g., by accessing the product URL directly), the membership will not activate properly. The customer will complete the purchase, but:- Supercycle won’t recognize it as a membership enrollment
- The customer won’t be connected to Supercycle
- Credits won’t be assigned to their account
- Swap and plan-management features won’t work
Create a membership page
Create a membership collection
This collection controls which plans appear on the storefront and is required for the membership block to display plans.
- Create a “Customer plans” collection with 3 plans for individual customers
- Create a “Business plans” collection with 3 plans for businesses
- Display them on different pages or in different blocks on the same page
Create a new page
Add membership app block
Open the membership page you created, add the Supercycle app block called Membership plans,
and select the collection you created earlier.See the Membership plans app block documentation for detailed setup instructions.
FAQs
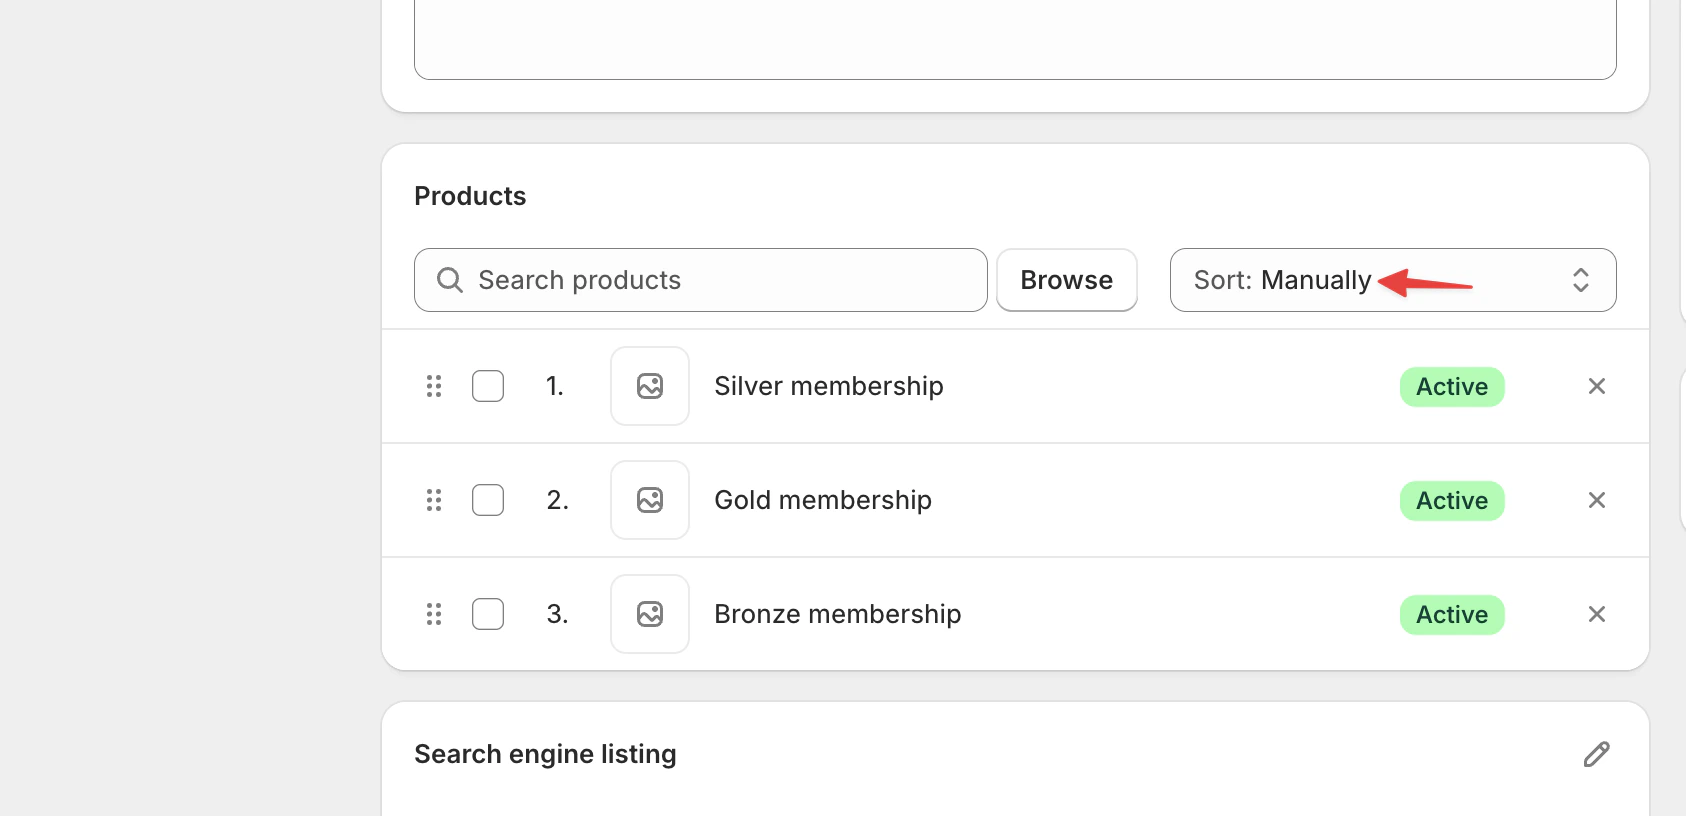
How do I show memberships in order from least expensive to most expensive?
How do I show memberships in order from least expensive to most expensive?

Open your membership collection

Sort memberships manually
What happens if a customer buys a plan product directly?
What happens if a customer buys a plan product directly?
- The customer won’t be connected to Supercycle
- They won’t receive membership credits
- They won’t be able to use any membership features (swapping, plan management, etc.)
- Refund the order in Shopify
- Guide the customer to enroll properly through the membership block on your storefront
- Consider hiding plan products by setting them to “unlisted” status (see “Hide membership plan products” section above)
I accidentally deleted my membership products from Shopify. What should I do?
I accidentally deleted my membership products from Shopify. What should I do?
To fix it:
Delete the plan in Supercycle
Recreate the plan in Supercycle
Supercycle will automatically recreate the Shopify product linked to the plan.
Add the plan product to your storefront collection