Removing a rental from an order
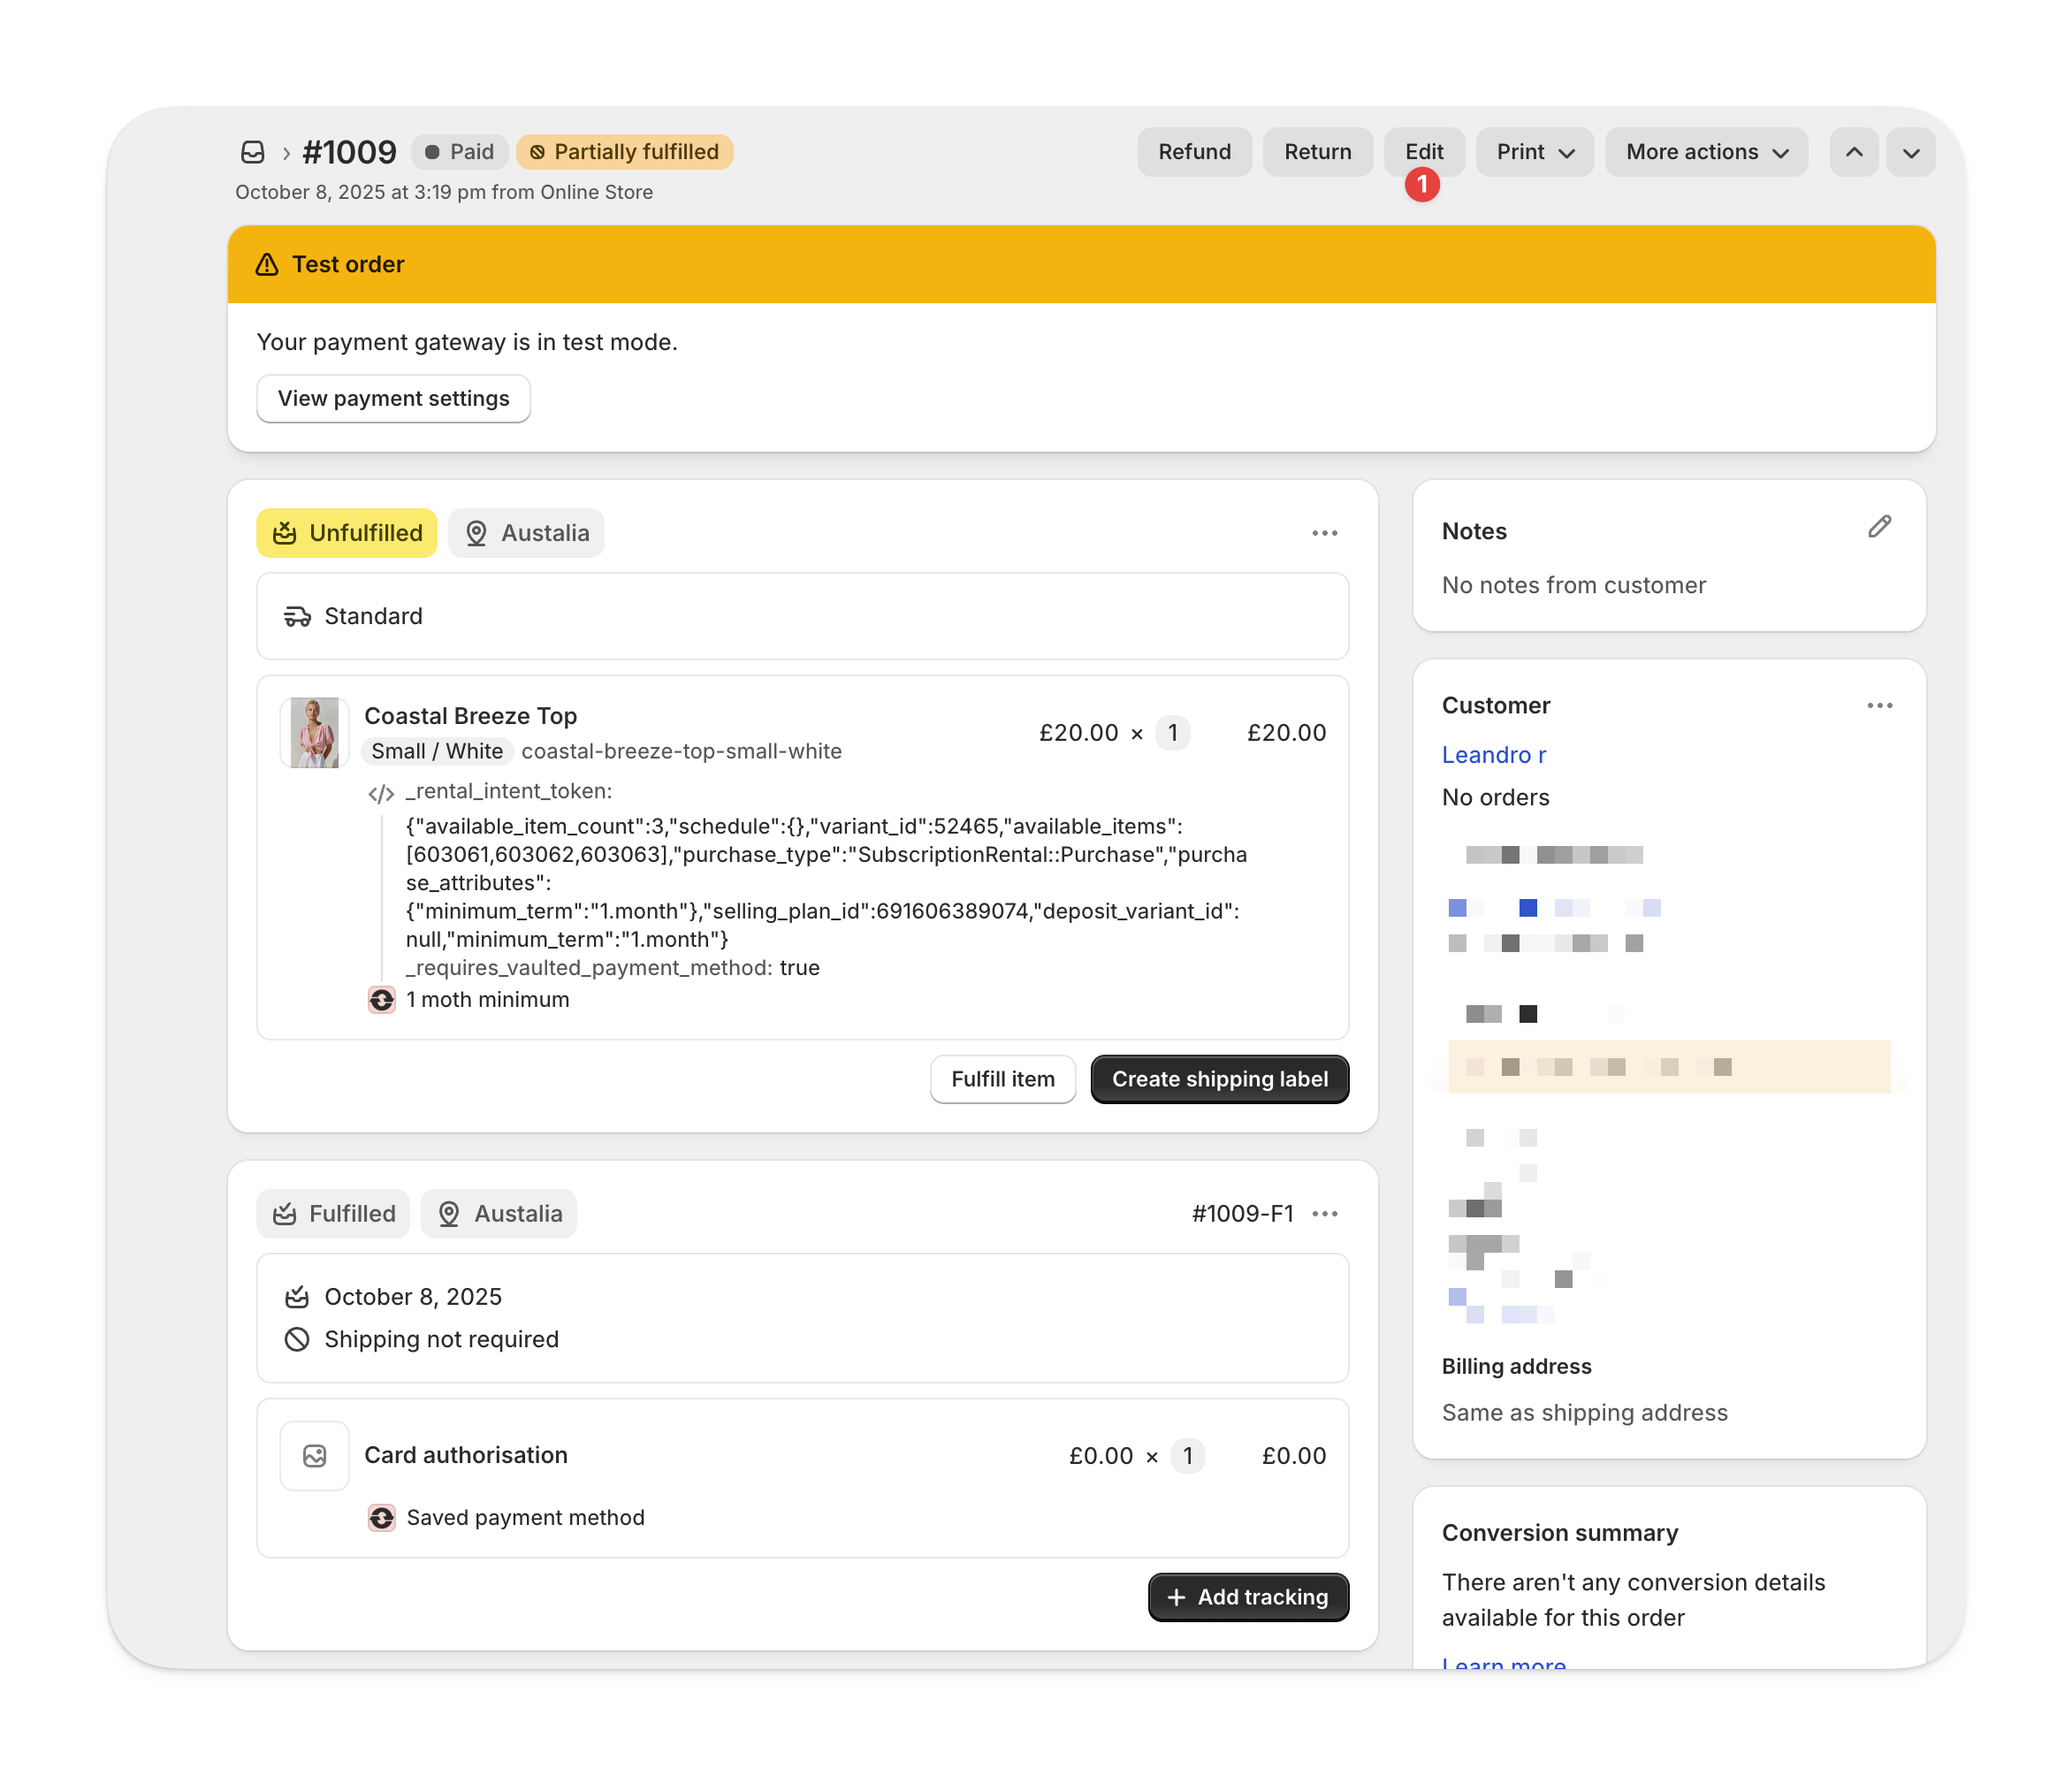
Go to the order in Shopify
In your Shopify admin, go to Orders and open the specific order you want to edit.
Remove the rental item
Hover over the rental item you want to remove.
Select the X that appears, or set the quantity to 0.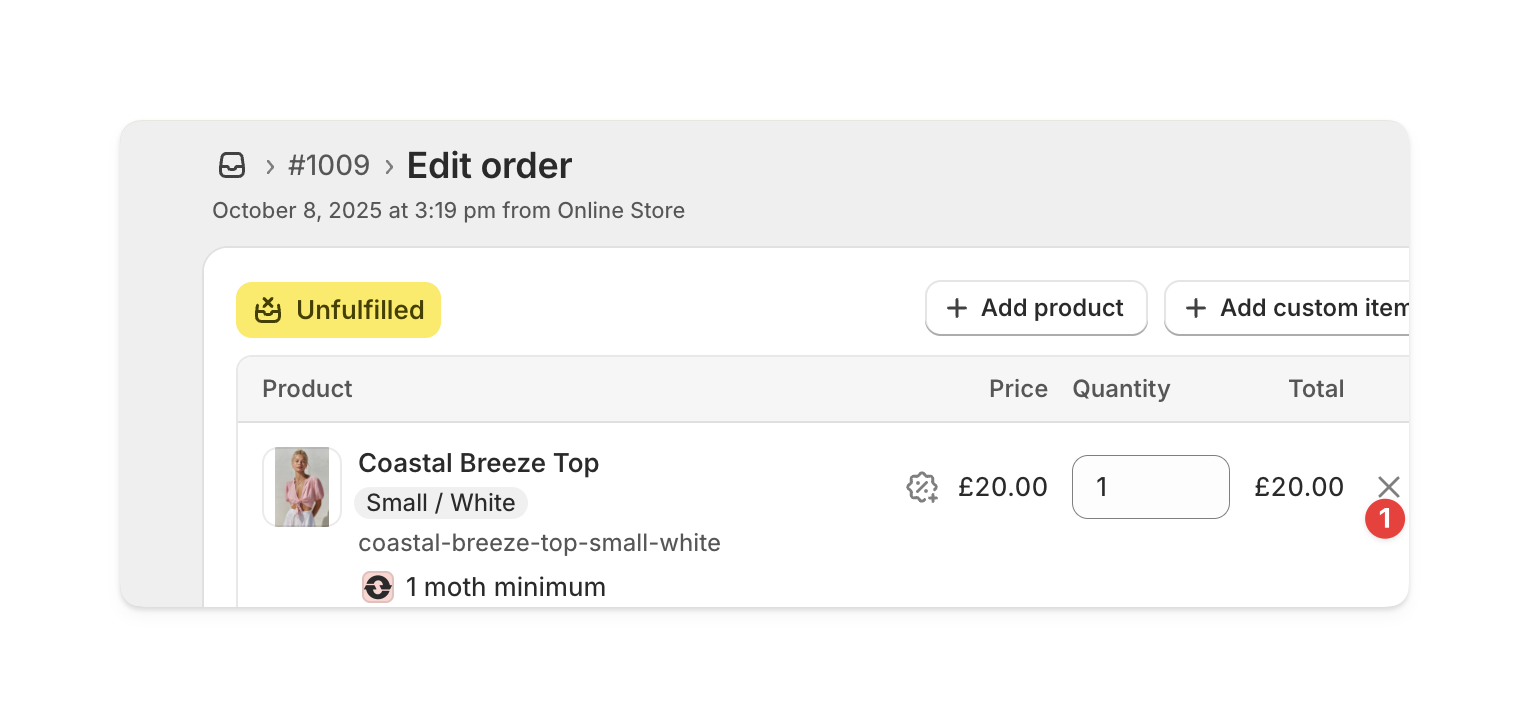
Select the X that appears, or set the quantity to 0.
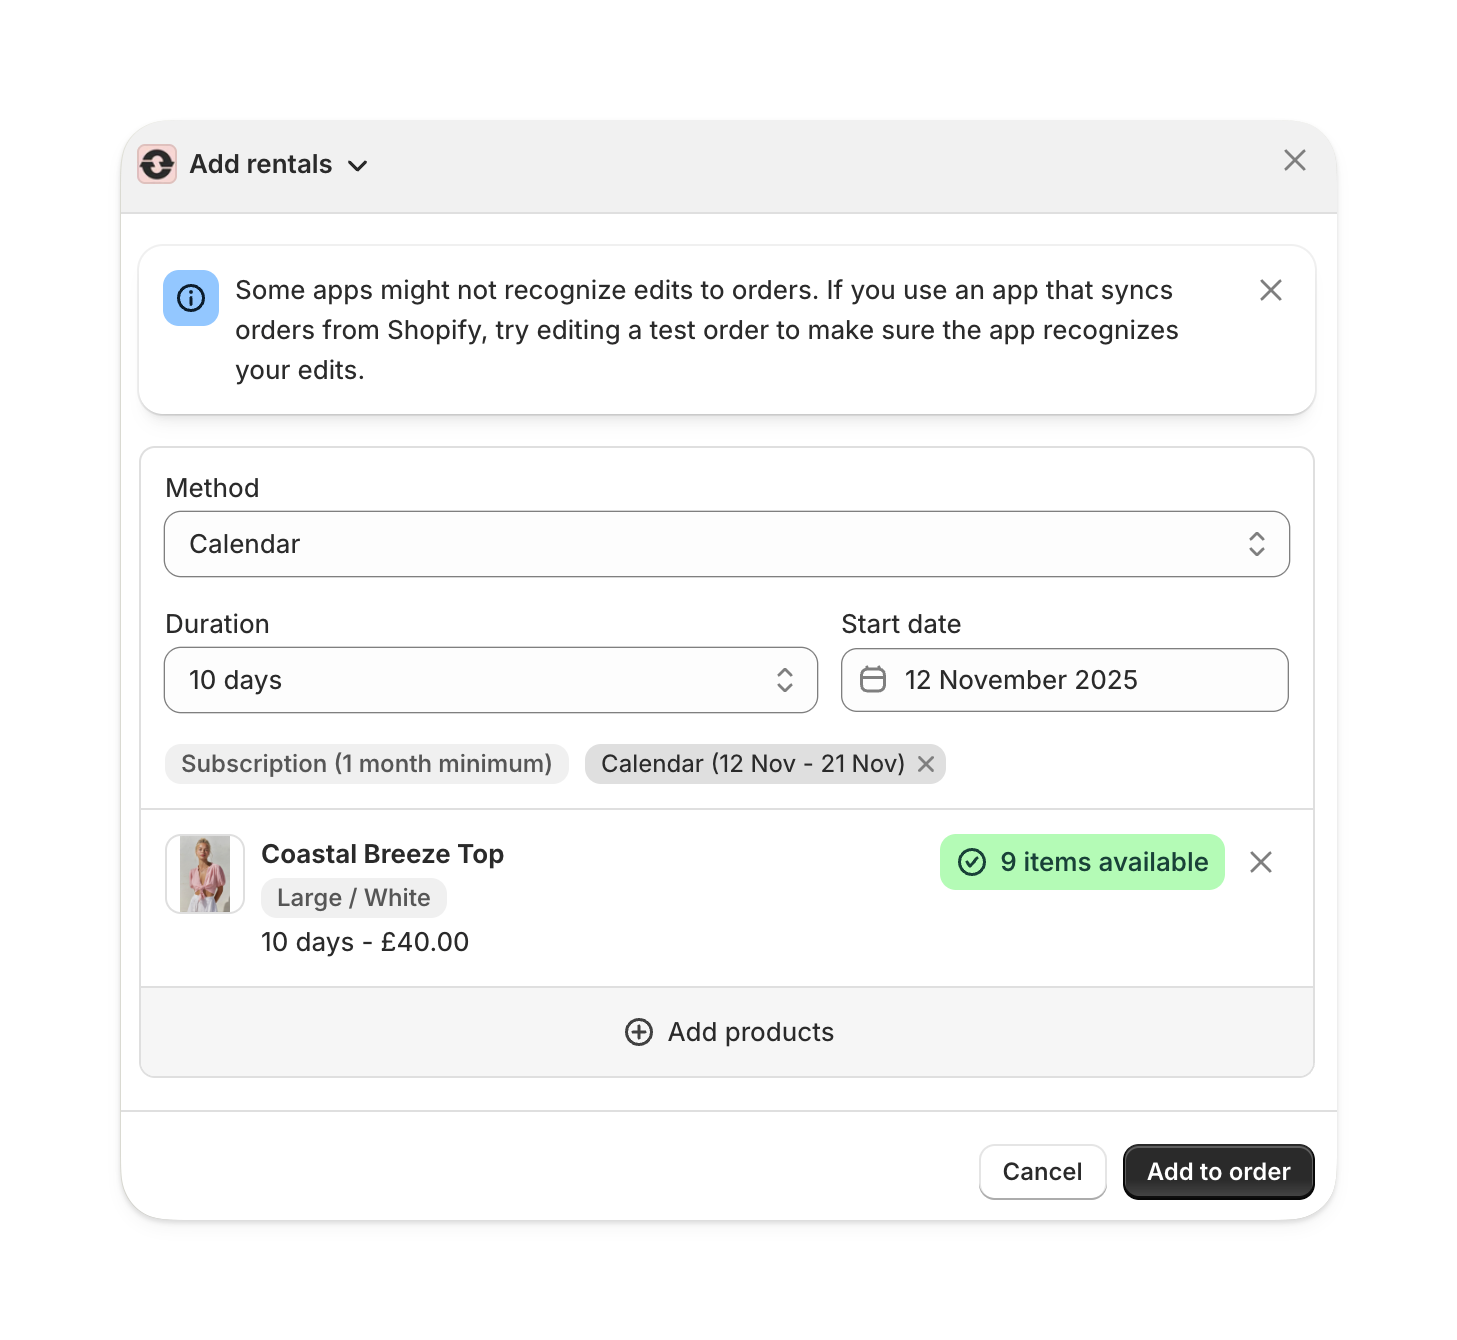
Adding a rental to an order
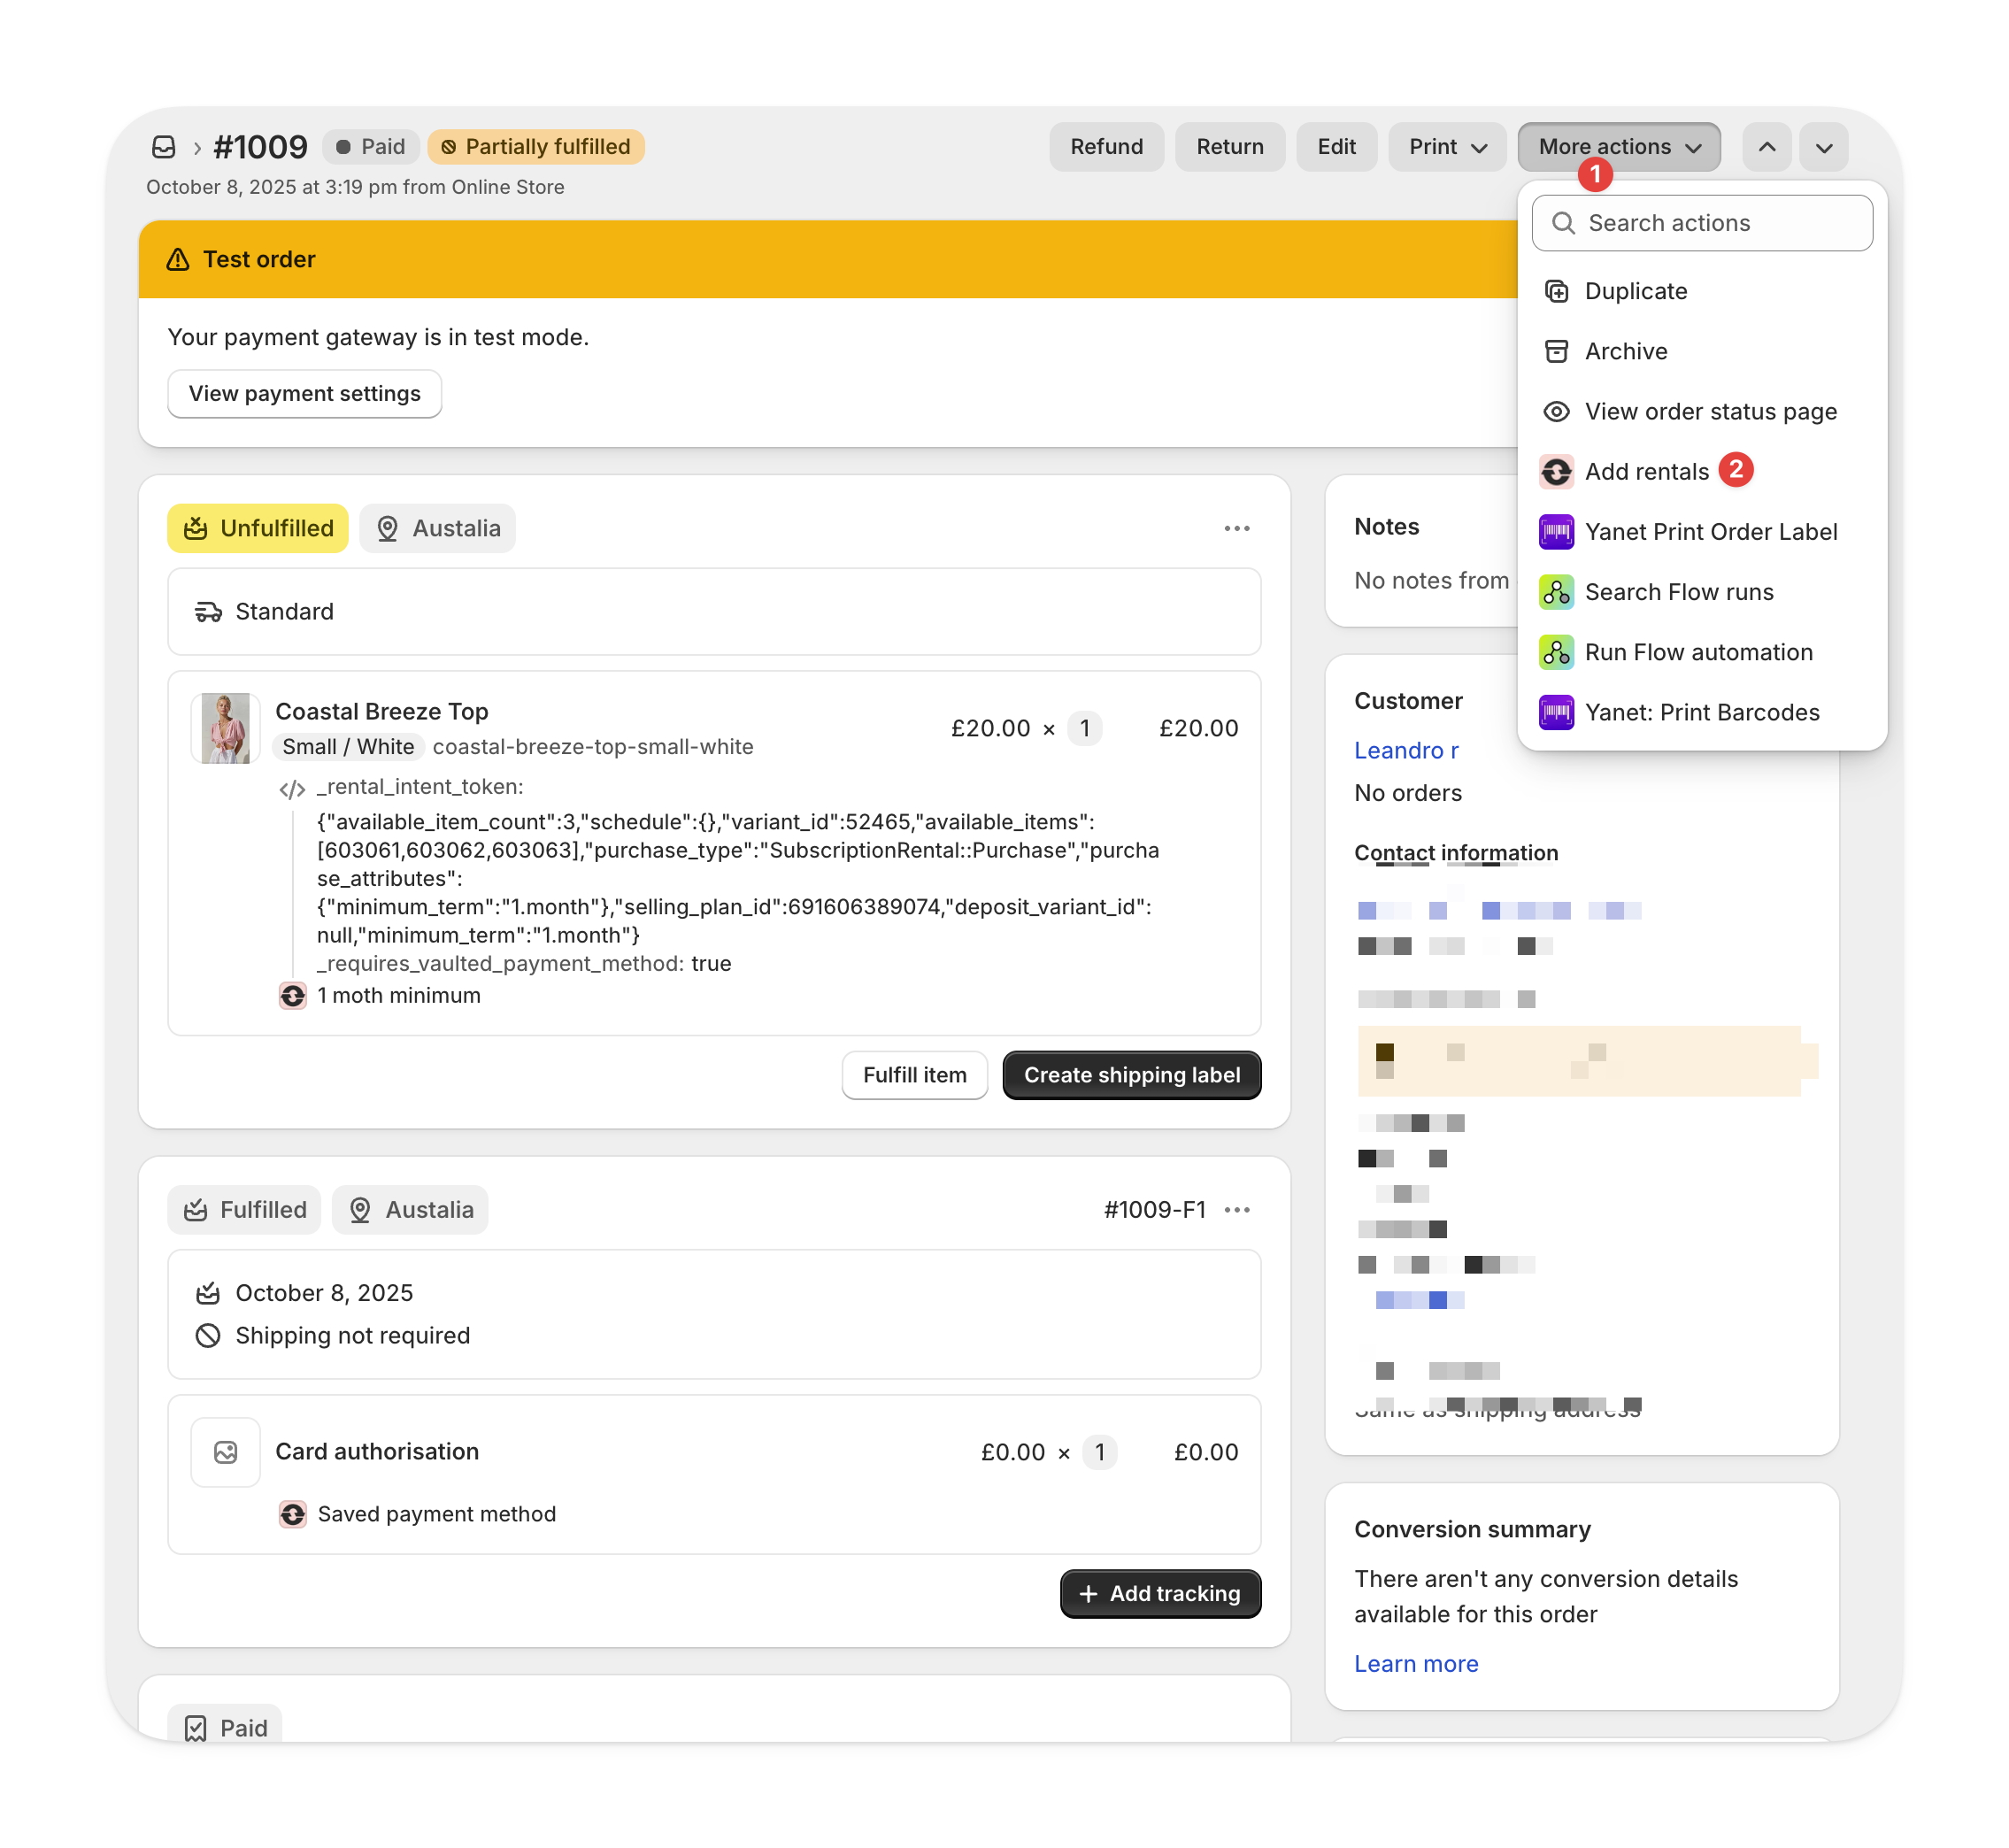
Choose a method and start date
You can:
For example, if the order includes a subscription and a calendar rental from October 10–21, you’ll see both a Subscription preset and a Calendar (Oct 10–21) preset.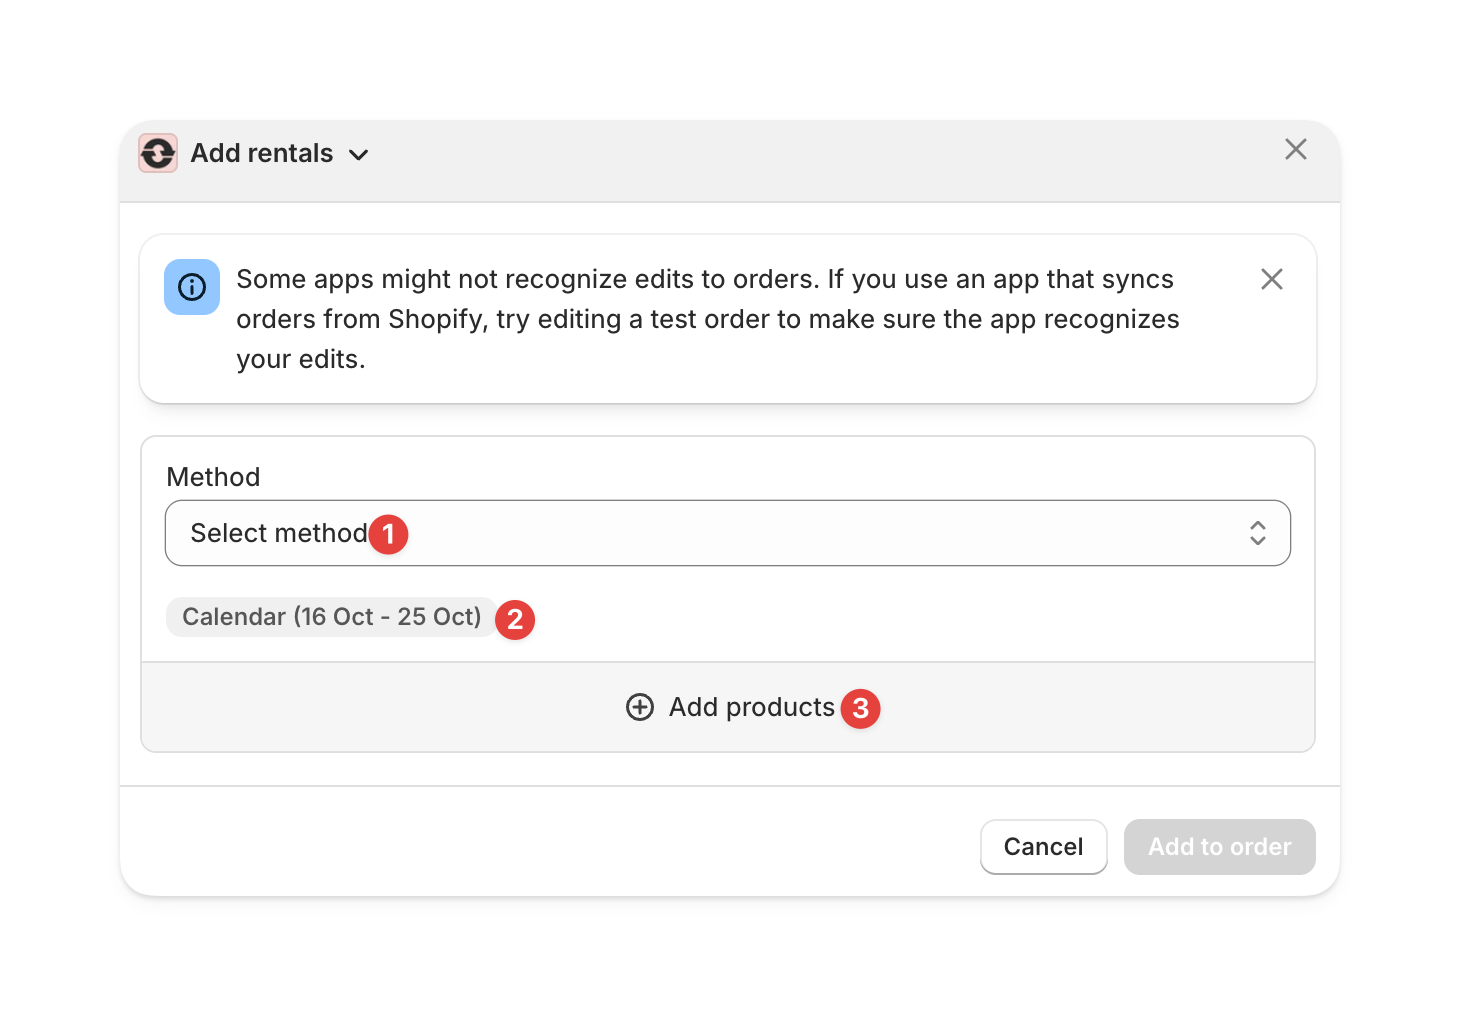
- Manually choose a rental method and start date, or
- Select from one of the presets shown.
For example, if the order includes a subscription and a calendar rental from October 10–21, you’ll see both a Subscription preset and a Calendar (Oct 10–21) preset.
Charging the difference
If adding rentals increases the total order value, Shopify will show the outstanding balance.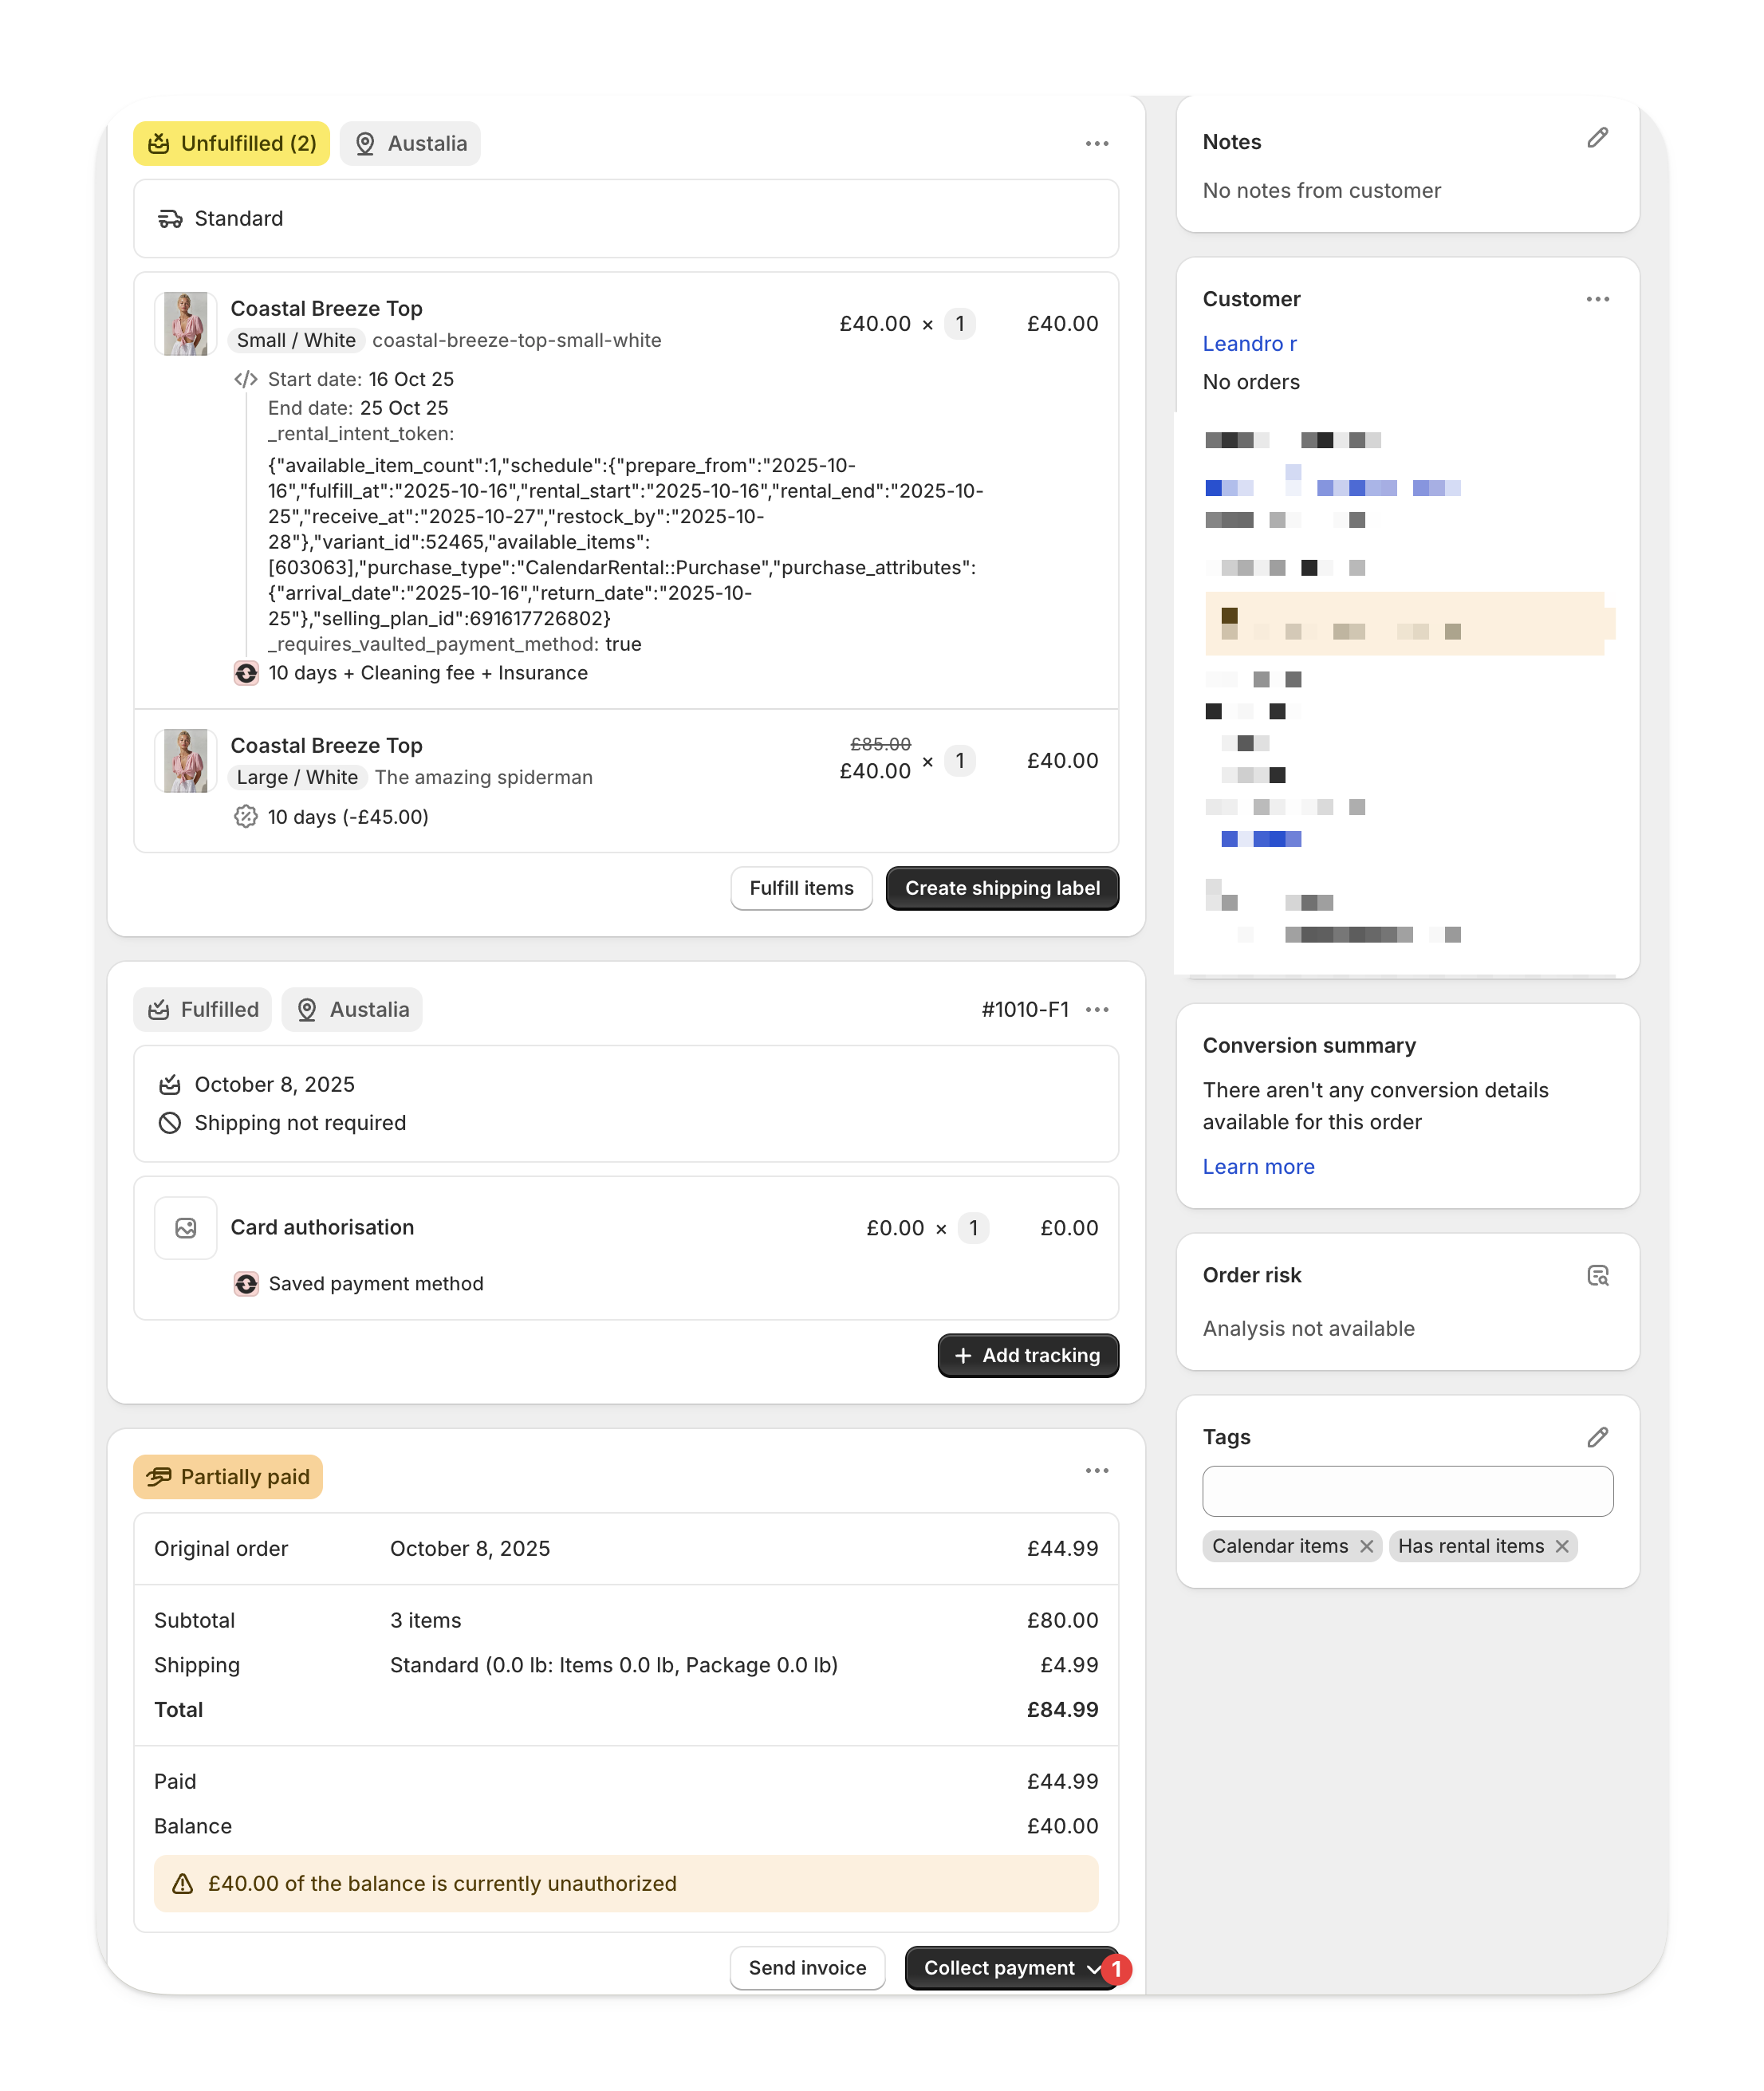
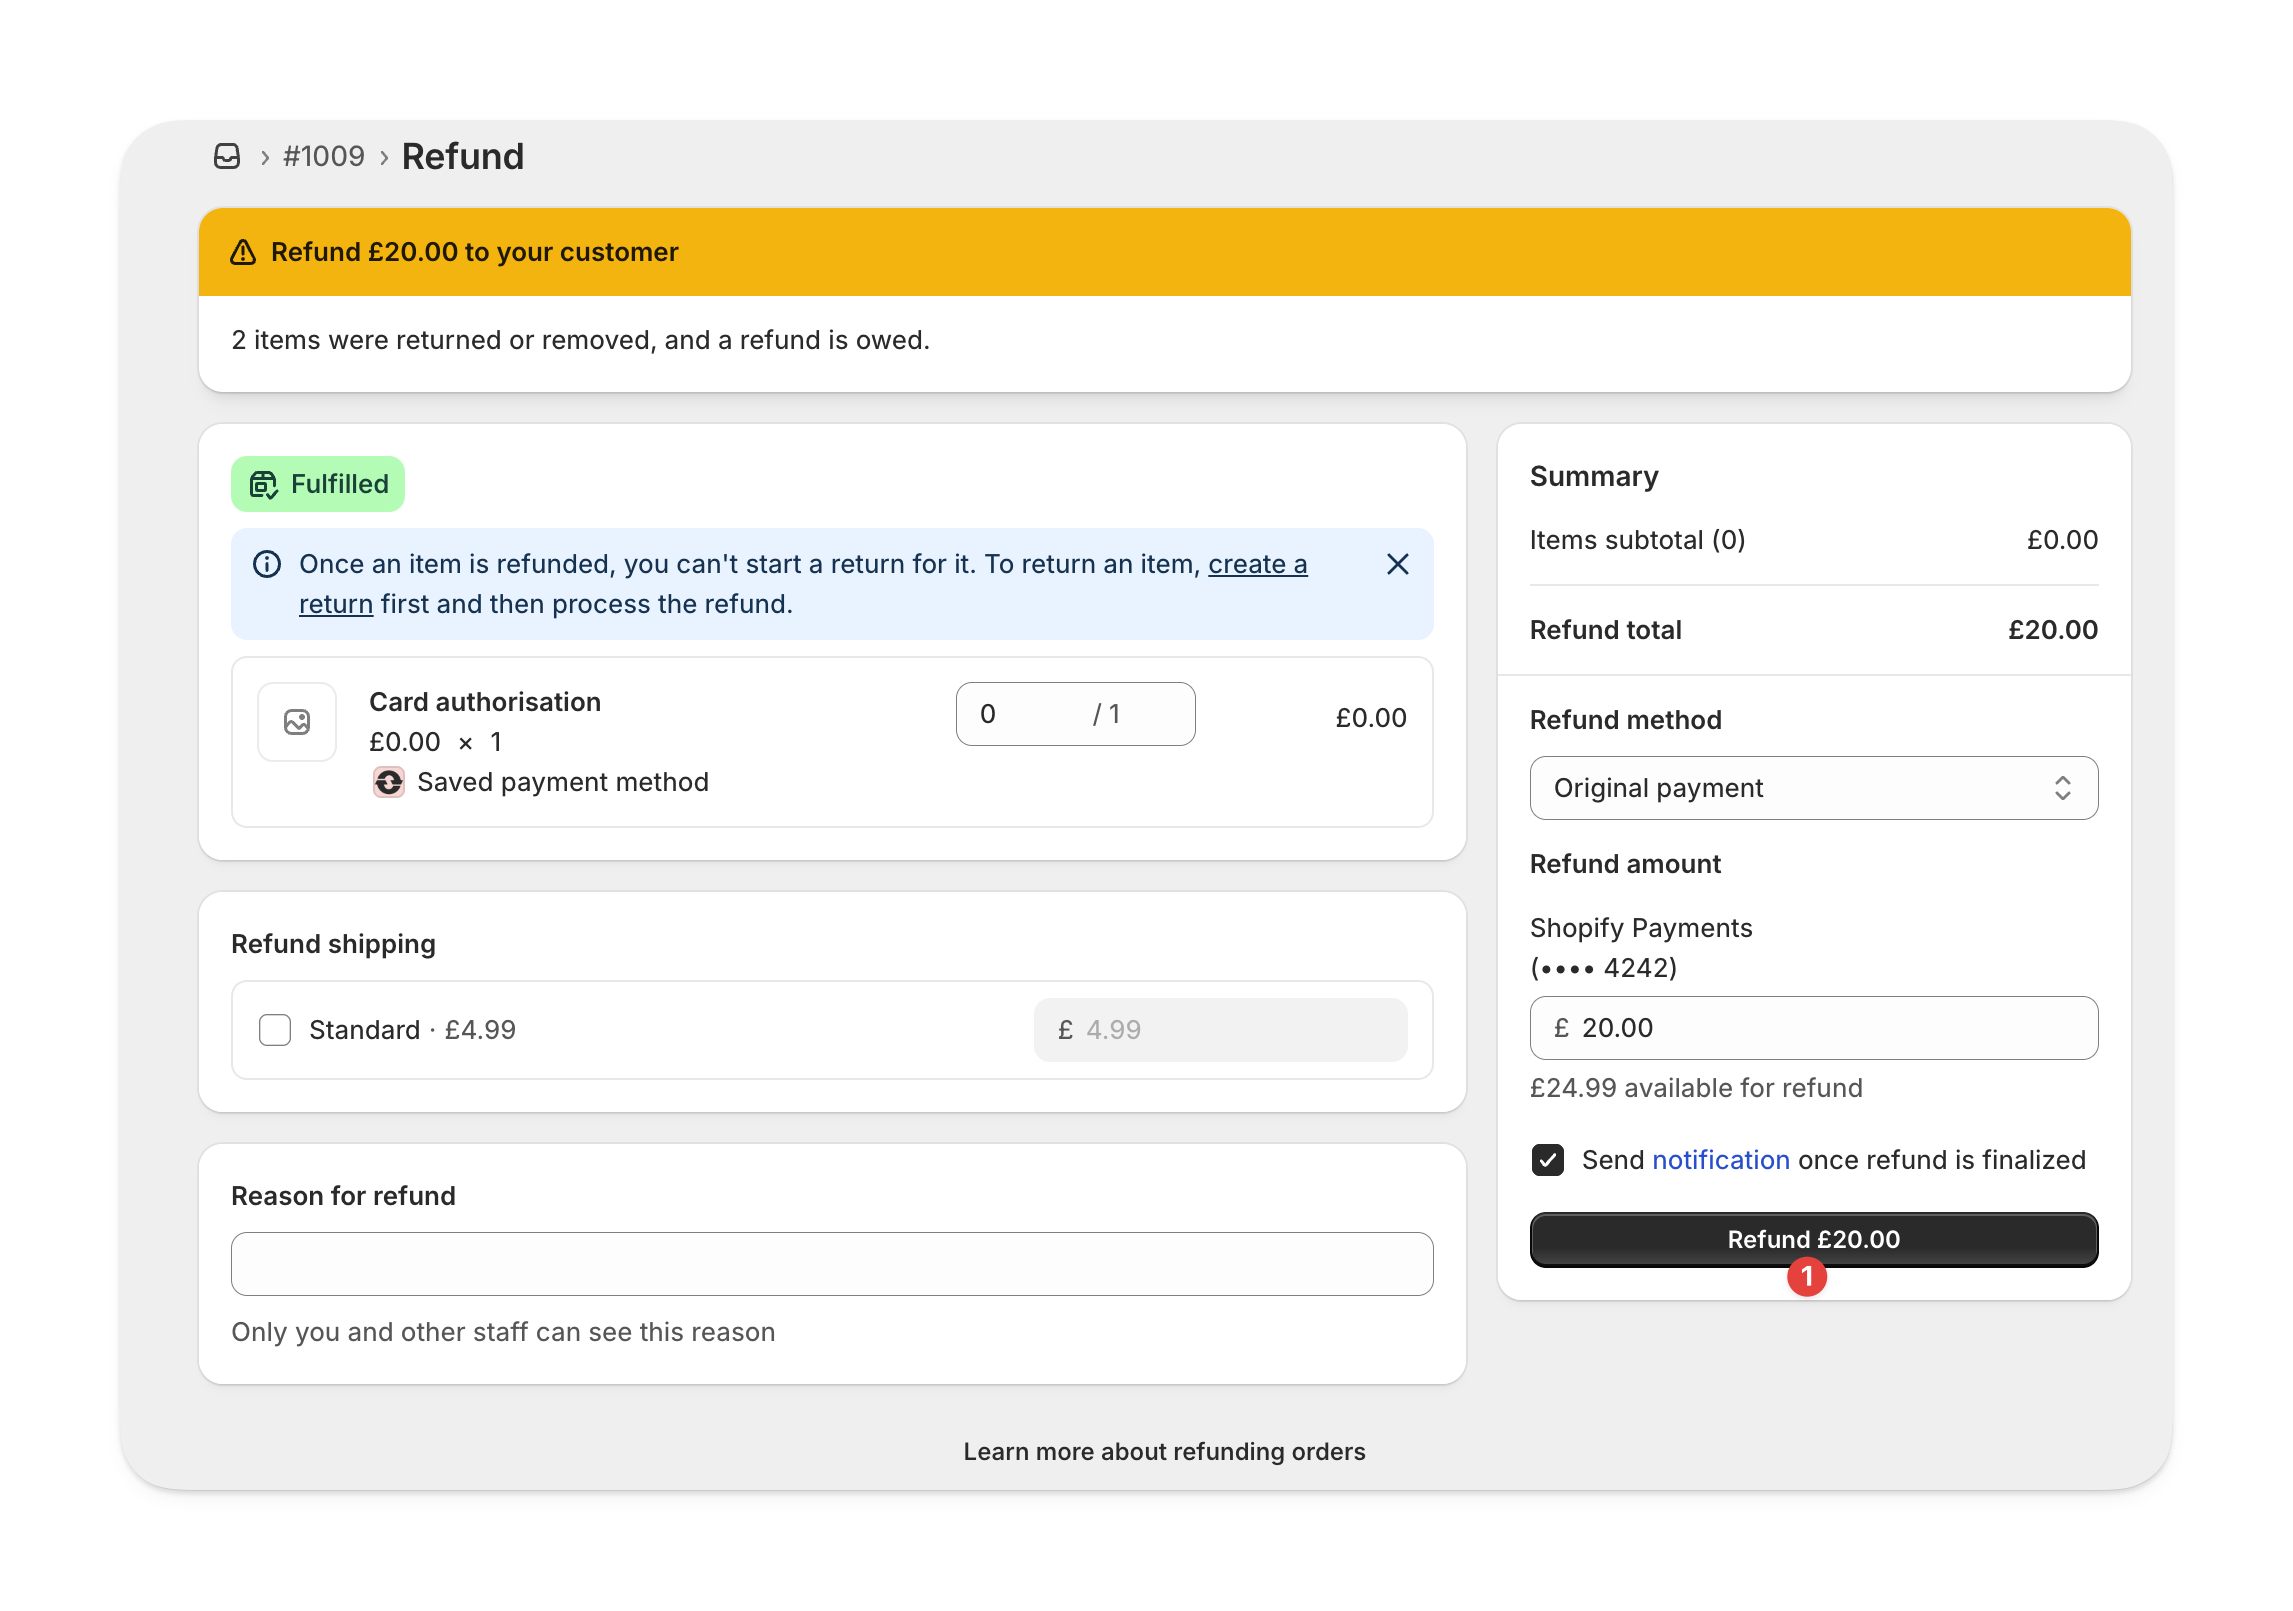
Refunding the difference
If removing rentals lowers the total order value, you’ll see a Manage refund button.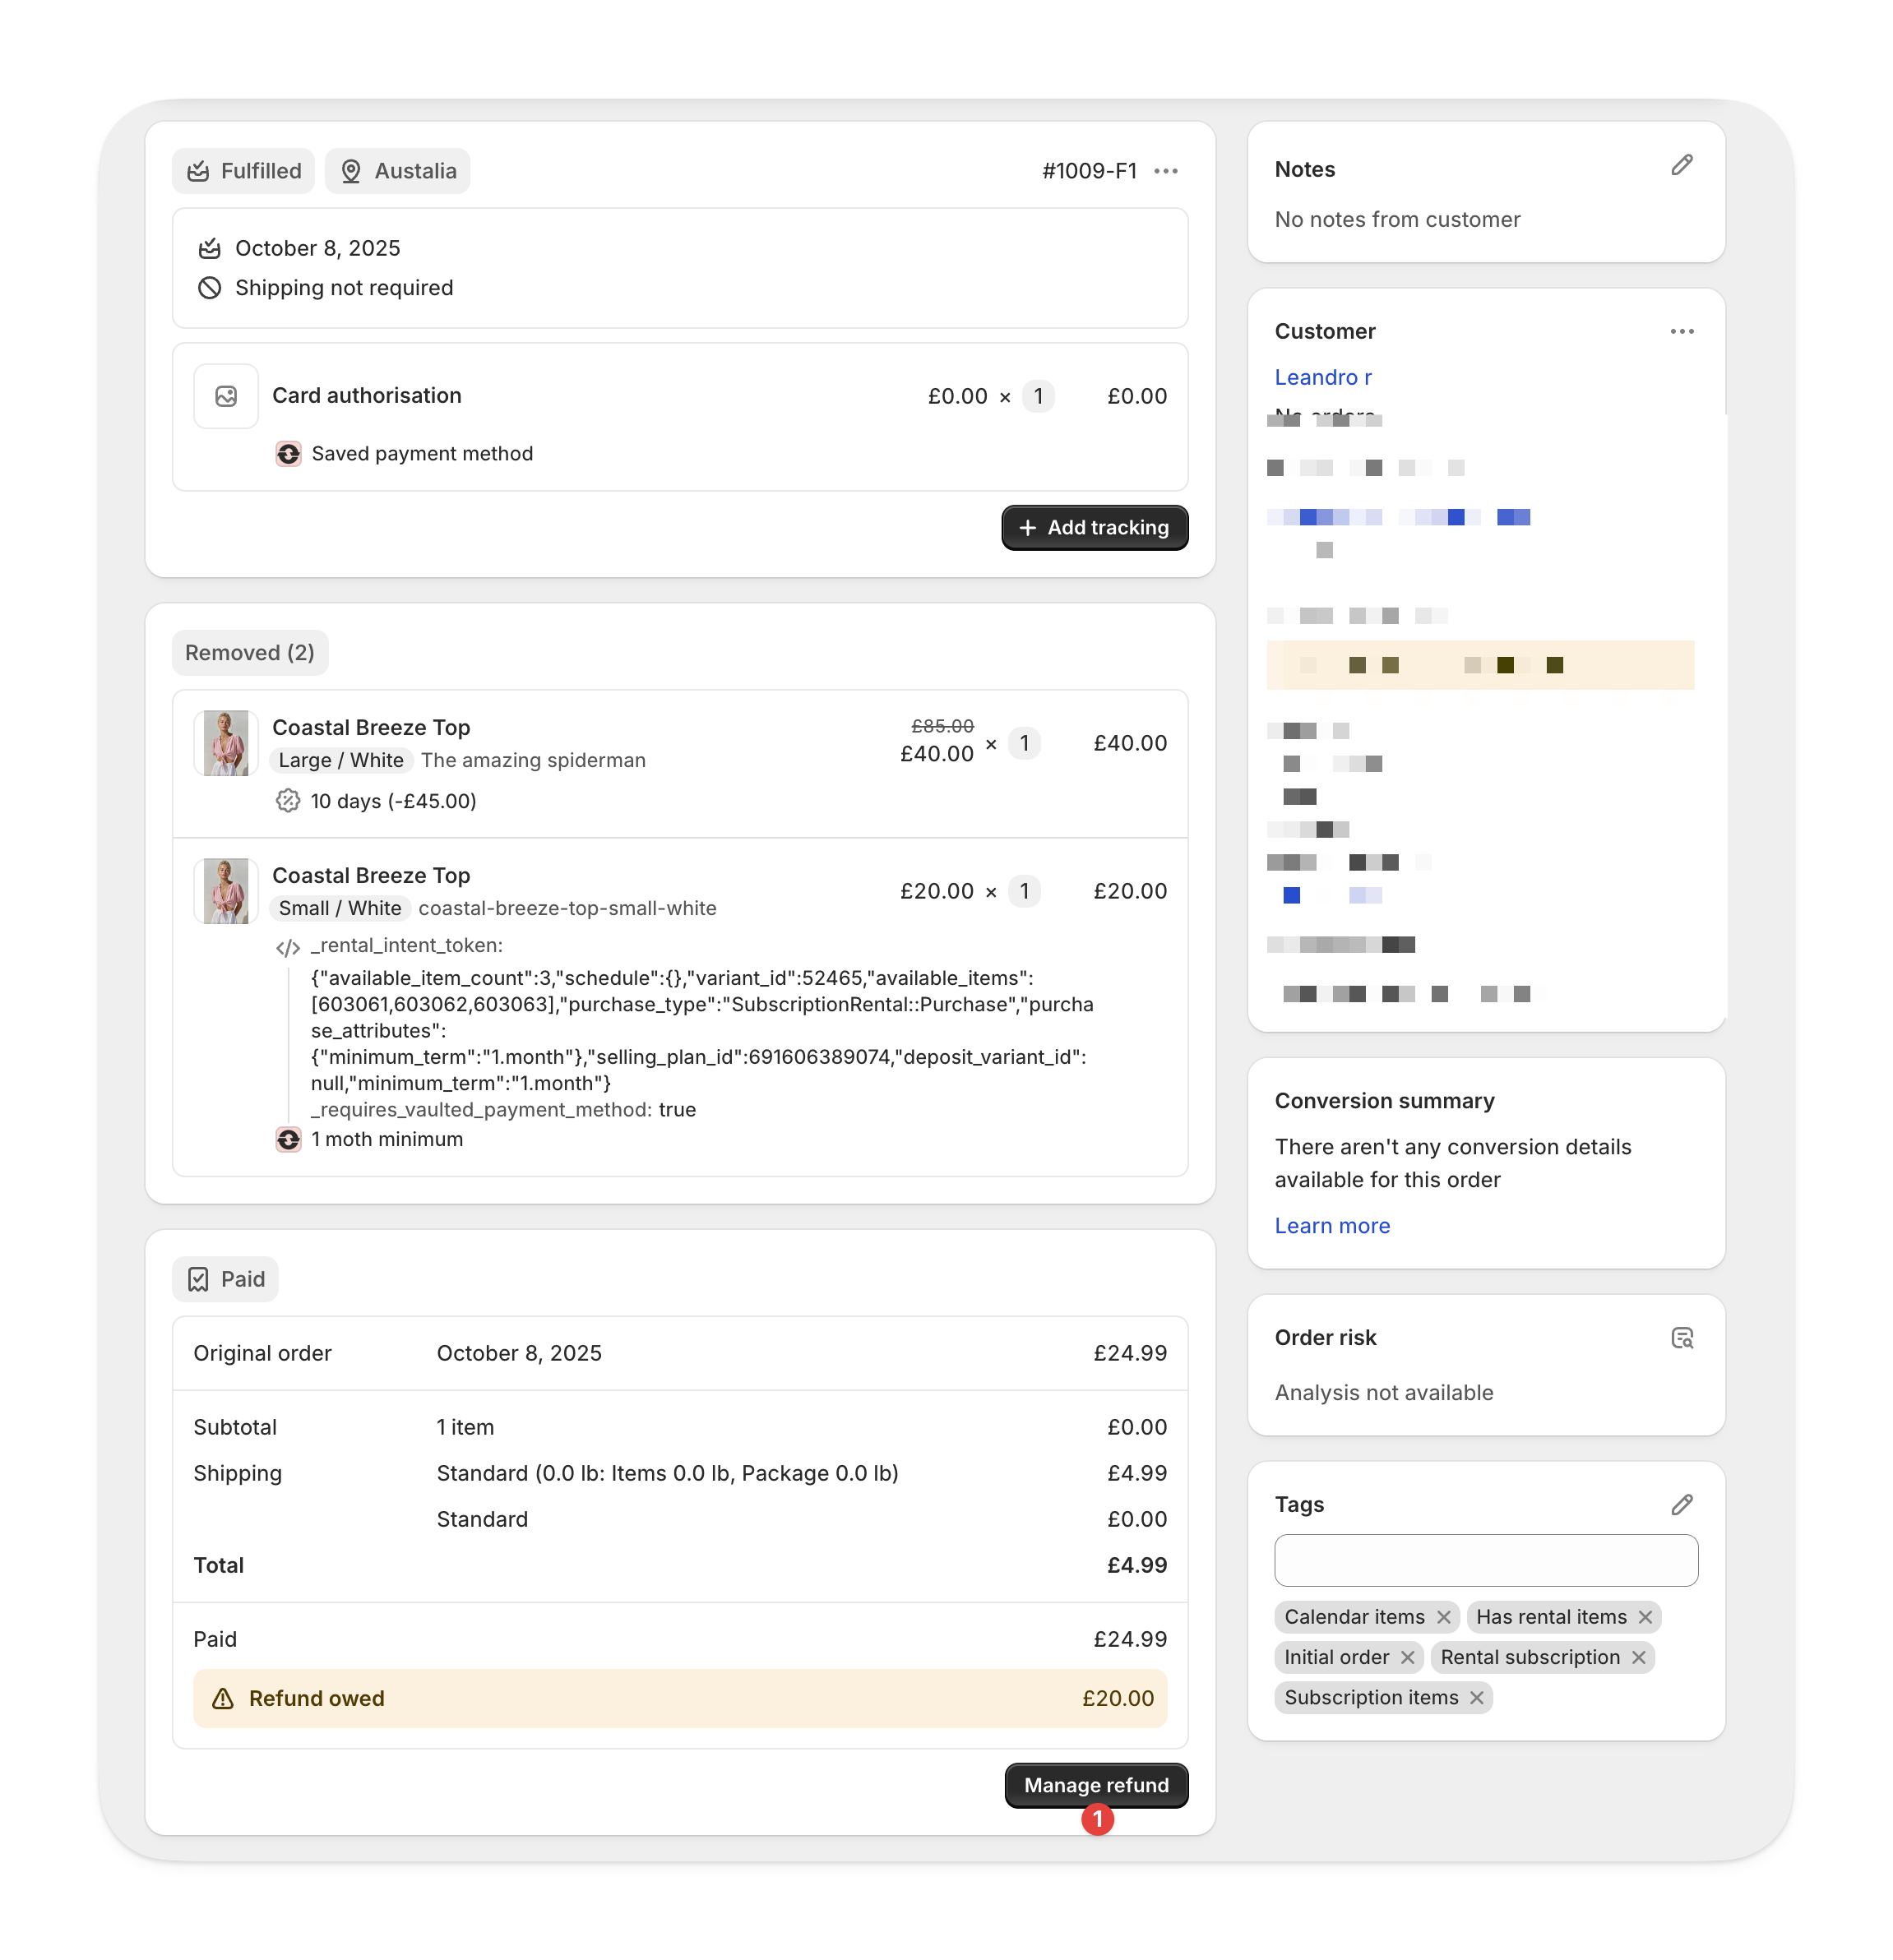
FAQs
How do I change the address on an existing order?
How do I change the address on an existing order?
To change the shipping address for an existing order, go to the order in Shopify.
Click the three dots next to the customer’s name, then select Edit address.
Any changes you make will automatically be reflected in Supercycle.