Rental overview
Each rental record includes details about the rented product, item, serial, customer, return progress, billing, and key activity.Return progress
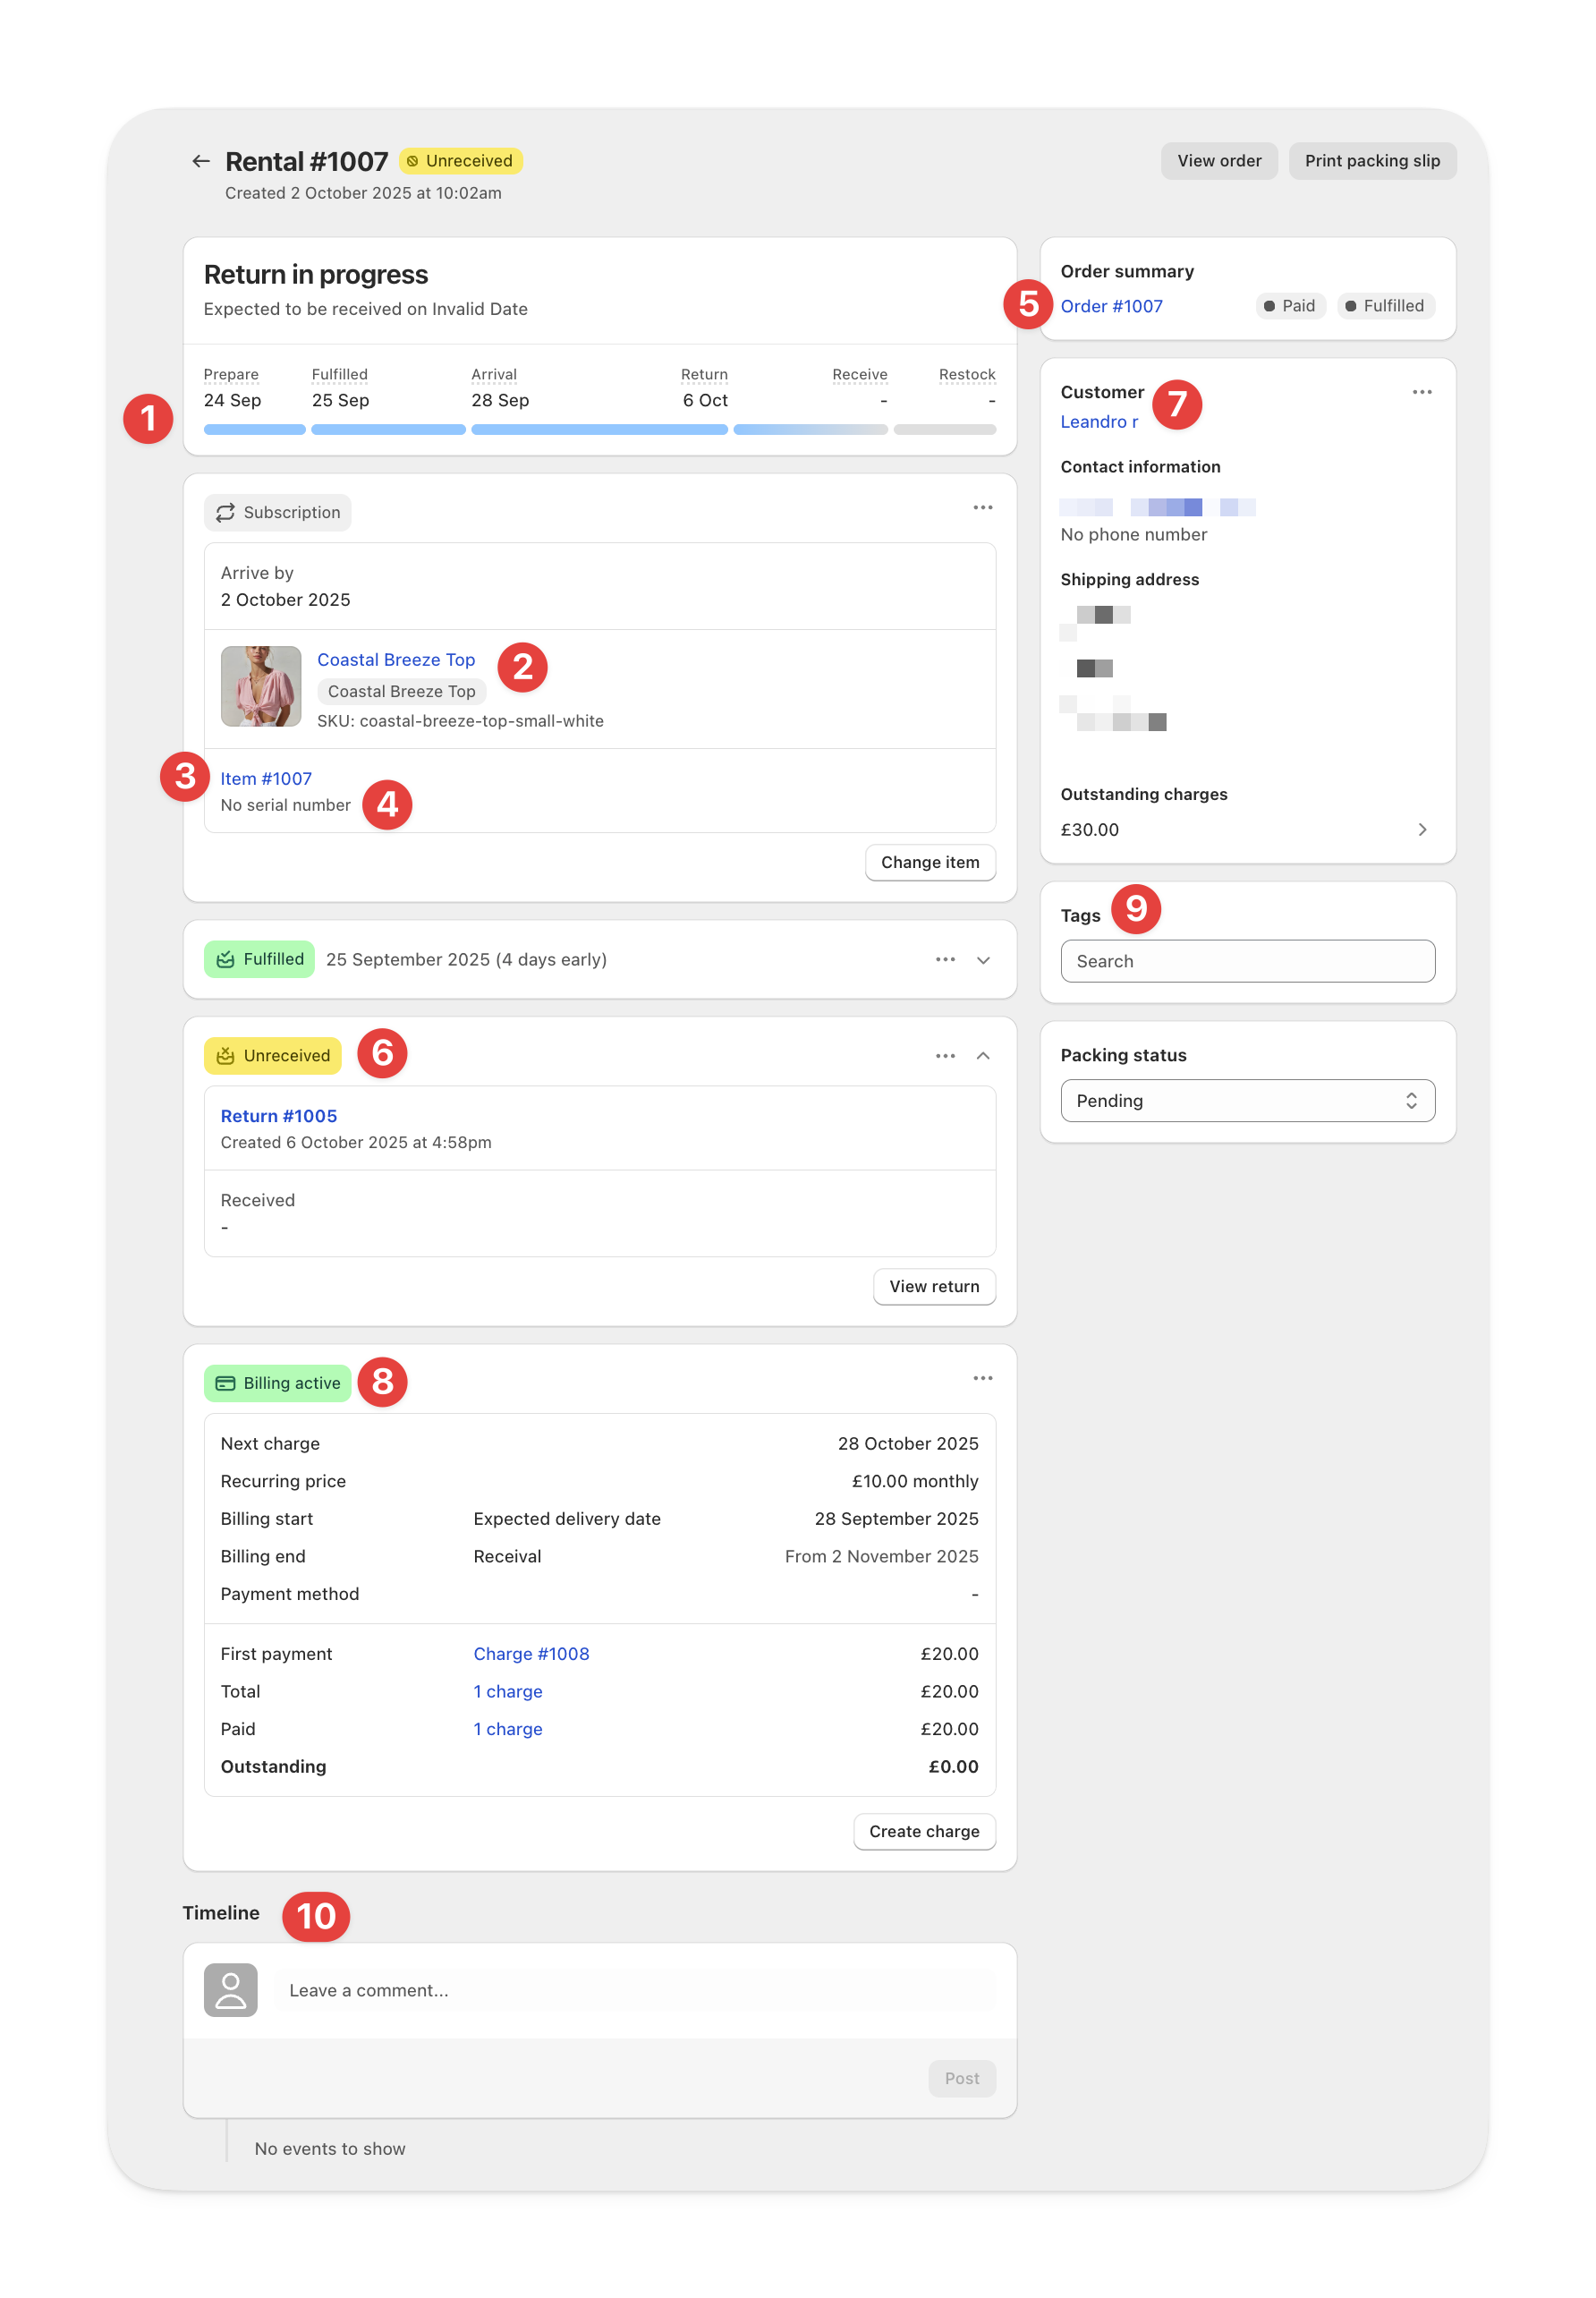
Displays the current stage of the rental and return process — Prepare, Fulfilled, Arrival, Return, Receive, and Restock.Also shows the expected receival date if a return is in progress.
Product
The rented product and variant.Item
The specific Item assigned to the rental.Serial
The item’s Serial currently assigned to the rental.Use this for scanning, tracking, and service history.
Order
The Shopify order linked to this rental.Open it directly, view fulfillment details, or print packing slips.
Return
The associated return record.Customer
Displays the customer’s name, email, and shipping address.Includes quick access to contact details and outstanding charges.
Billing
Shows the billing summary for the rental, including next charge date and total charges for recurring rentals.You can also create manual charges directly from this section.
Tags
Freeform tags used to group, filter, or search rentals.Timeline
Shows all activity on the rental, including creation, fulfillment, return, and billing events.Use it to trace when actions occurred and who performed them.
Rental FAQs
How do I see all rentals from the same order?
How do I see all rentals from the same order?
You can filter rentals by Order ID from the Reservations table.
Does the arrival date update based on tracking?
Does the arrival date update based on tracking?
No. The arrival date does not update based on tracking information.
It’s calculated using your configured logistics buffers.