
Documentation Index

Fetch the complete documentation index at: https://docs.supercycle.com/llms.txt

Use this file to discover all available pages before exploring further.

Once you’ve imported a product into Supercycle, setting it up for calendar rental is a simple process.
1

Navigate to product in Supercycle

In your Shopify admin, navigate to Supercycle > Products.Select the product you want to set up and then select the Calendar rental method.
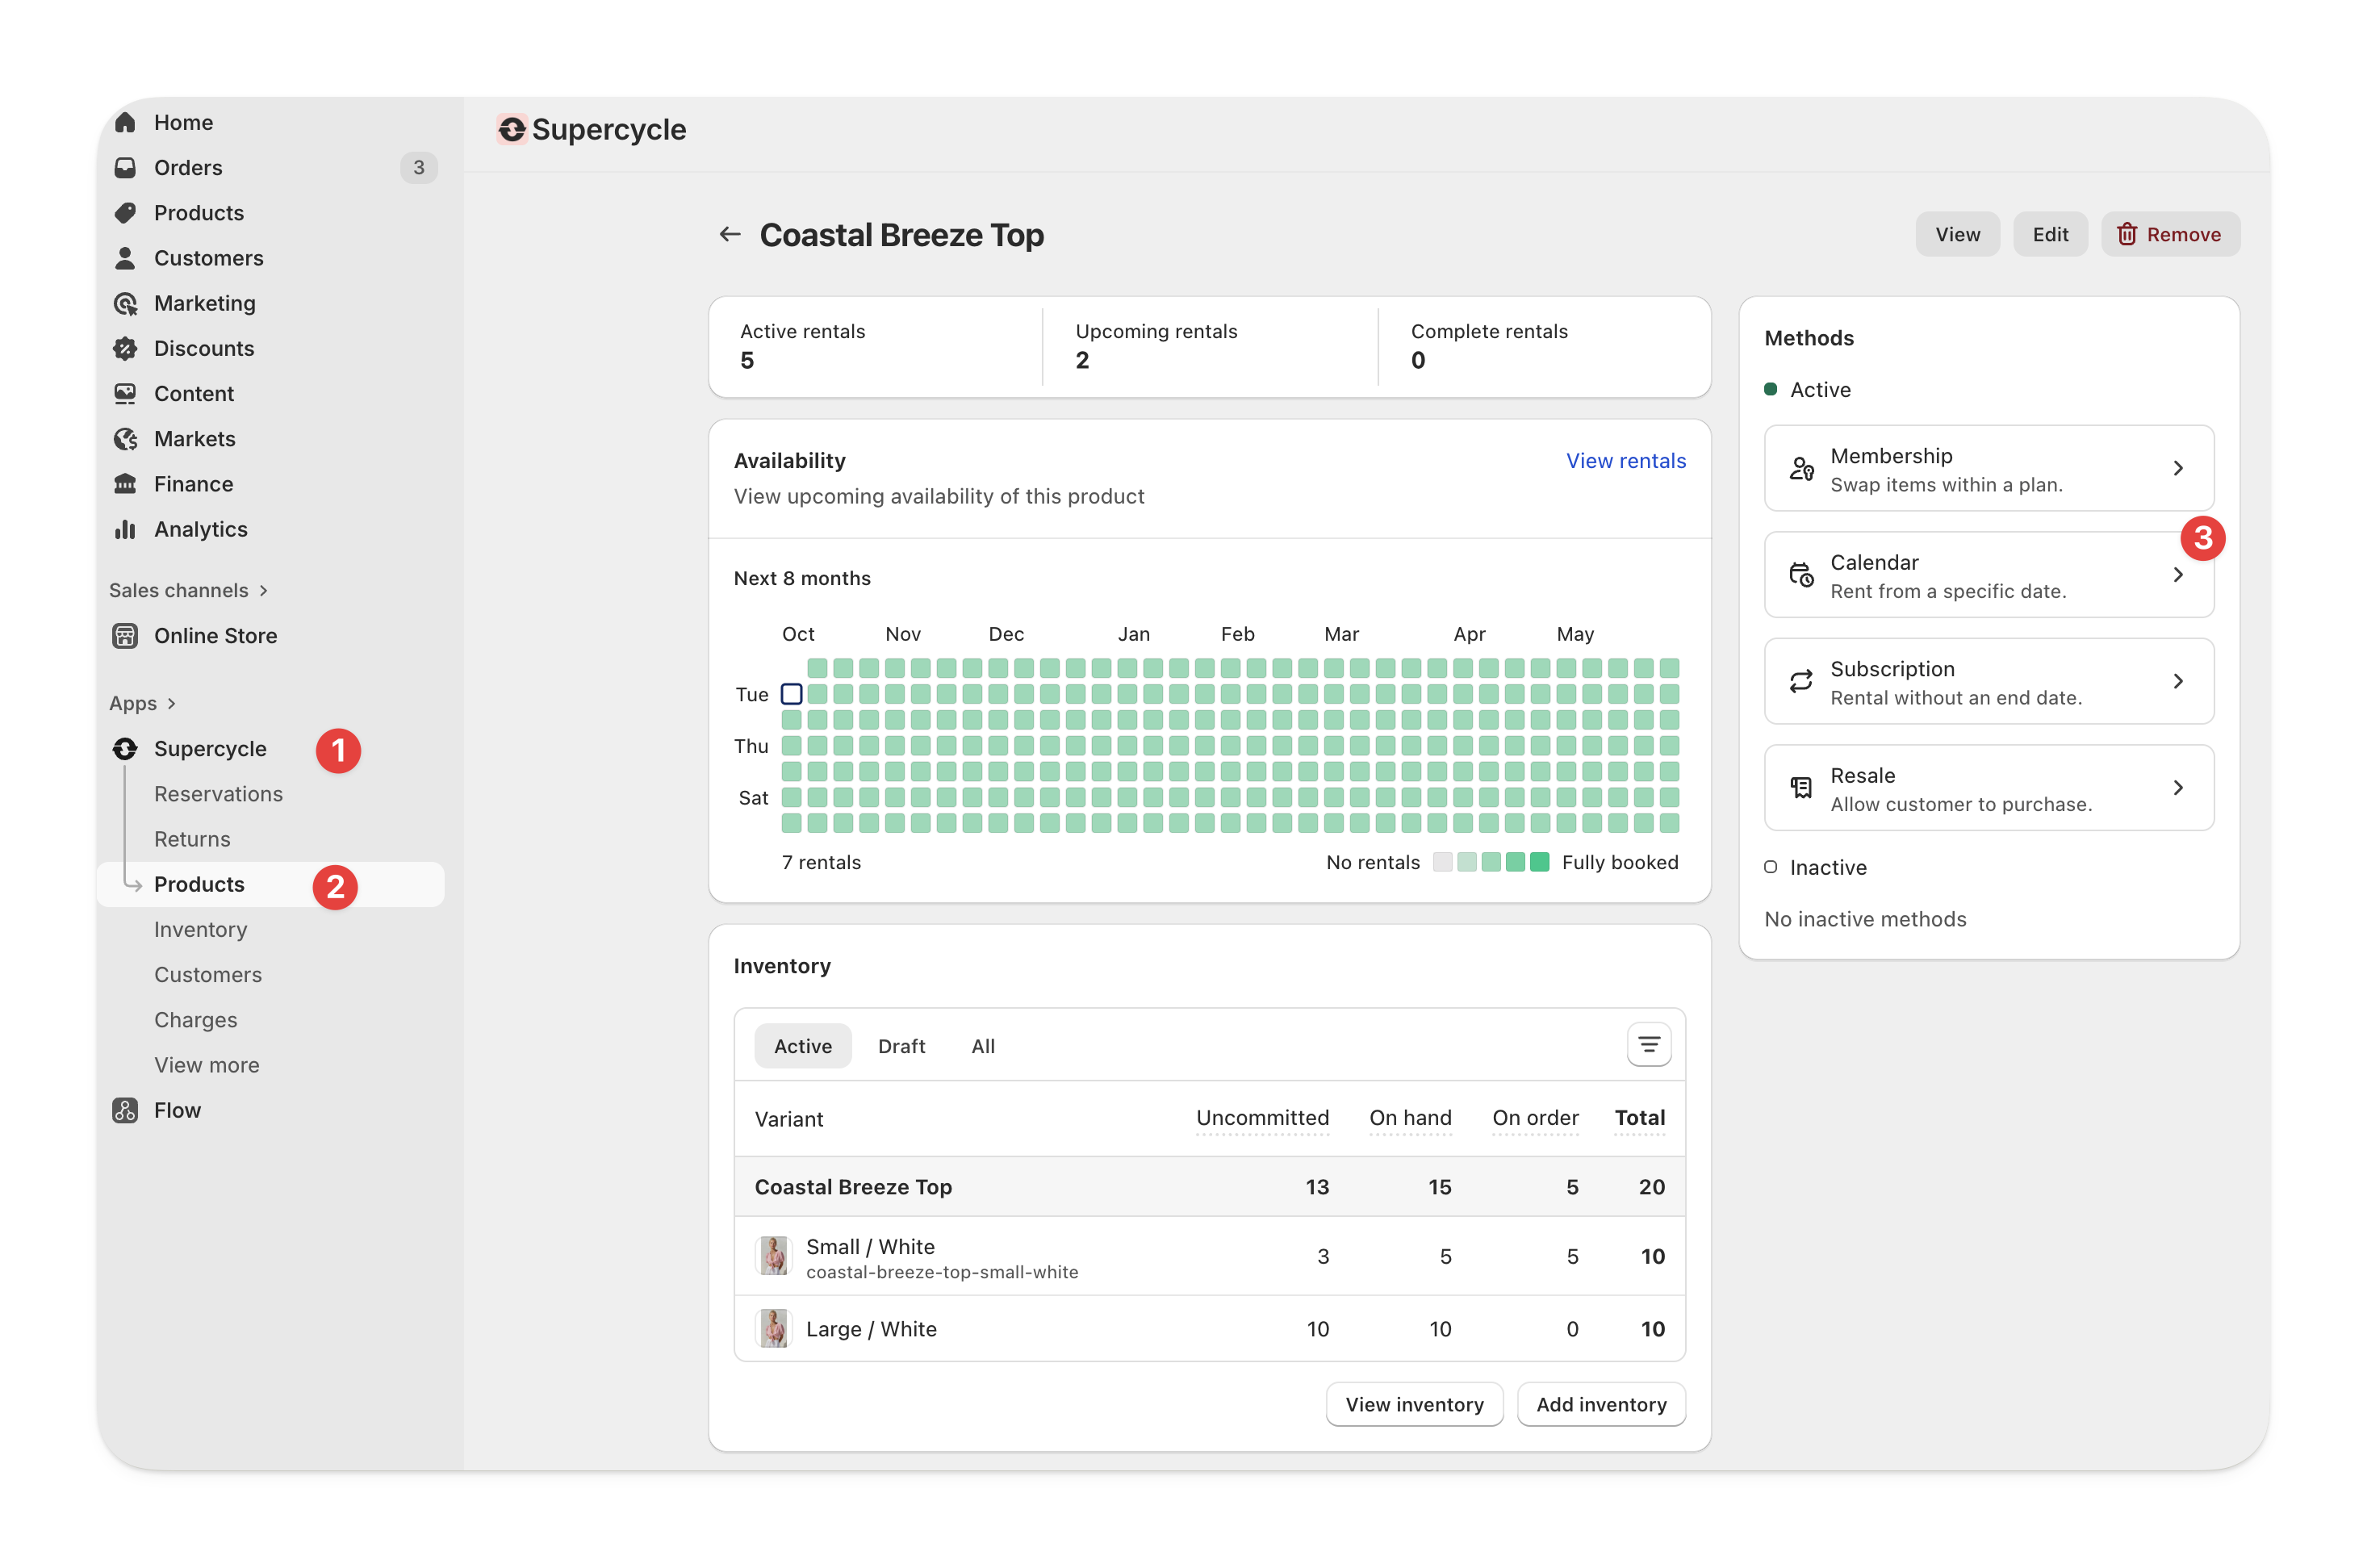
2

Create rental periods

Under Rental periods and pricing, click Add rental period and add a price and period.
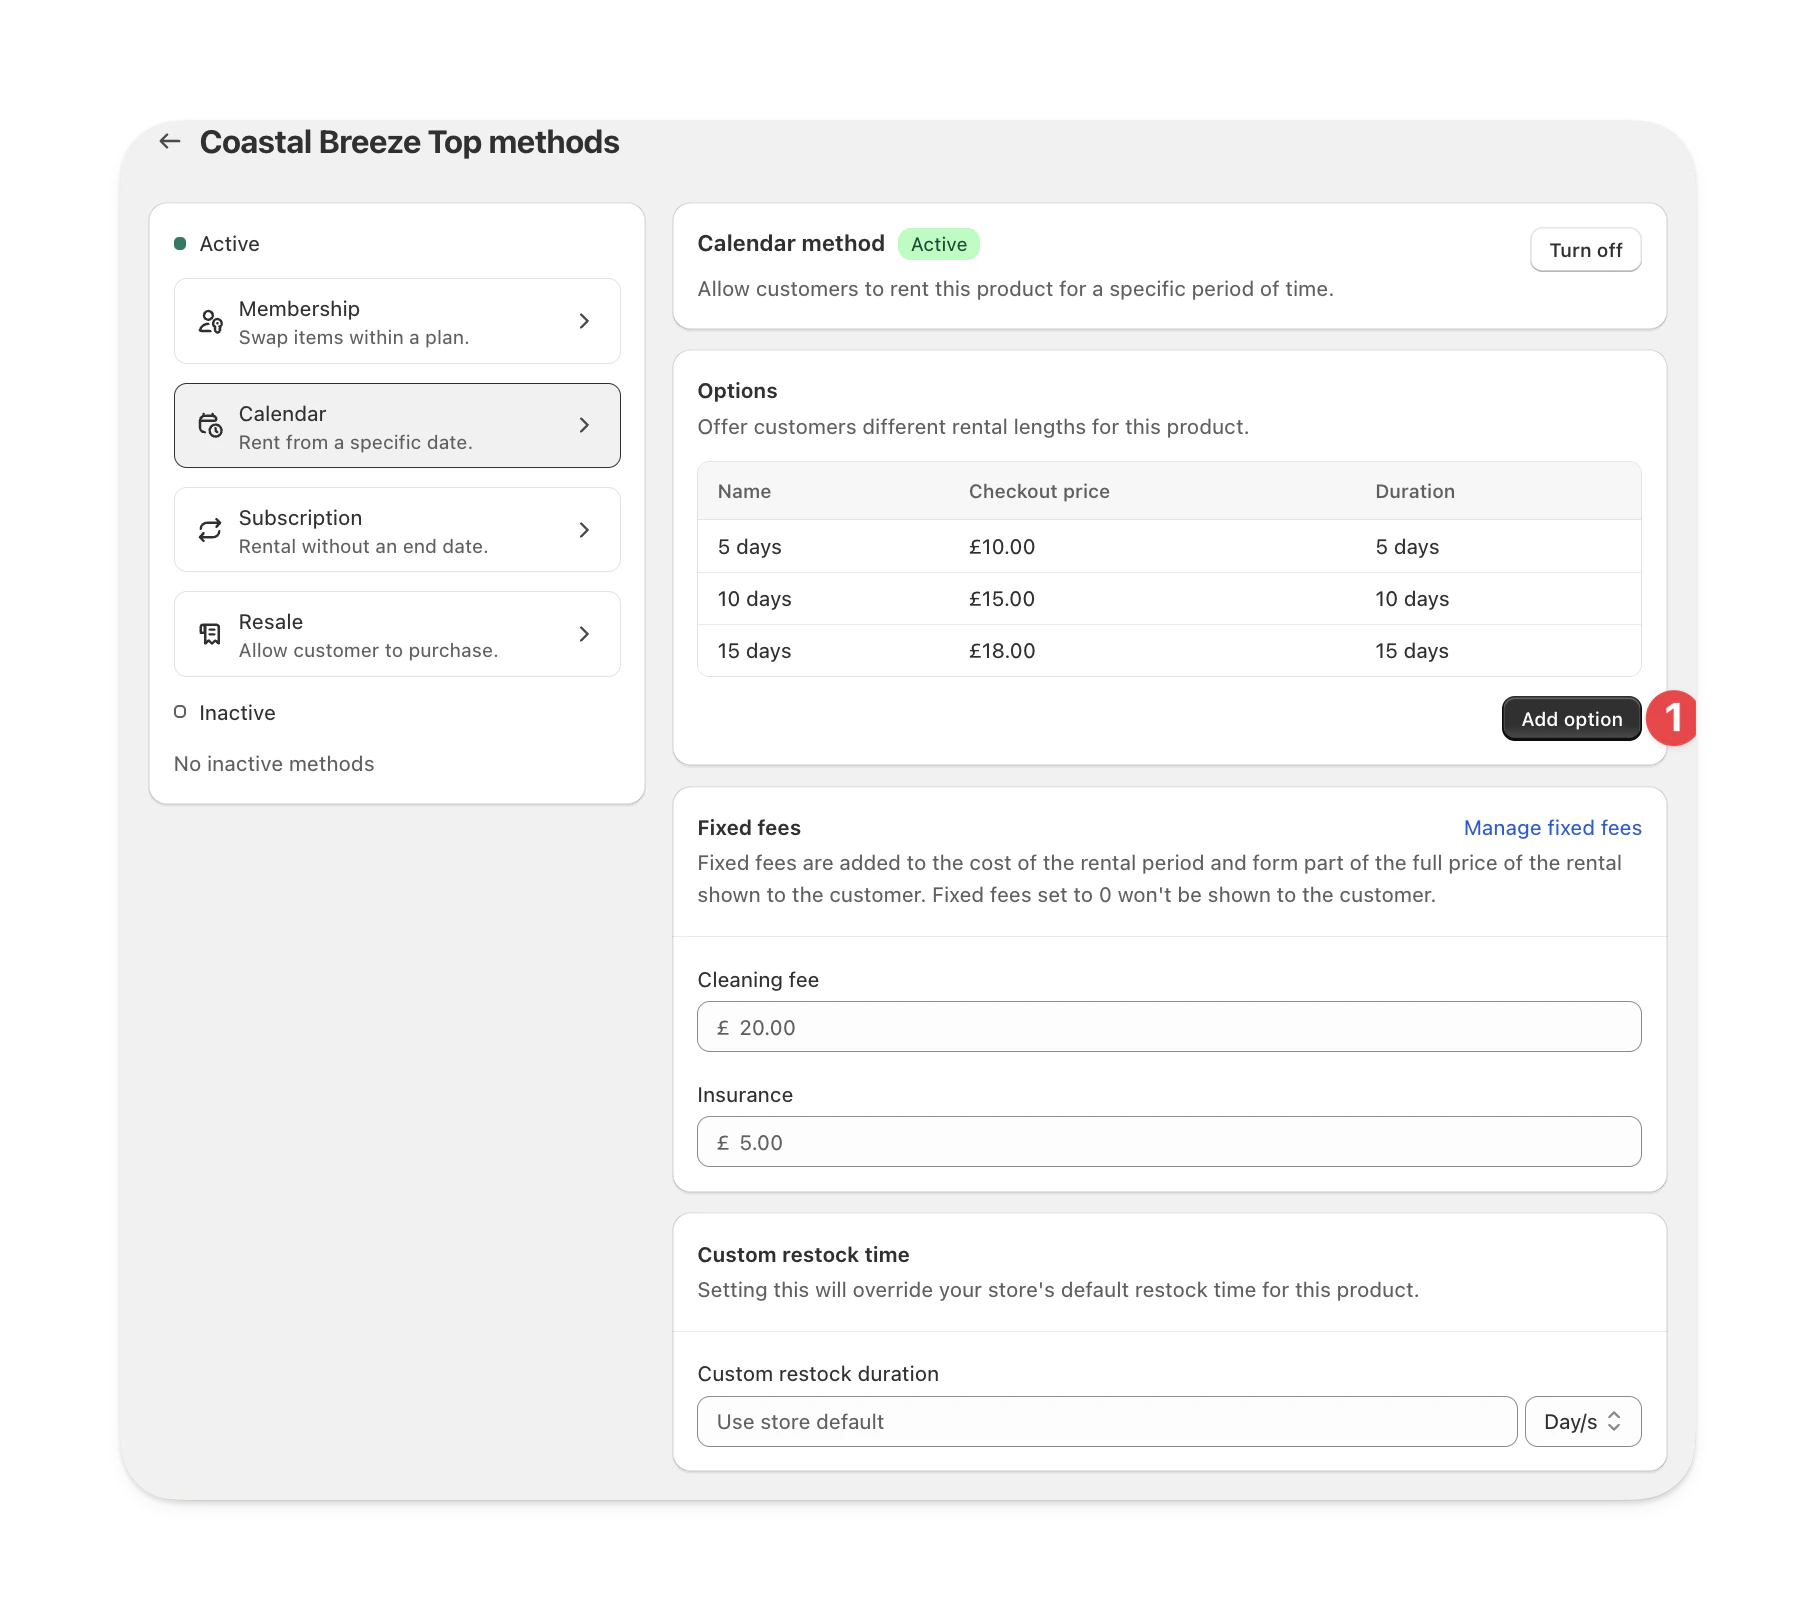
Repeat this step for different periods. We recommend no more than 4 rental periods to maintain a good UX.
3

Turn on and save

Turn the calendar rental method on and click save.
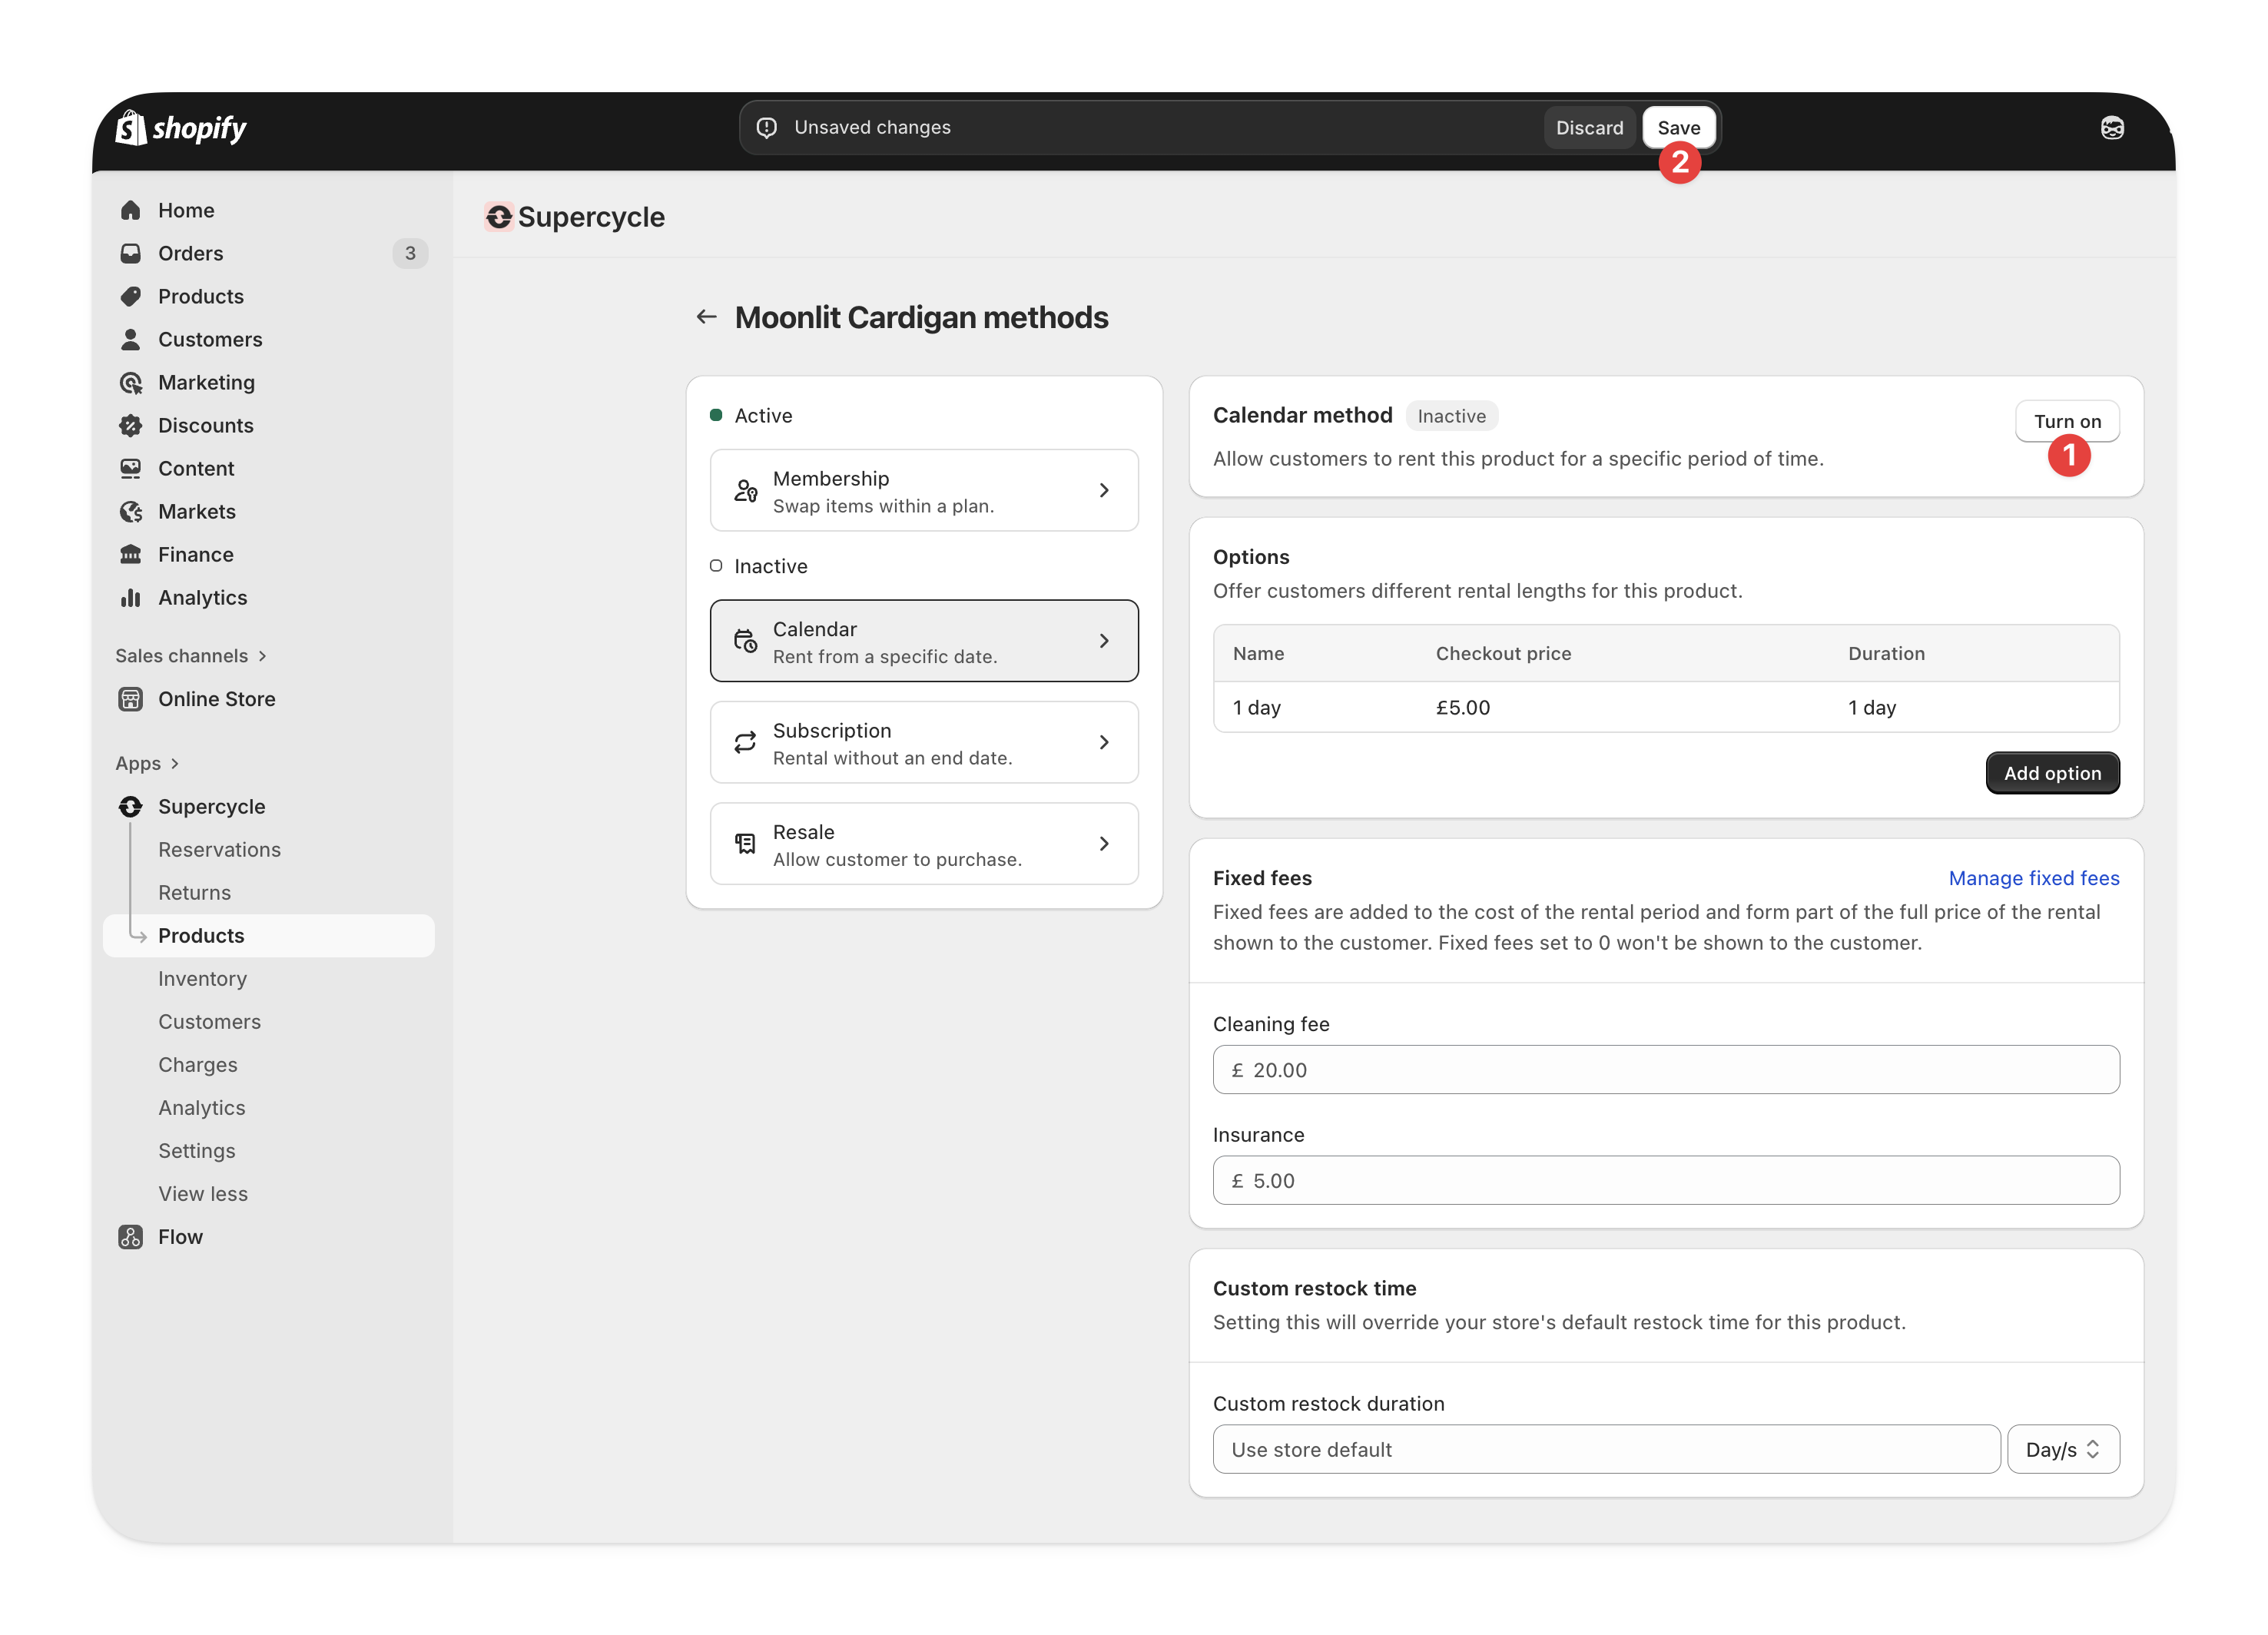
Next, you’ll learn about the fixed fees settings you saw on this page.
Each rental period can be targeted to specific Shopify markets — useful for charging different prices per region or currency. Open a rental period and use Apply to specific markets. See Multi-market pricing.

Troubleshooting

Yes, you can bulk create or update method options. Learn how in Product actions.