> ## Documentation Index
> Fetch the complete documentation index at: https://docs.supercycle.com/llms.txt
> Use this file to discover all available pages before exploring further.
# Return actions
> Step-by-step guides for creating, receiving, and processing returned items
### Create a return
A customer can initiate a return from their rental portal.
In the rental portal, the customer should click **Return items**. This button may have different text depending on your [Language](/documentation/online-store/languages) settings.
On the next page, the customer can select the items they'd like to return. Then select **Request return**
You can create a return on behalf of a customer, either proactively or if you receive items back where the customer has not created the return.
In Shopify Admin, head to **Supercycle** > [**Customers**](https://admin.shopify.com/apps/supercycle/customers) > **Customer**.
On the customer page, under **Active rentals** click the **Create return** button.
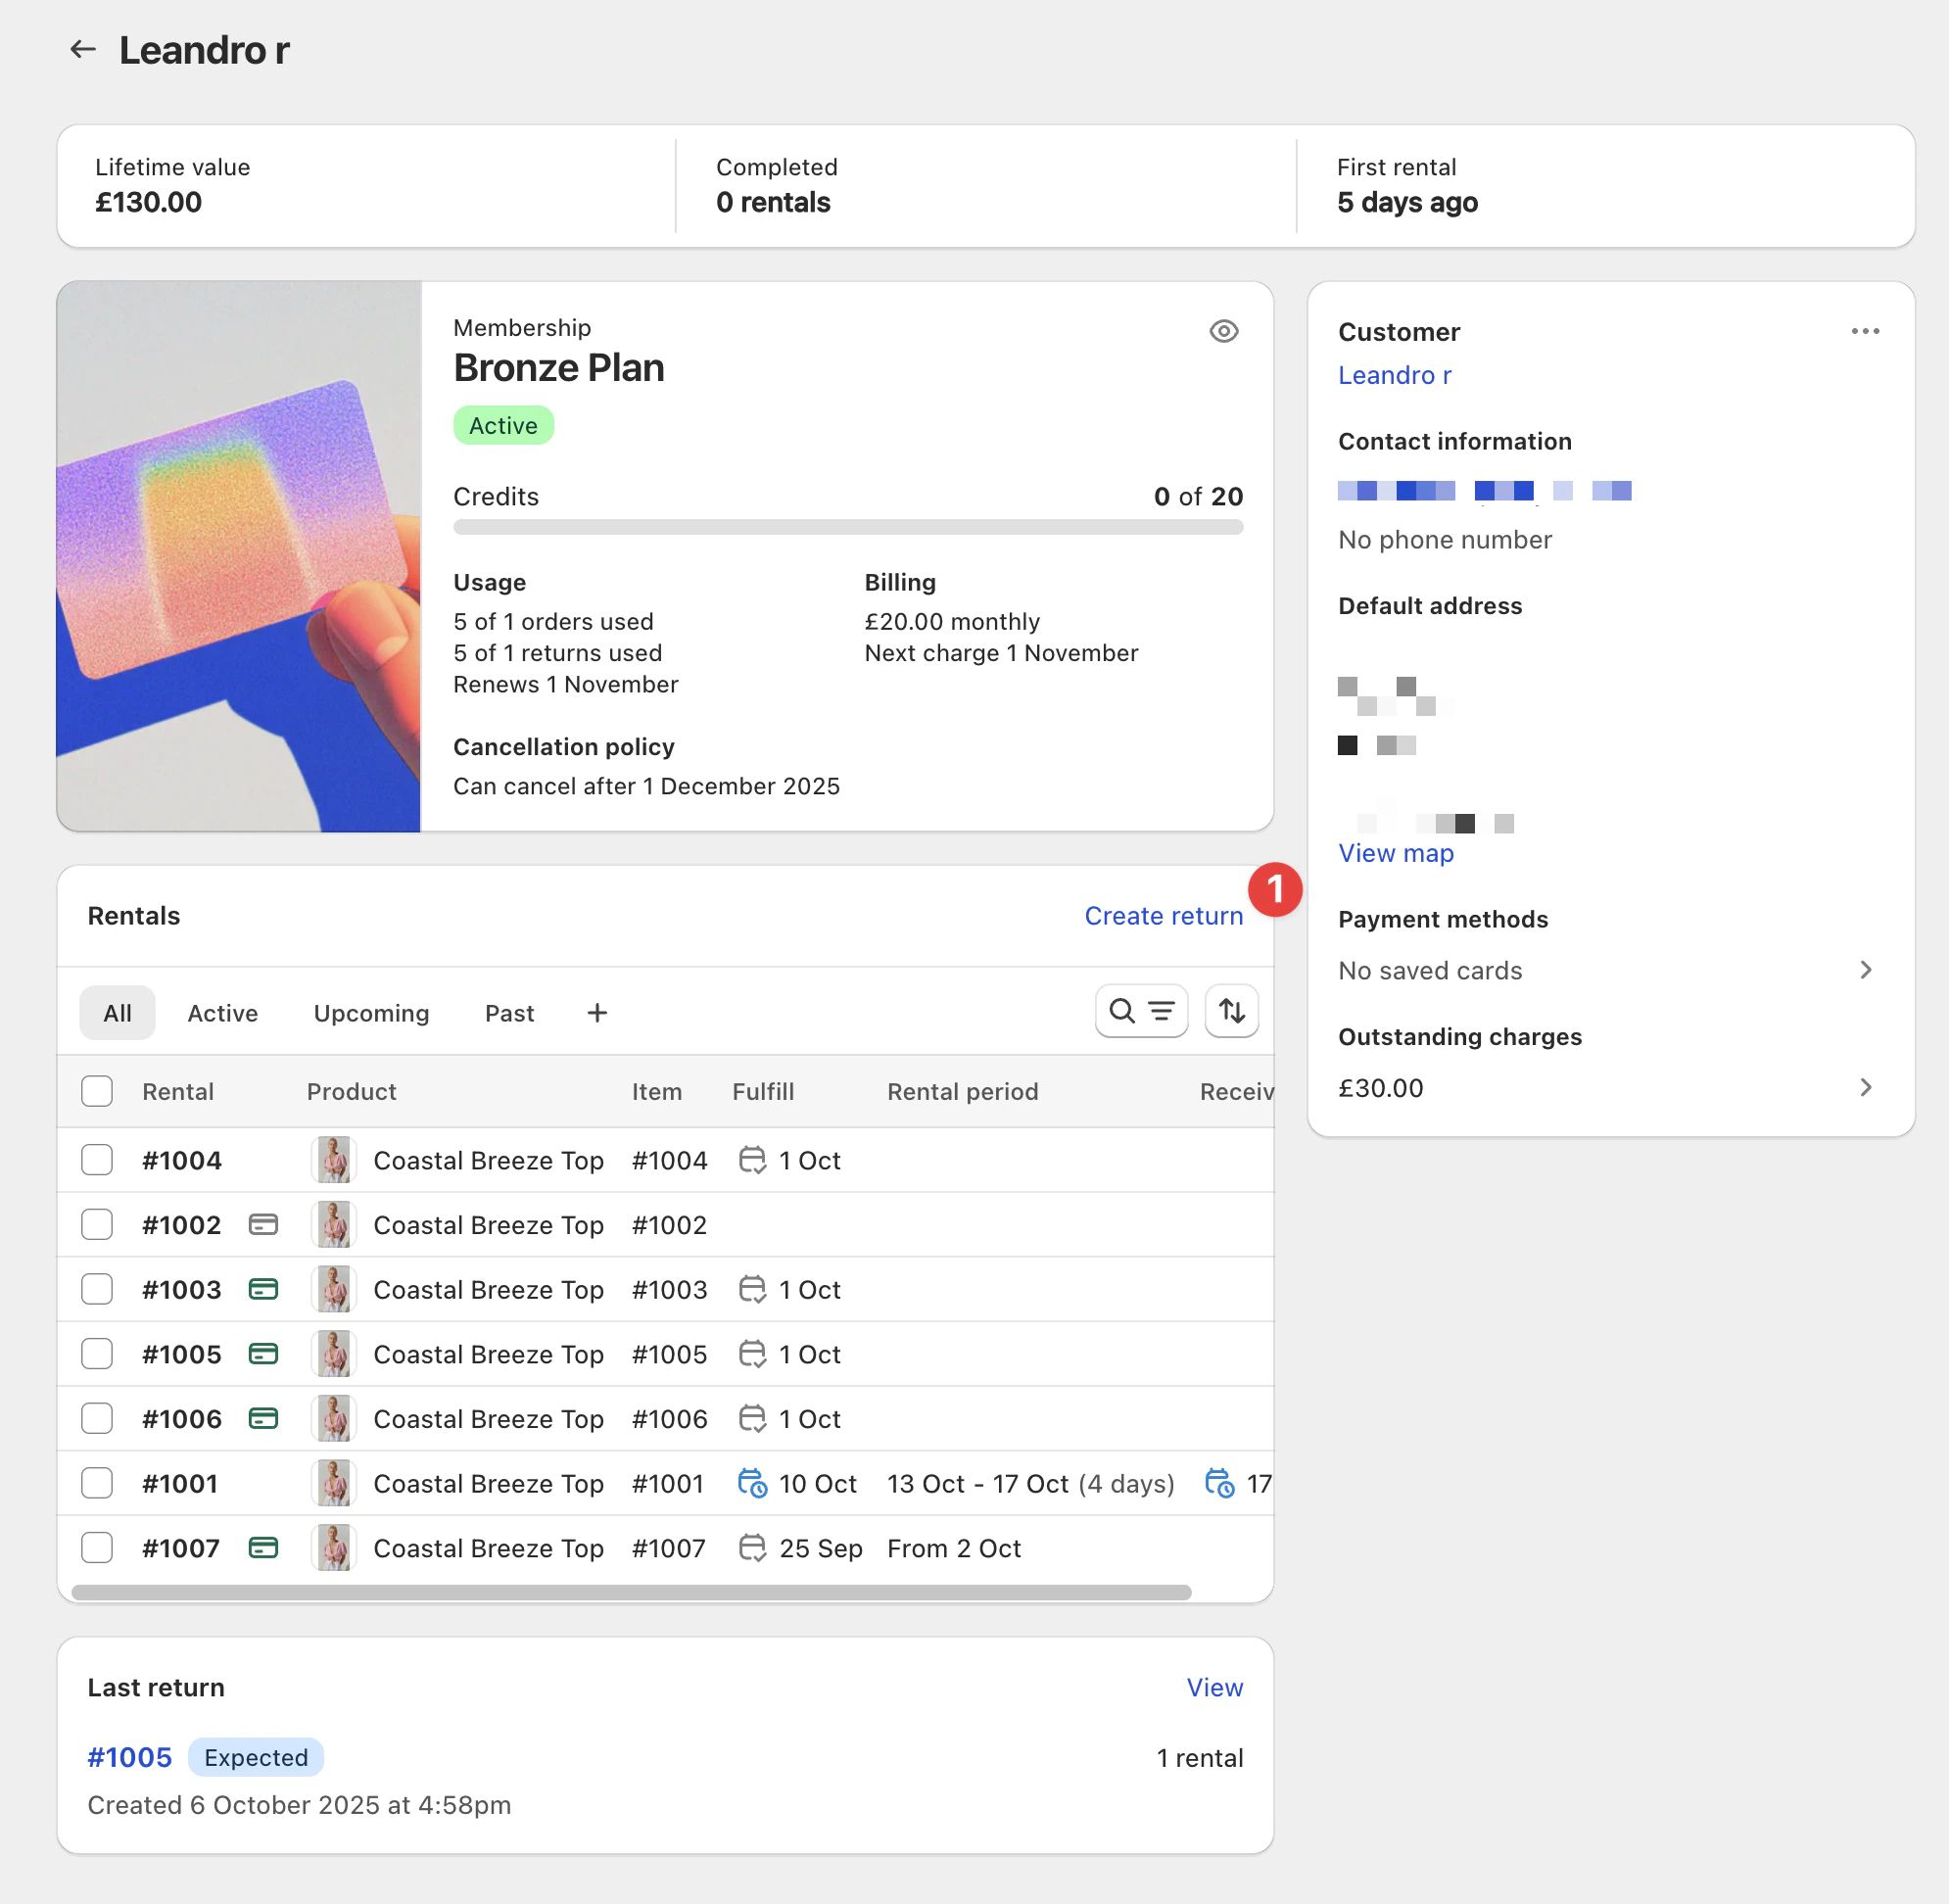 Click **Browse**, Add any items from the list of the customers' active rentals, click **select,** and click **Save**.
You can create a return directly from a cycle.
In Shopify Admin, head to **Supercycle** > [**Rentals**](https://admin.shopify.com/apps/supercycle/rentals) > **Rental**.
On the rental page, click the **Create return** button.
Click **Browse**, add any items from the rental, click **select,** and click **Save**.
Use this shortcut when the customer has already returned the items physically (for example via their own label or an in-store drop-off) and you just need to record receival. It creates the return and marks the items as received in a single step, and skips the **Return requested** email so the customer isn't asked to send items they've already handed back.
In Shopify Admin, head to **Supercycle** > [**Rentals**](https://admin.shopify.com/apps/supercycle/rentals) > **Rental**.
On the cycle's inbound card, click the **Mark as received** button next to **Create return**.
This option only appears on fulfilled cycles that don't already have a return.
Pick the date the items were received and confirm. The return is created and the rentals are marked as received in one action.
You can create a return by scanning items with the [Supercycle Scanner](/documentation/manage/scanner/scanner).
If the scanned serial number belongs to a rental that doesn't already have an associated return, the rental modal opens automatically.
Press **Create return & receive** — this creates a return and marks the rental as received in one step.
From a [multi-scan session](/documentation/manage/scanner/scanner#scan-modes), press **Receive return** in the bulk action bar. Any selected item that's on an active cycle gets a return created and is marked received in one step. Items already on a return, or not on a cycle, are skipped. See [Bulk actions](/documentation/manage/scanner/scanner-actions#bulk-actions).
Use the [`create_return`](/ai/operators-mcp/tools#returns) tool with:
* `customer_id` - Customer email or Shopify ID
* `rental_ids` - Array of rental IDs (e.g. `['SC-1042', 'SC-1043']`)
* `return_method_type` - Optional: `collection` or `return_label`
Use the [Create a return](/api-reference/admin/returnorders/create-a-return) endpoint.
***
### Receive a return
Click **Receive items** . You can then select which items to be marked as recieved.
If an item was added to a return by mistake, you can **Edit** the return, removing it to be added to a customer's future returns.
If the customer has already returned the items physically and no return exists yet, you can record receival directly from the cycle without creating the return first.
On the cycle's inbound card, click **Mark as received** next to **Create return**, pick the received date, and confirm. Supercycle creates the return and marks the items as received in a single step, and skips the **Return requested** customer email.
This shortcut is only available on fulfilled cycles that don't yet have a return. Once a return exists, use **From a Return** above (or **Mark as received** from the cycle's inbound card actions menu) instead.
Items are automatically marked as received on a return when you create a return from the scanner app. You can also mark items as received manually:
Open a single-scan match and mark the item received from the item detail screen.
Open the return in the scanner app and mark items received from the returns screen.
Scan a batch of items with a Zebra scanner and press **Receive return** in the bulk action bar. Any selected item that's on an active cycle gets a return created and marked received in one step. See [Bulk actions](/documentation/manage/scanner/scanner-actions#bulk-actions).
Use the [`update_return`](/ai/operators-mcp/tools#returns) tool with:
* `id` - Return ID (e.g. `#2001`)
* `return_lines` - Array of `{ id, status }` where status is `awaiting`, `received`, or `missing`
Use the [Update a return](/api-reference/admin/returnorders/update-a-return) endpoint.
***
### Recredit membership items
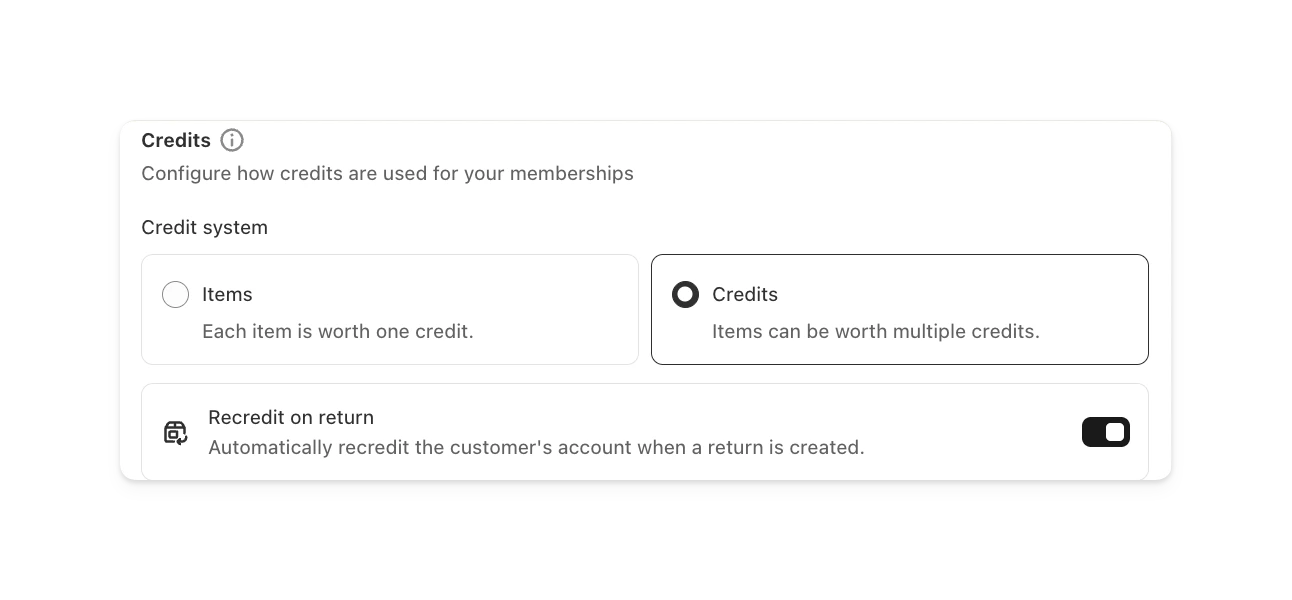
You can automatically recredit returns from changing settings in **Supercycle** > **Settings** > [Membership rental](https://admin.shopify.com/apps/supercycle/settings/membership).
Click **Browse**, Add any items from the list of the customers' active rentals, click **select,** and click **Save**.
You can create a return directly from a cycle.
In Shopify Admin, head to **Supercycle** > [**Rentals**](https://admin.shopify.com/apps/supercycle/rentals) > **Rental**.
On the rental page, click the **Create return** button.
Click **Browse**, add any items from the rental, click **select,** and click **Save**.
Use this shortcut when the customer has already returned the items physically (for example via their own label or an in-store drop-off) and you just need to record receival. It creates the return and marks the items as received in a single step, and skips the **Return requested** email so the customer isn't asked to send items they've already handed back.
In Shopify Admin, head to **Supercycle** > [**Rentals**](https://admin.shopify.com/apps/supercycle/rentals) > **Rental**.
On the cycle's inbound card, click the **Mark as received** button next to **Create return**.
This option only appears on fulfilled cycles that don't already have a return.
Pick the date the items were received and confirm. The return is created and the rentals are marked as received in one action.
You can create a return by scanning items with the [Supercycle Scanner](/documentation/manage/scanner/scanner).
If the scanned serial number belongs to a rental that doesn't already have an associated return, the rental modal opens automatically.
Press **Create return & receive** — this creates a return and marks the rental as received in one step.
From a [multi-scan session](/documentation/manage/scanner/scanner#scan-modes), press **Receive return** in the bulk action bar. Any selected item that's on an active cycle gets a return created and is marked received in one step. Items already on a return, or not on a cycle, are skipped. See [Bulk actions](/documentation/manage/scanner/scanner-actions#bulk-actions).
Use the [`create_return`](/ai/operators-mcp/tools#returns) tool with:
* `customer_id` - Customer email or Shopify ID
* `rental_ids` - Array of rental IDs (e.g. `['SC-1042', 'SC-1043']`)
* `return_method_type` - Optional: `collection` or `return_label`
Use the [Create a return](/api-reference/admin/returnorders/create-a-return) endpoint.
***
### Receive a return
Click **Receive items** . You can then select which items to be marked as recieved.
If an item was added to a return by mistake, you can **Edit** the return, removing it to be added to a customer's future returns.
If the customer has already returned the items physically and no return exists yet, you can record receival directly from the cycle without creating the return first.
On the cycle's inbound card, click **Mark as received** next to **Create return**, pick the received date, and confirm. Supercycle creates the return and marks the items as received in a single step, and skips the **Return requested** customer email.
This shortcut is only available on fulfilled cycles that don't yet have a return. Once a return exists, use **From a Return** above (or **Mark as received** from the cycle's inbound card actions menu) instead.
Items are automatically marked as received on a return when you create a return from the scanner app. You can also mark items as received manually:
Open a single-scan match and mark the item received from the item detail screen.
Open the return in the scanner app and mark items received from the returns screen.
Scan a batch of items with a Zebra scanner and press **Receive return** in the bulk action bar. Any selected item that's on an active cycle gets a return created and marked received in one step. See [Bulk actions](/documentation/manage/scanner/scanner-actions#bulk-actions).
Use the [`update_return`](/ai/operators-mcp/tools#returns) tool with:
* `id` - Return ID (e.g. `#2001`)
* `return_lines` - Array of `{ id, status }` where status is `awaiting`, `received`, or `missing`
Use the [Update a return](/api-reference/admin/returnorders/update-a-return) endpoint.
***
### Recredit membership items
You can automatically recredit returns from changing settings in **Supercycle** > **Settings** > [Membership rental](https://admin.shopify.com/apps/supercycle/settings/membership).
 ***
### Item ready
When an [Item](/documentation/manage/inventory/items) is received from a Return, the processing status is set to `Not Ready` as you’ll typically need to process it (clean, refurbish, etc.) before it’s `Ready` to go out on its next rental.
The process of marking that Item as `Ready` is often called restocking.
Update processing state from the [Warehouse](/documentation/manage/inventory/items/#warehouse) field on the Item.
**Update status** action from the **Actions** options on the [Inventory](https://admin.shopify.com/apps/supercycle/items) table.
***
### Item ready
When an [Item](/documentation/manage/inventory/items) is received from a Return, the processing status is set to `Not Ready` as you’ll typically need to process it (clean, refurbish, etc.) before it’s `Ready` to go out on its next rental.
The process of marking that Item as `Ready` is often called restocking.
Update processing state from the [Warehouse](/documentation/manage/inventory/items/#warehouse) field on the Item.
**Update status** action from the **Actions** options on the [Inventory](https://admin.shopify.com/apps/supercycle/items) table.
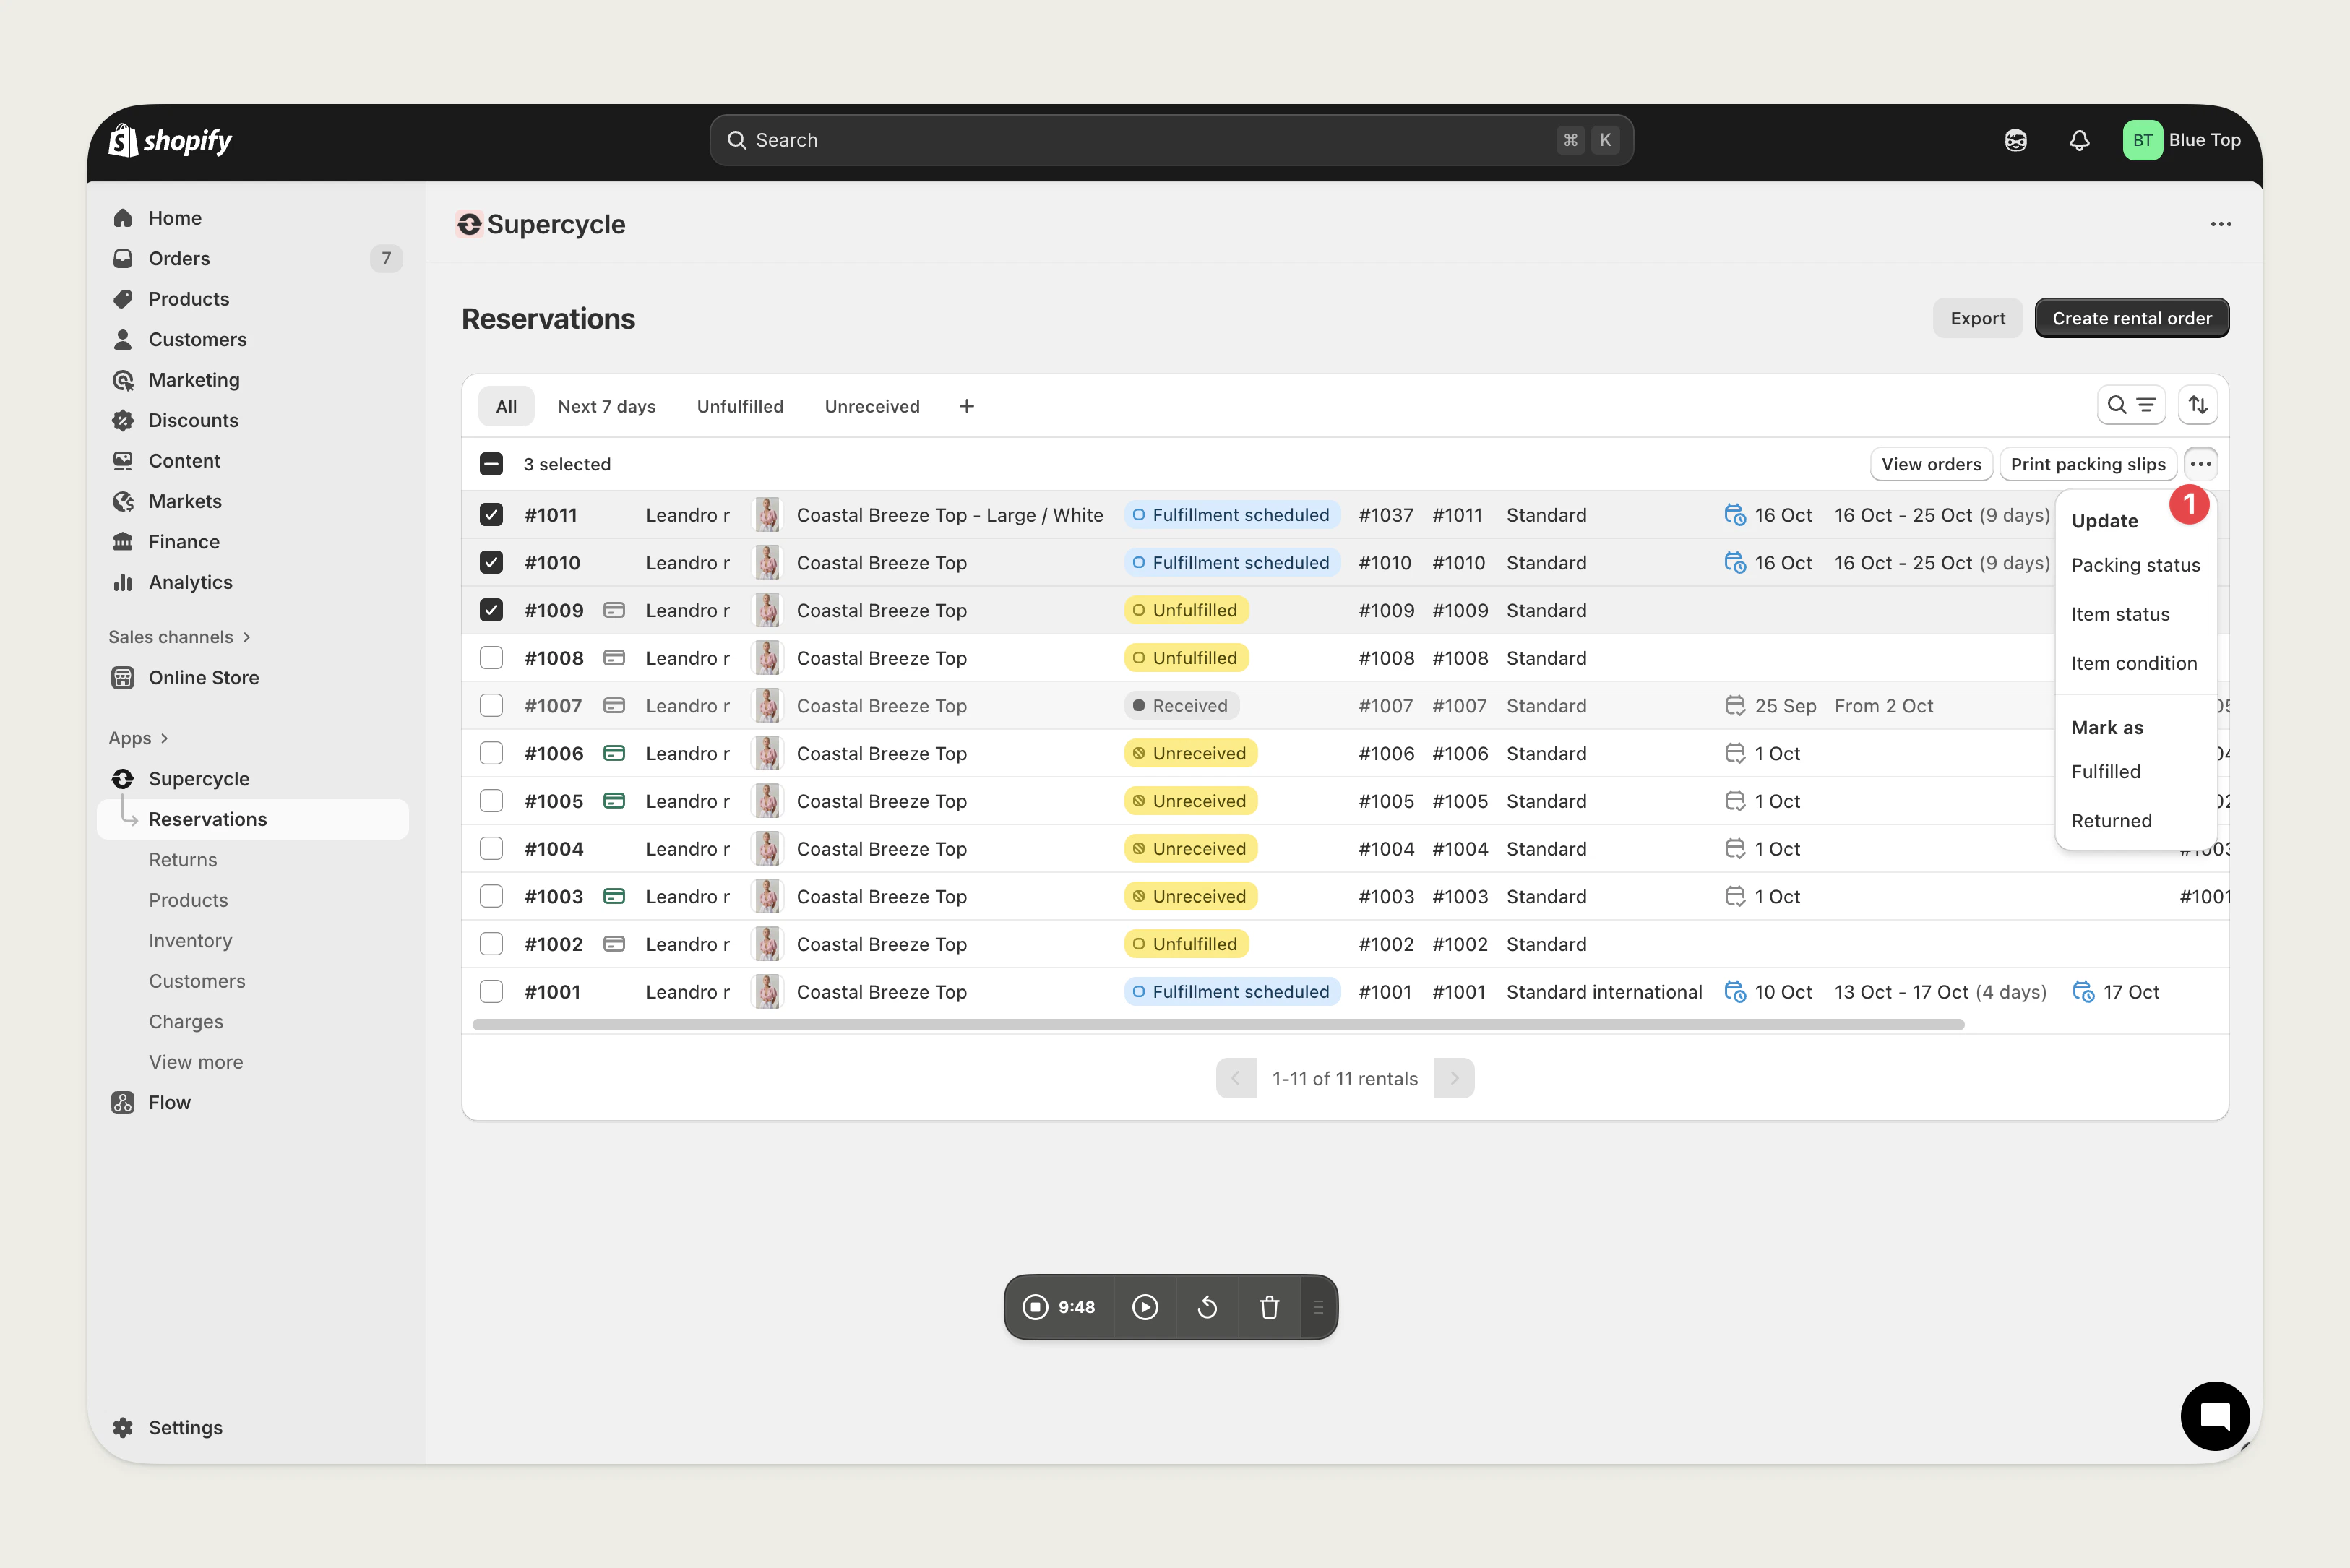
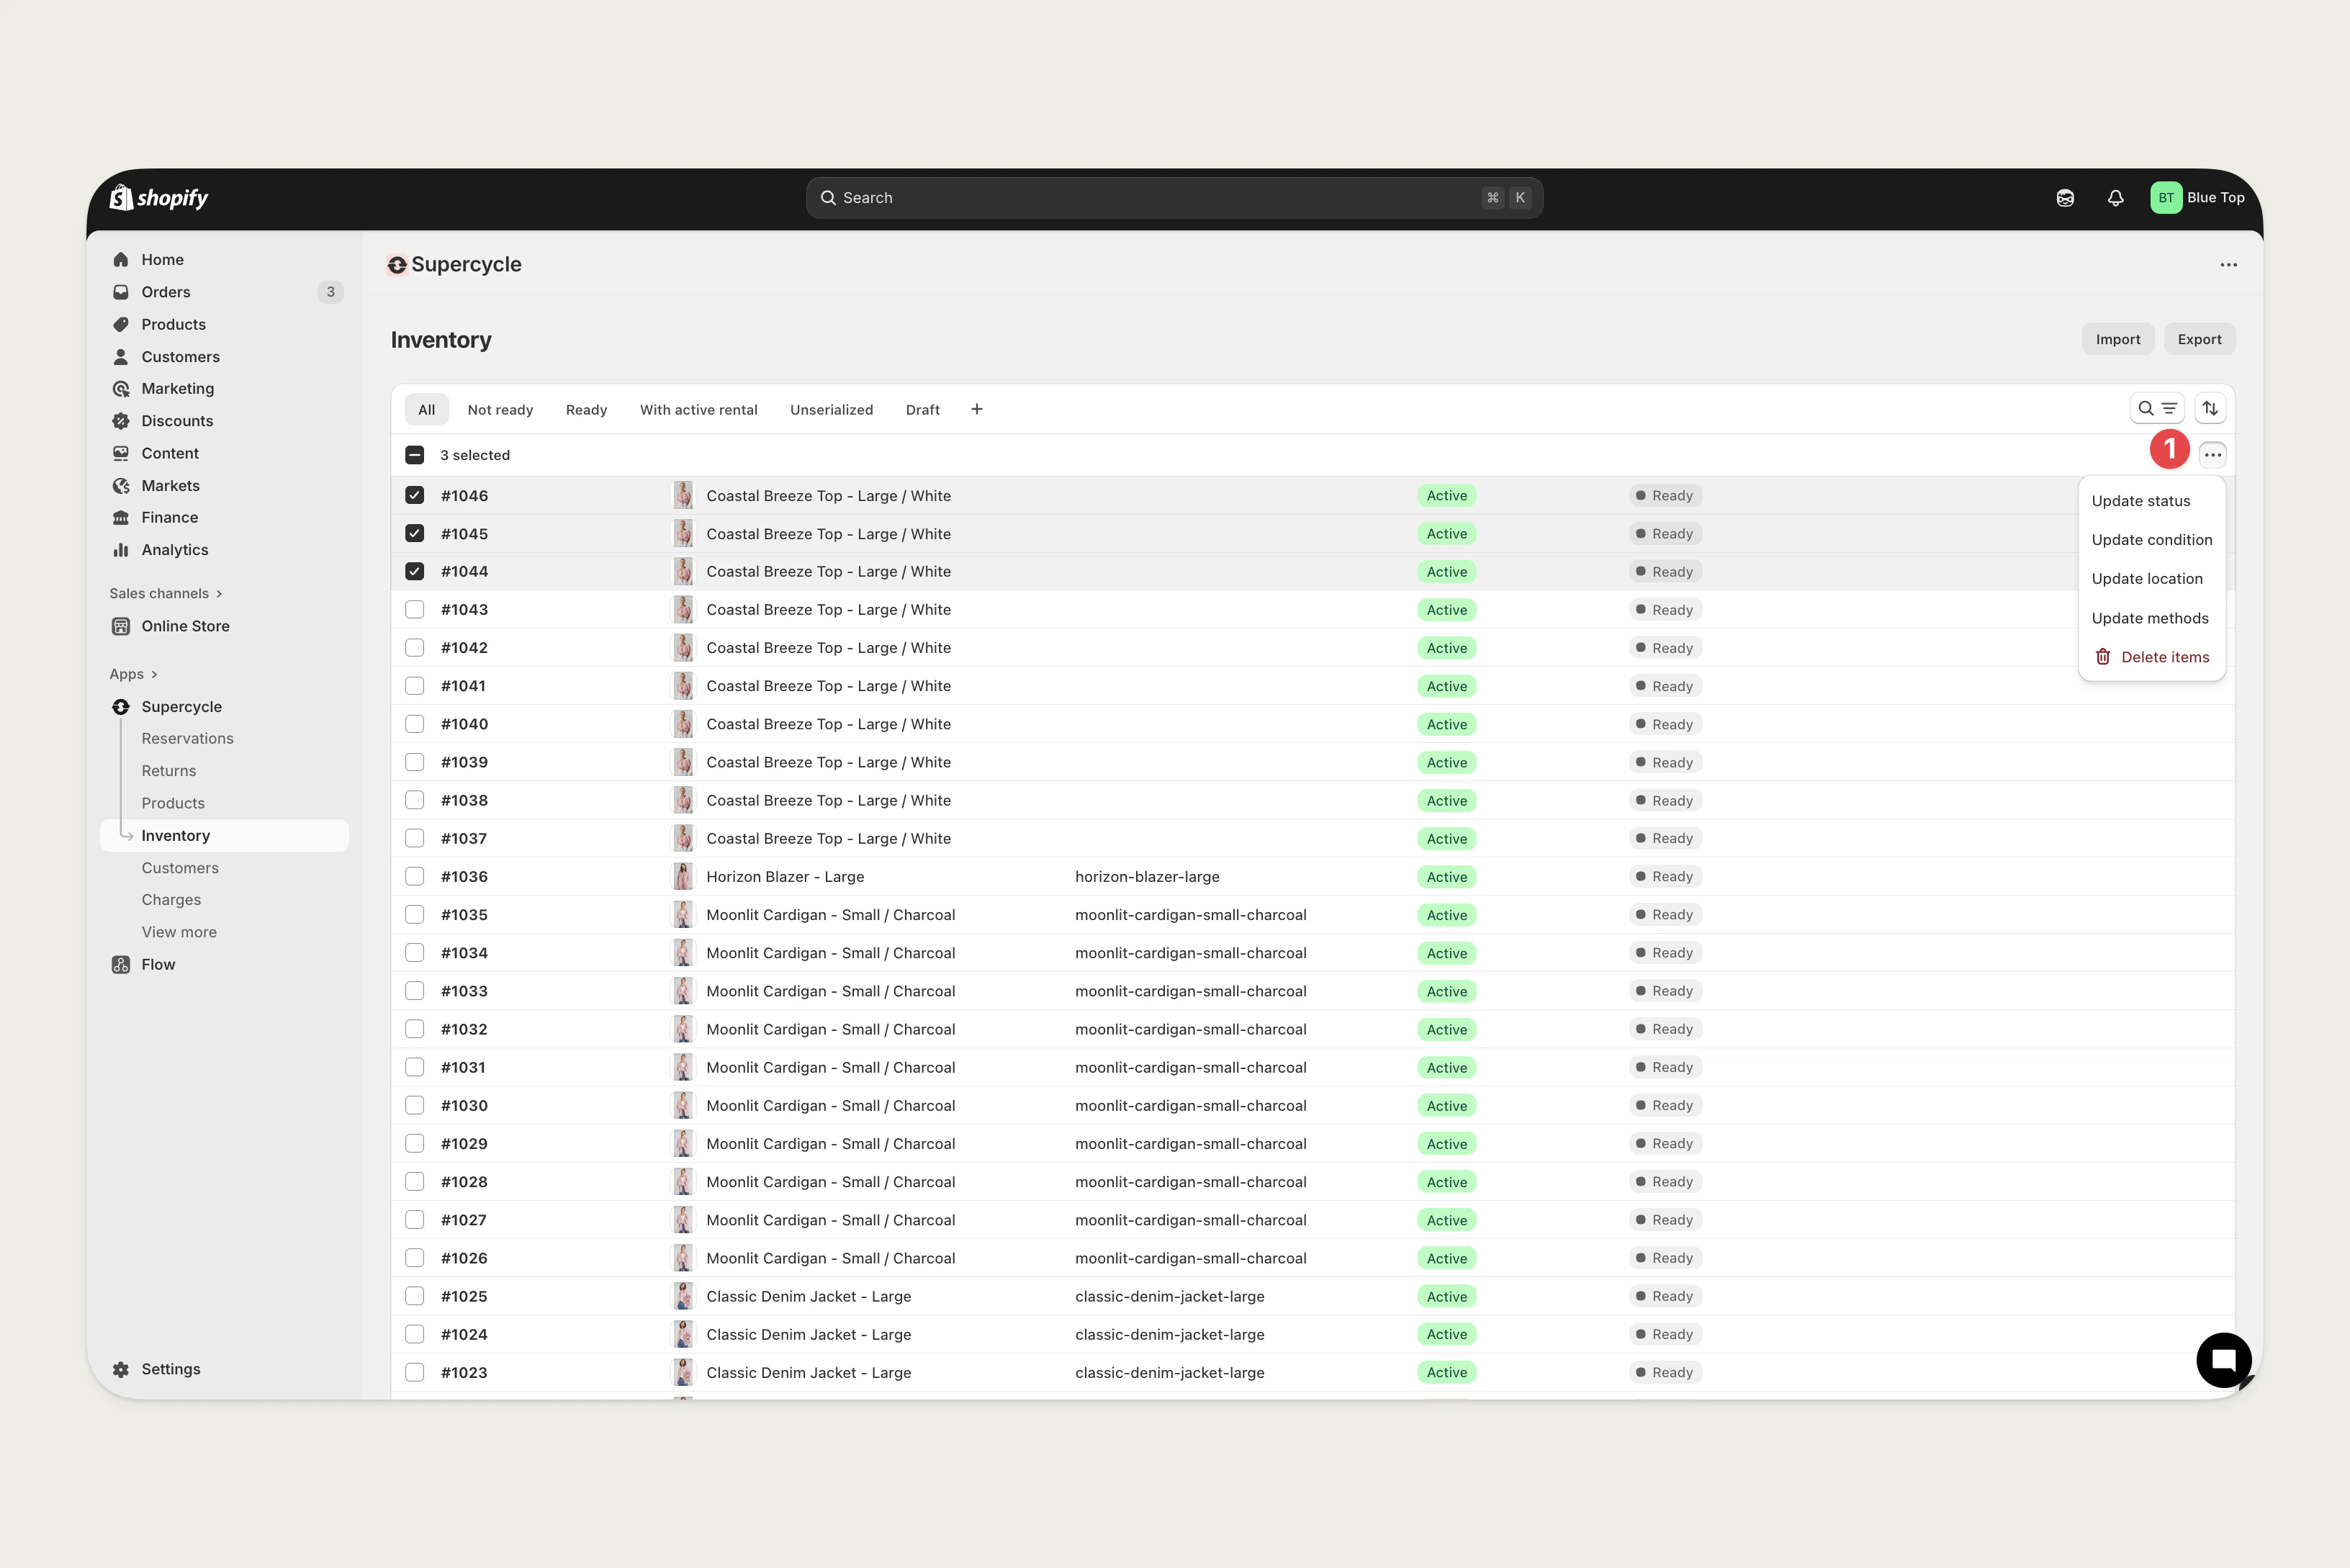 **Update item status** action from the **Actions** options on the [Cycles](https://admin.shopify.com/apps/supercycle/rentals) table.